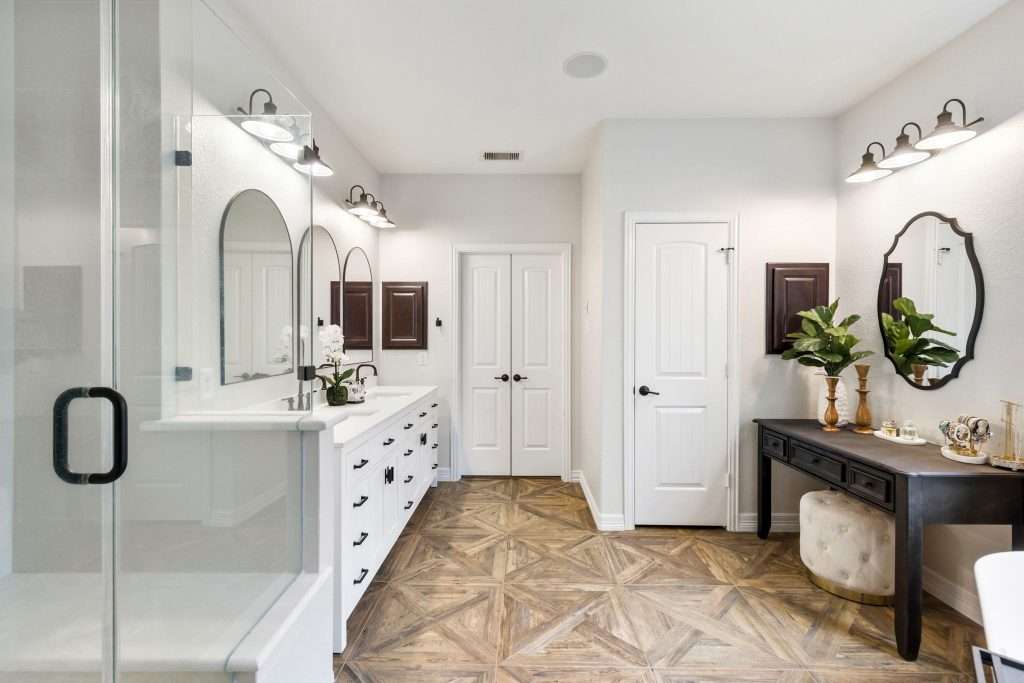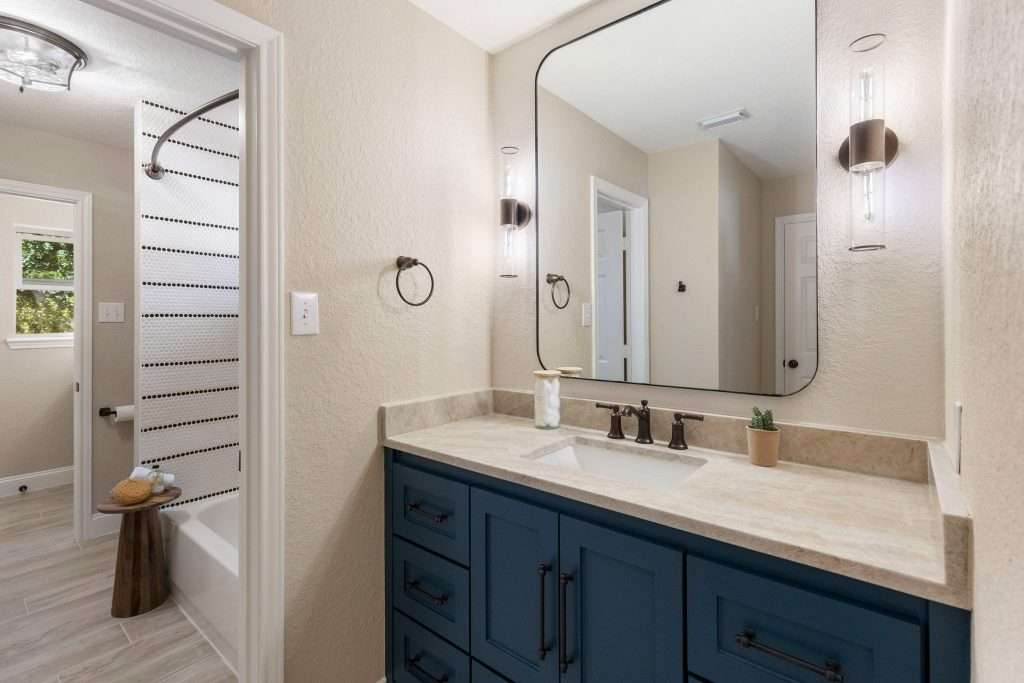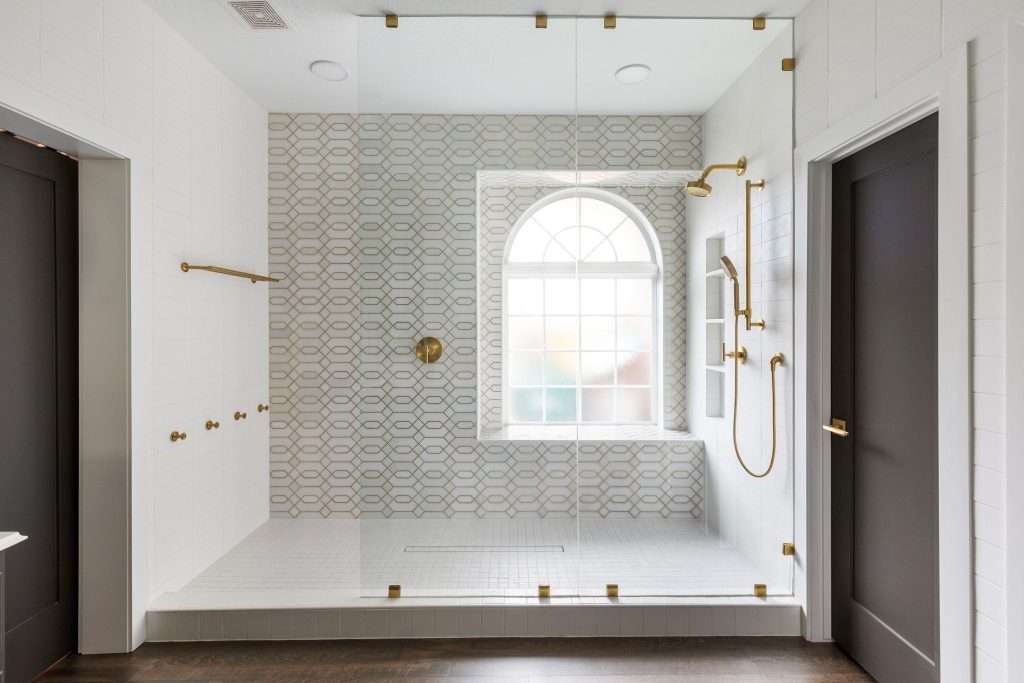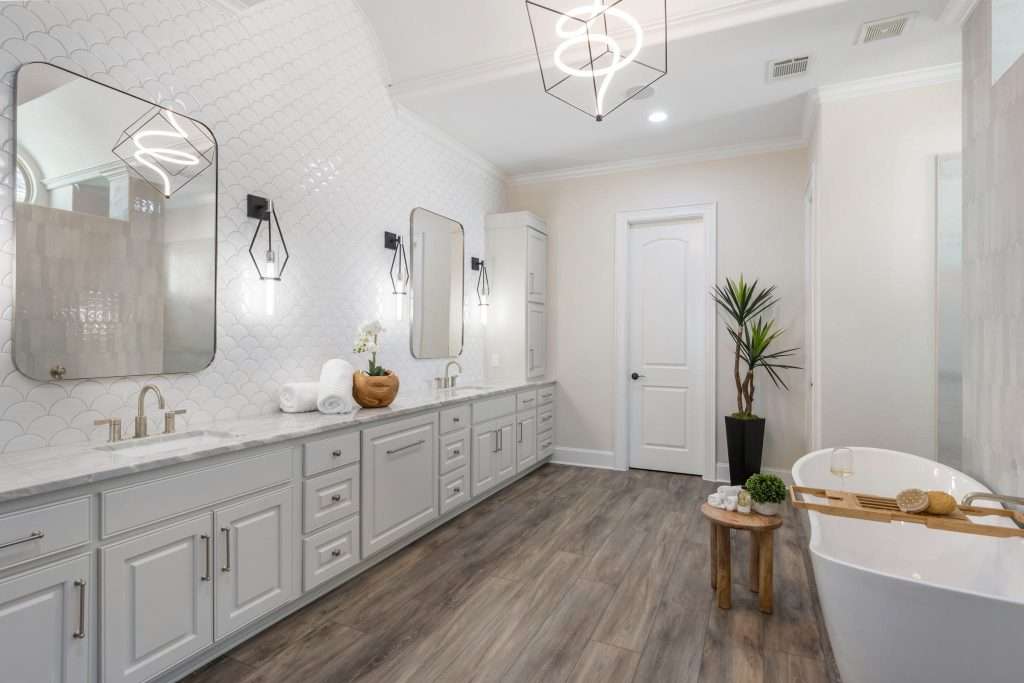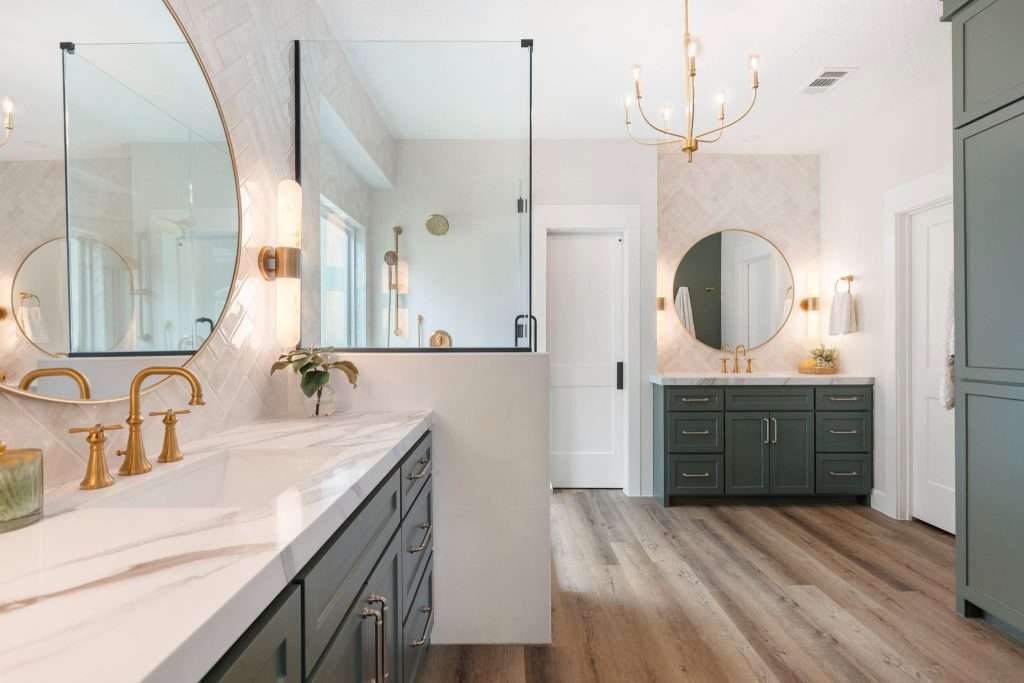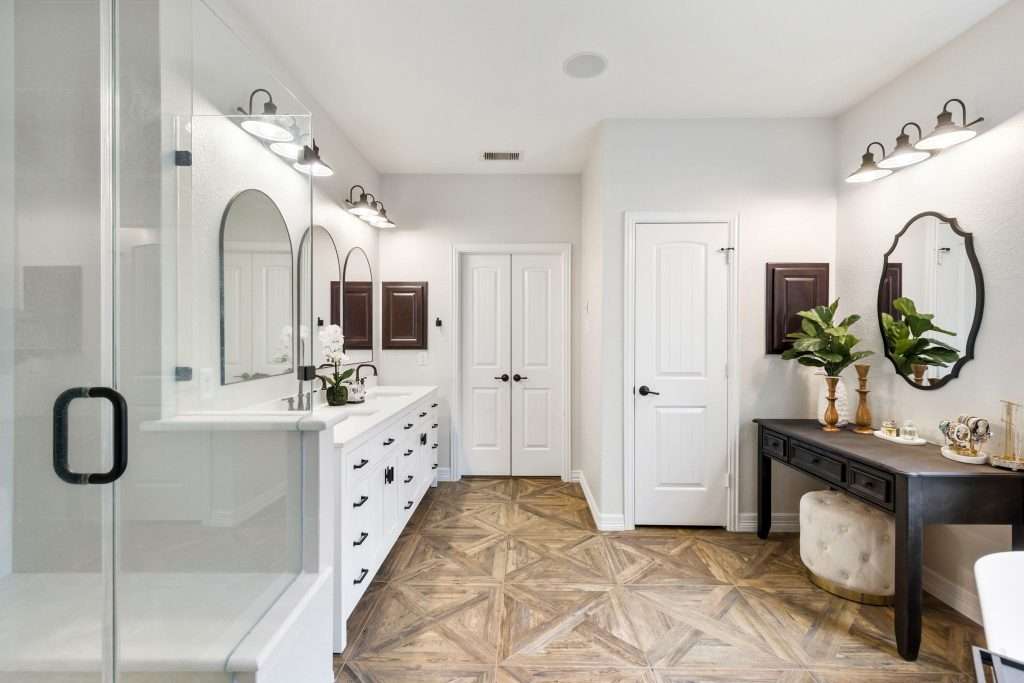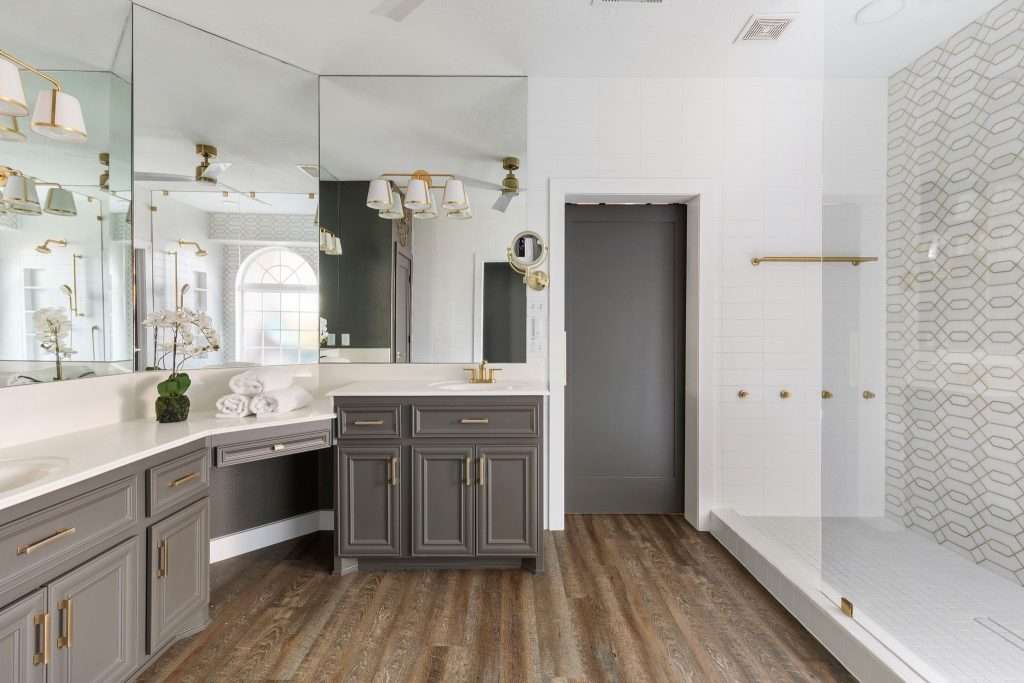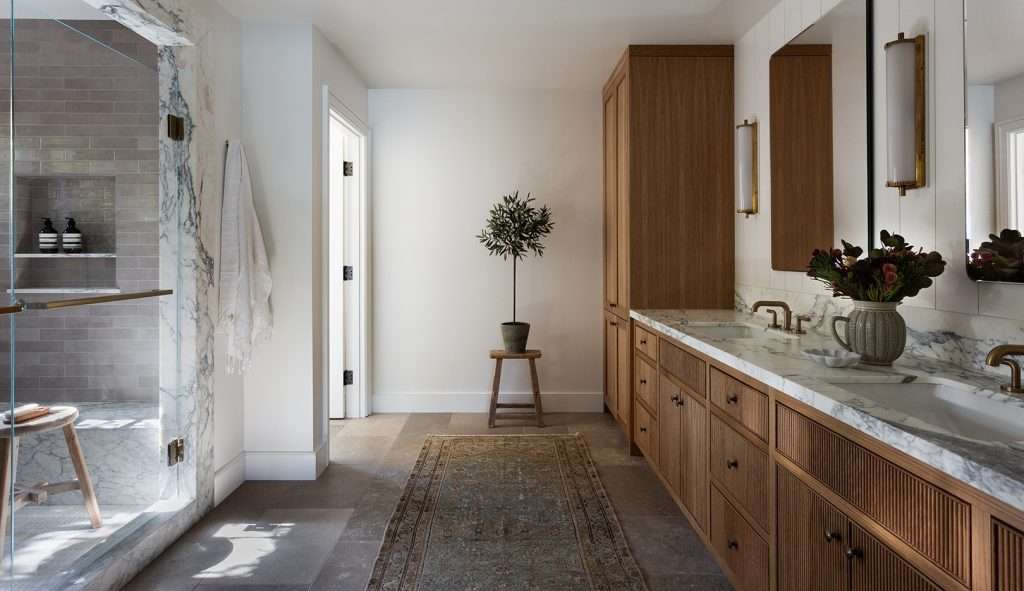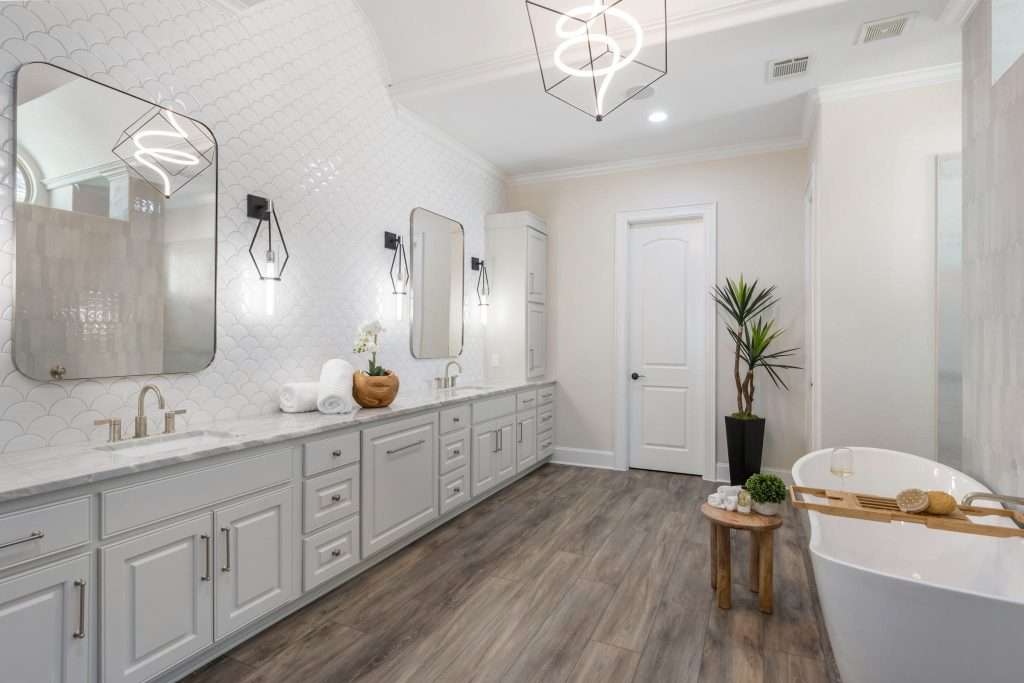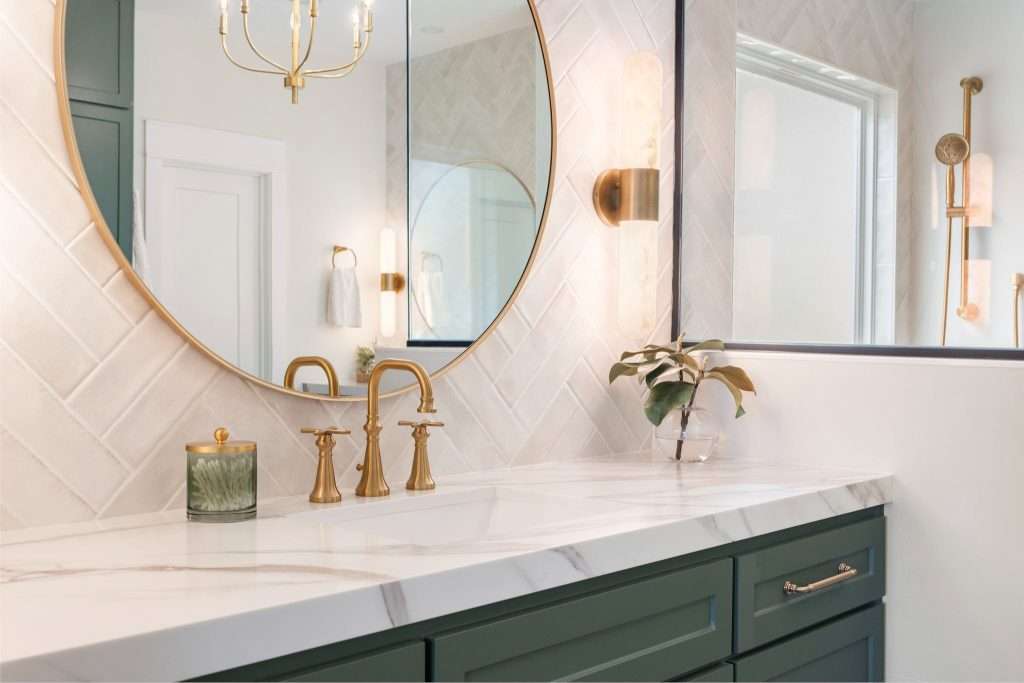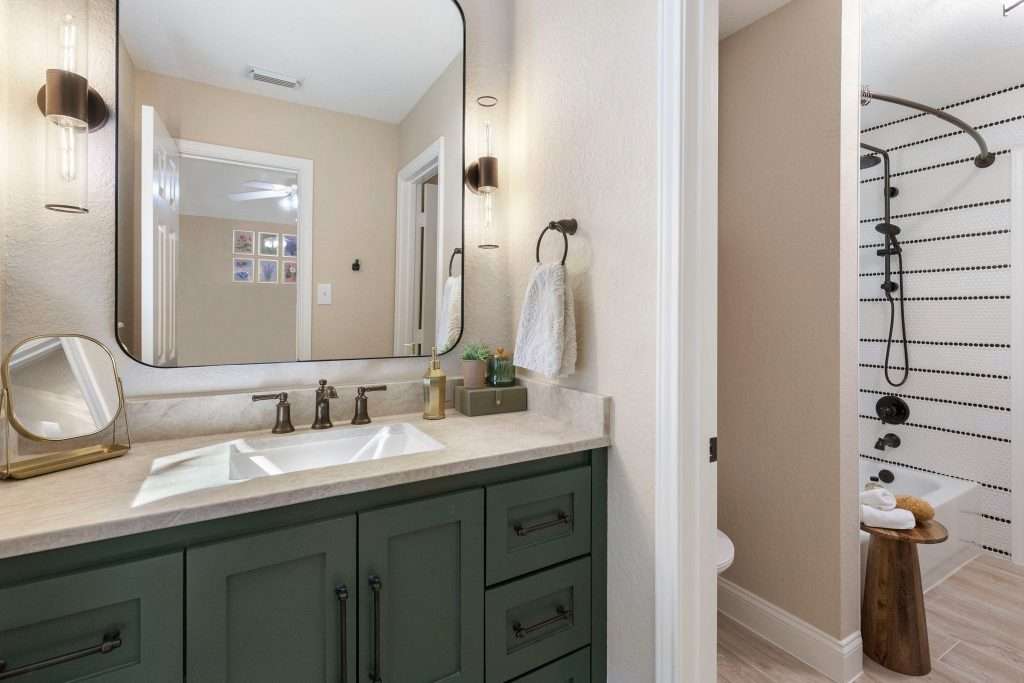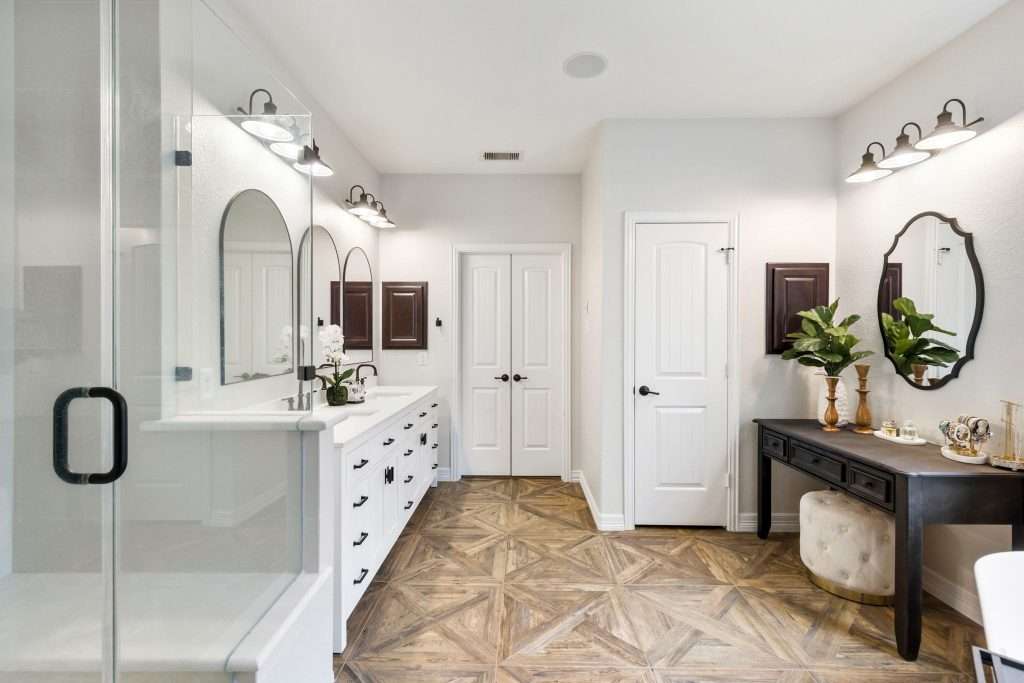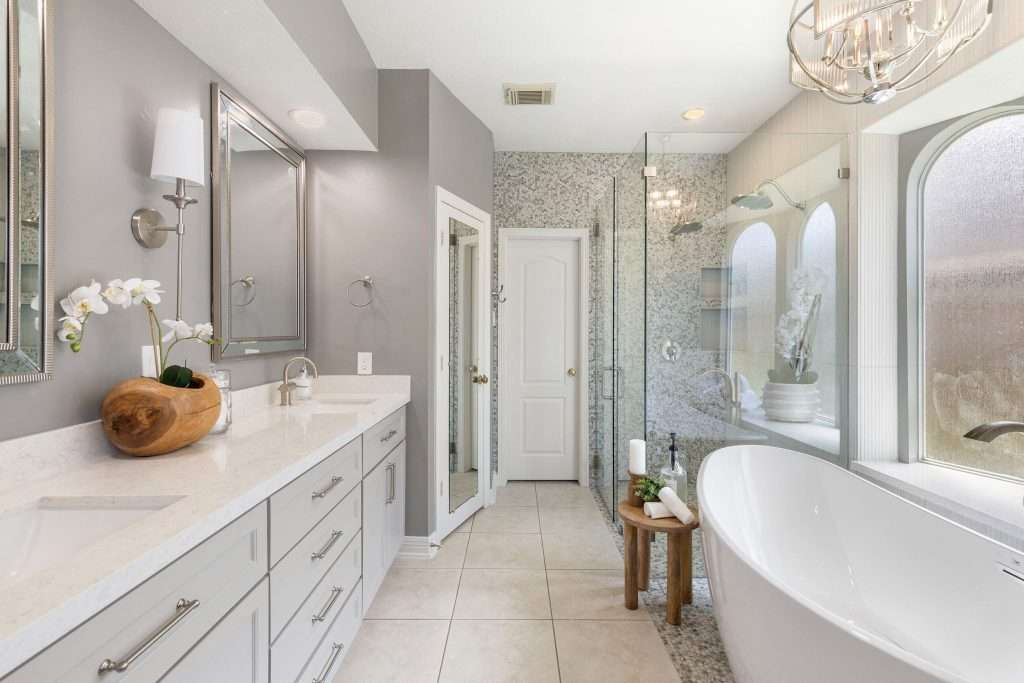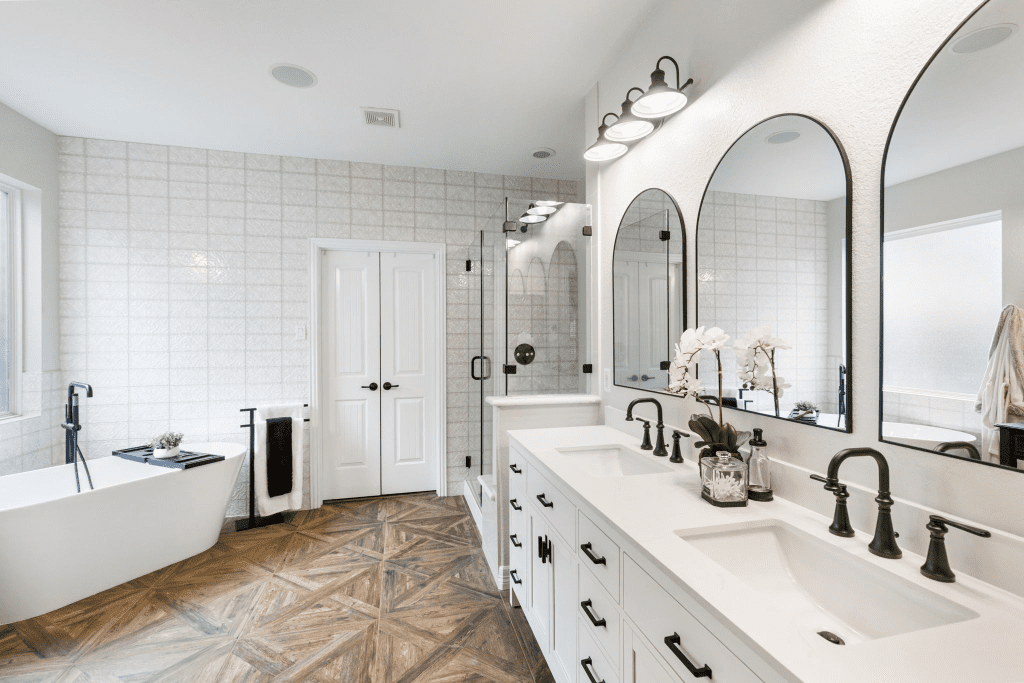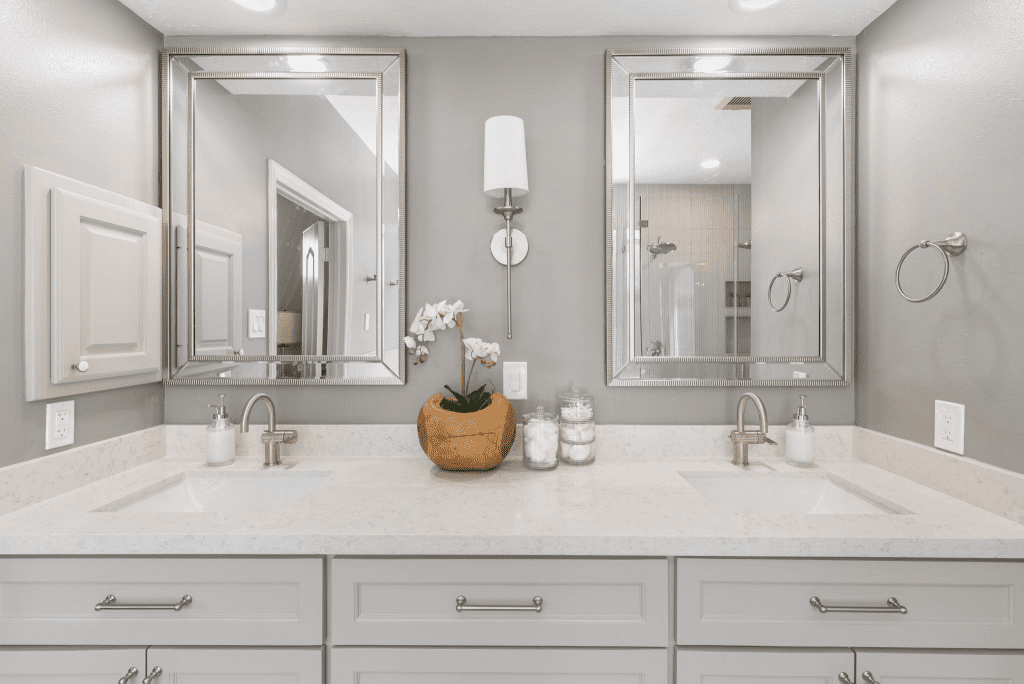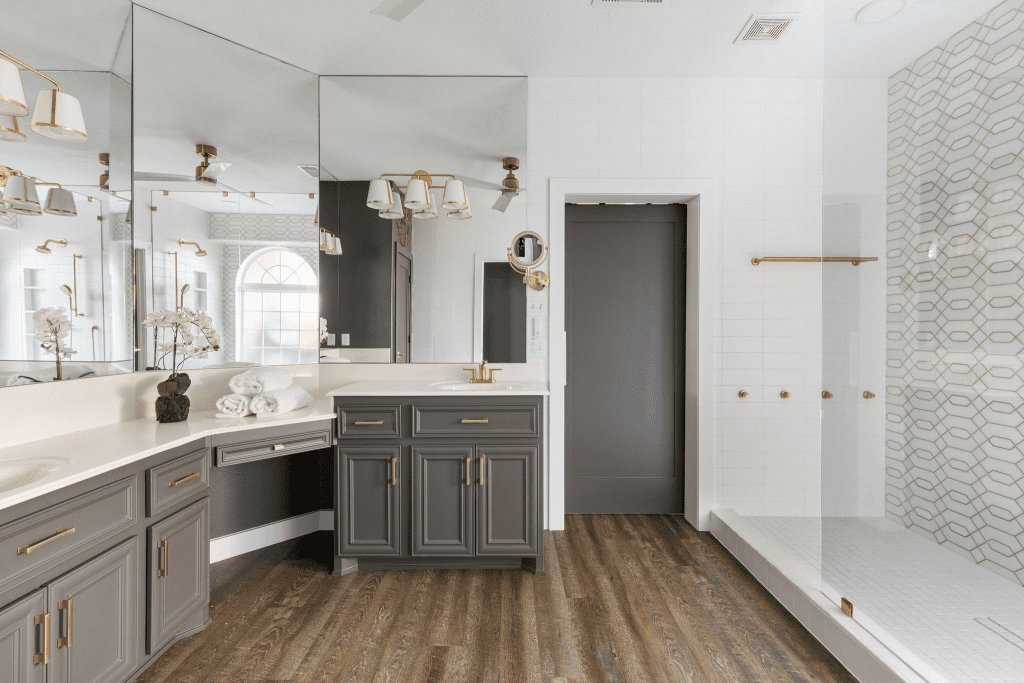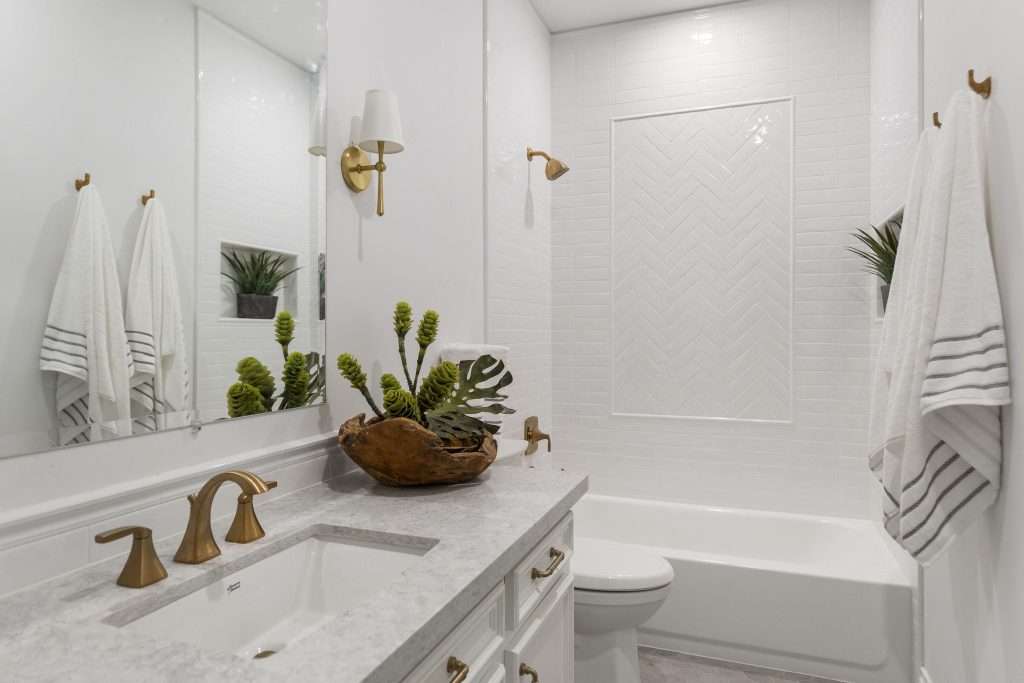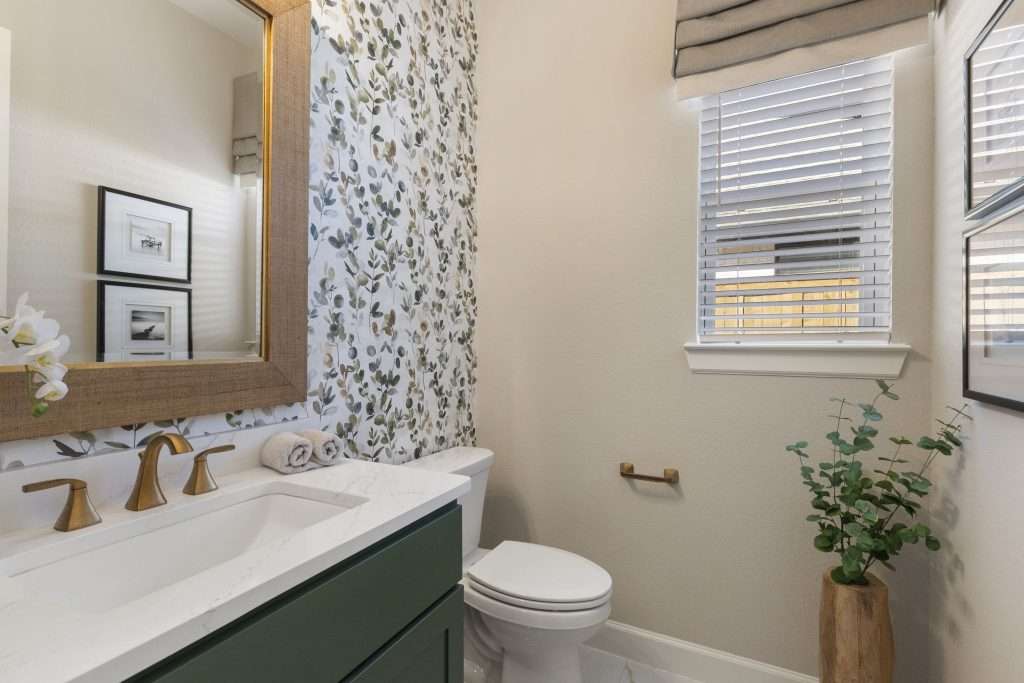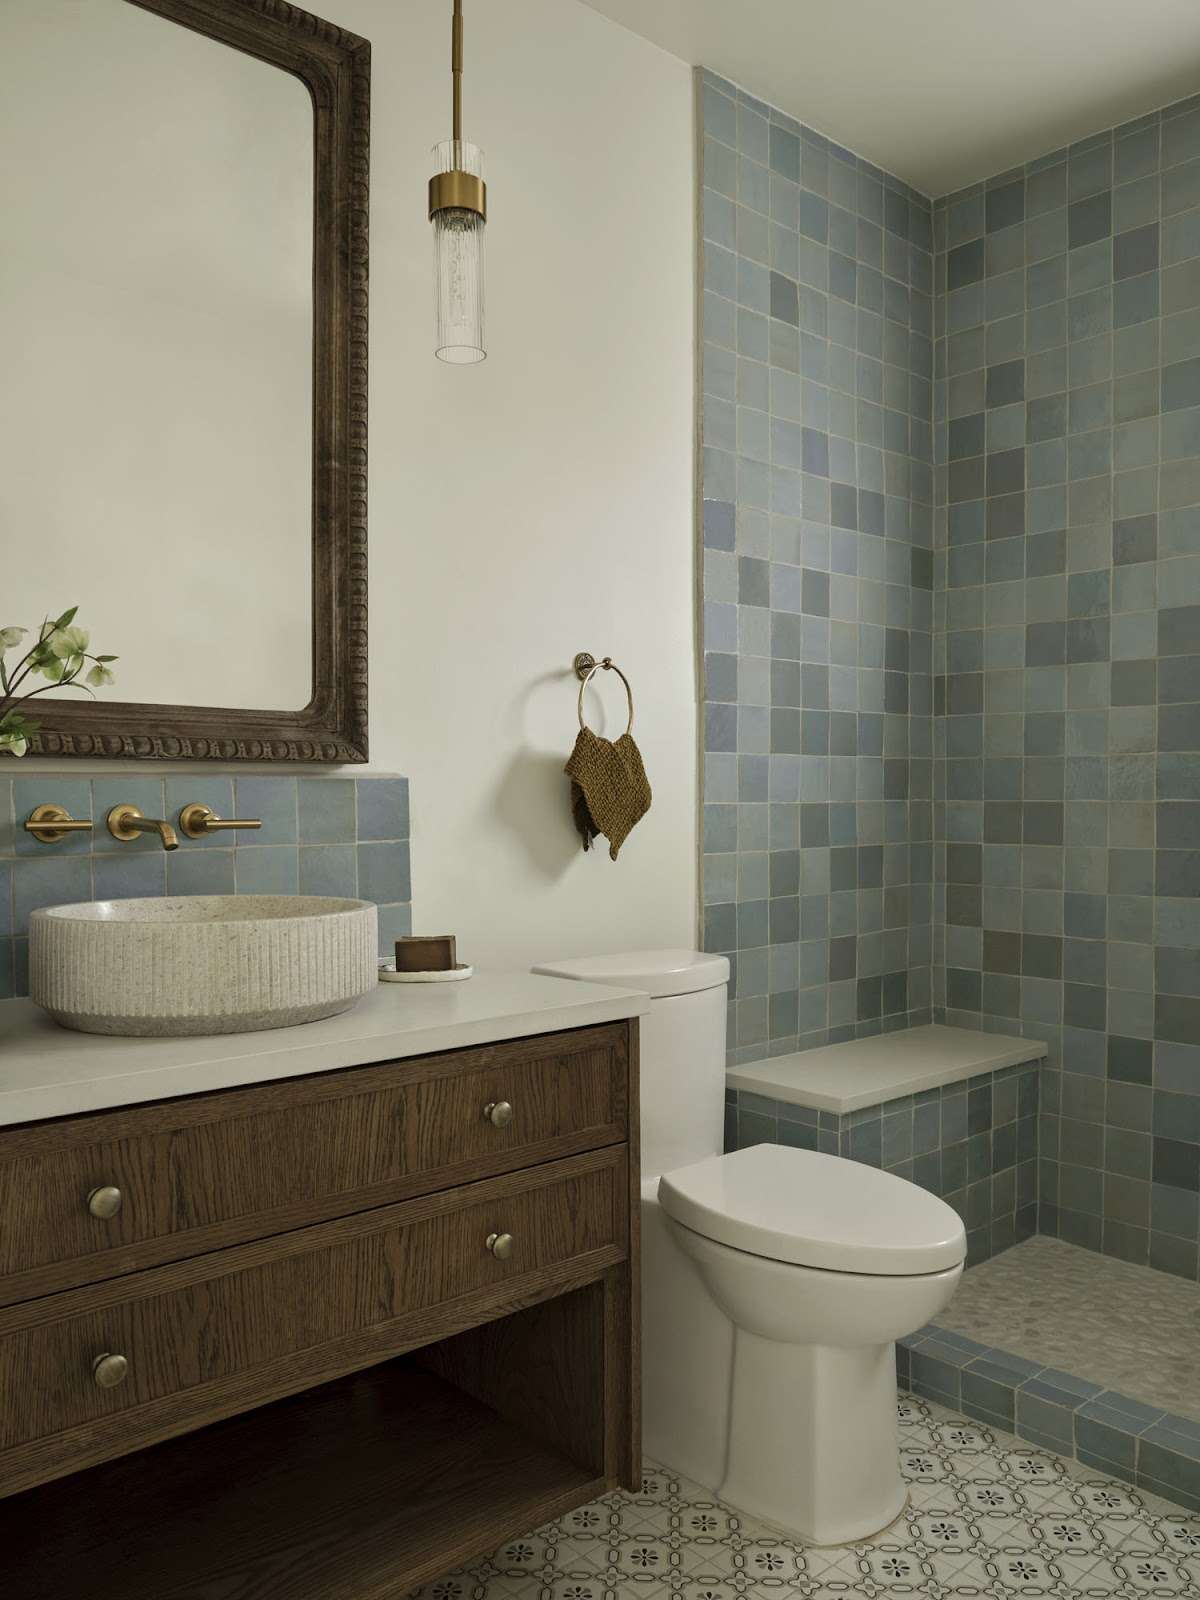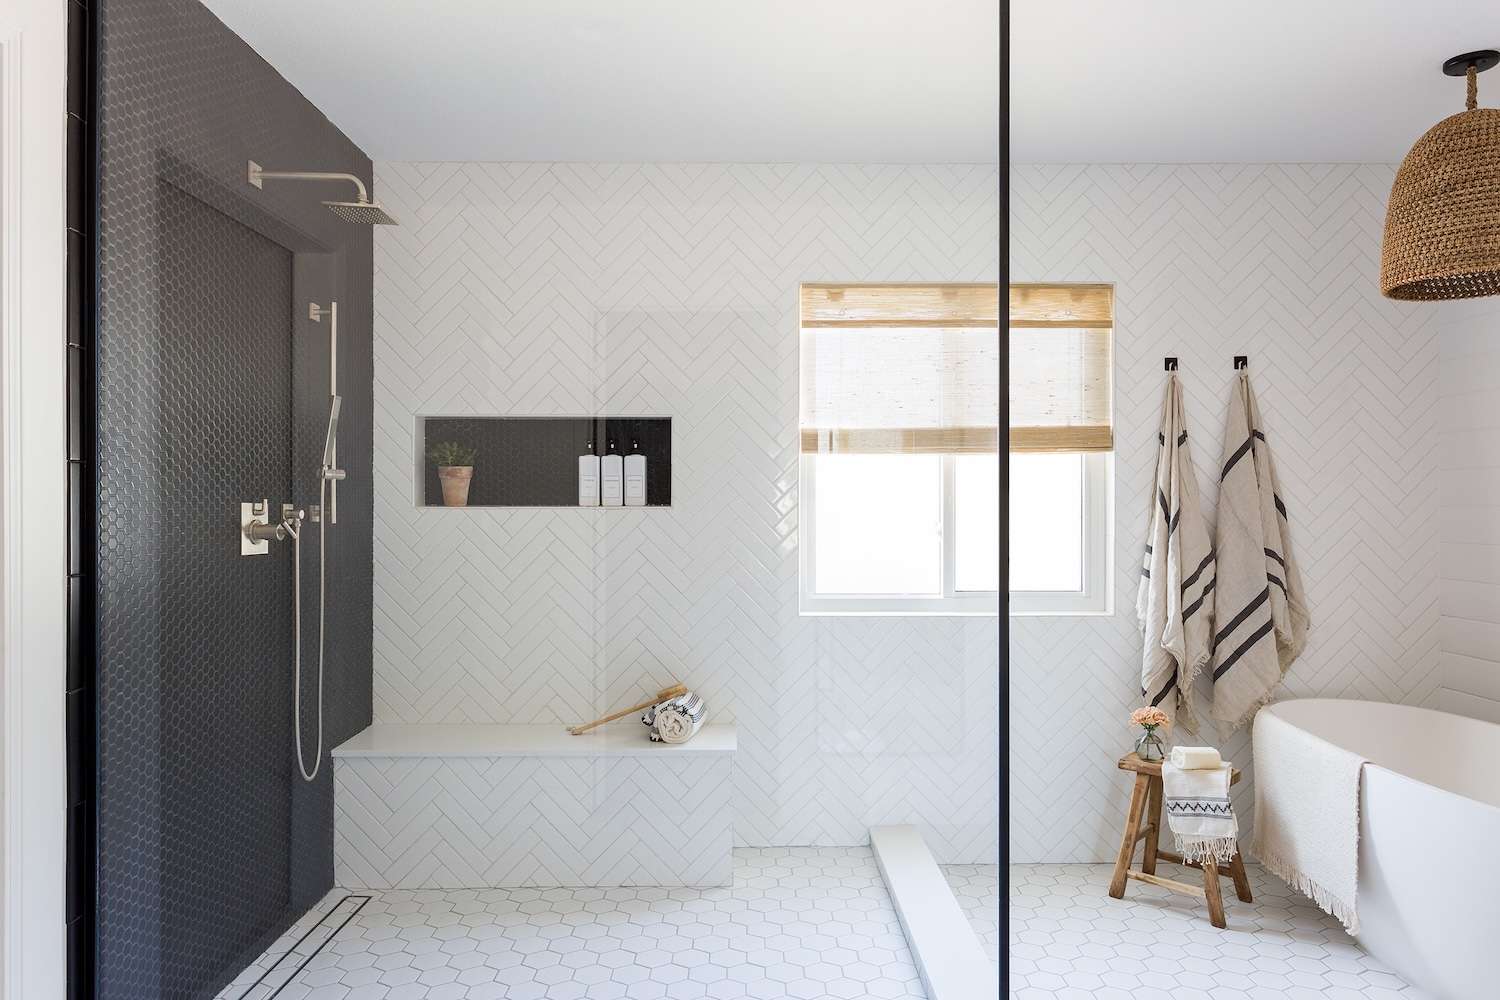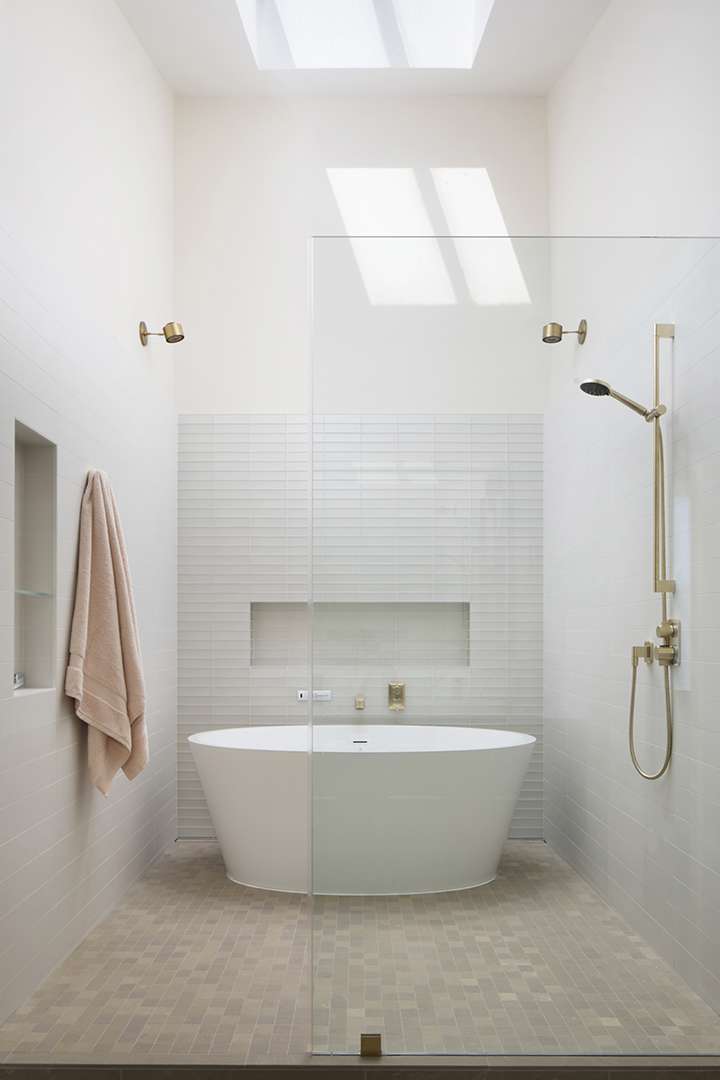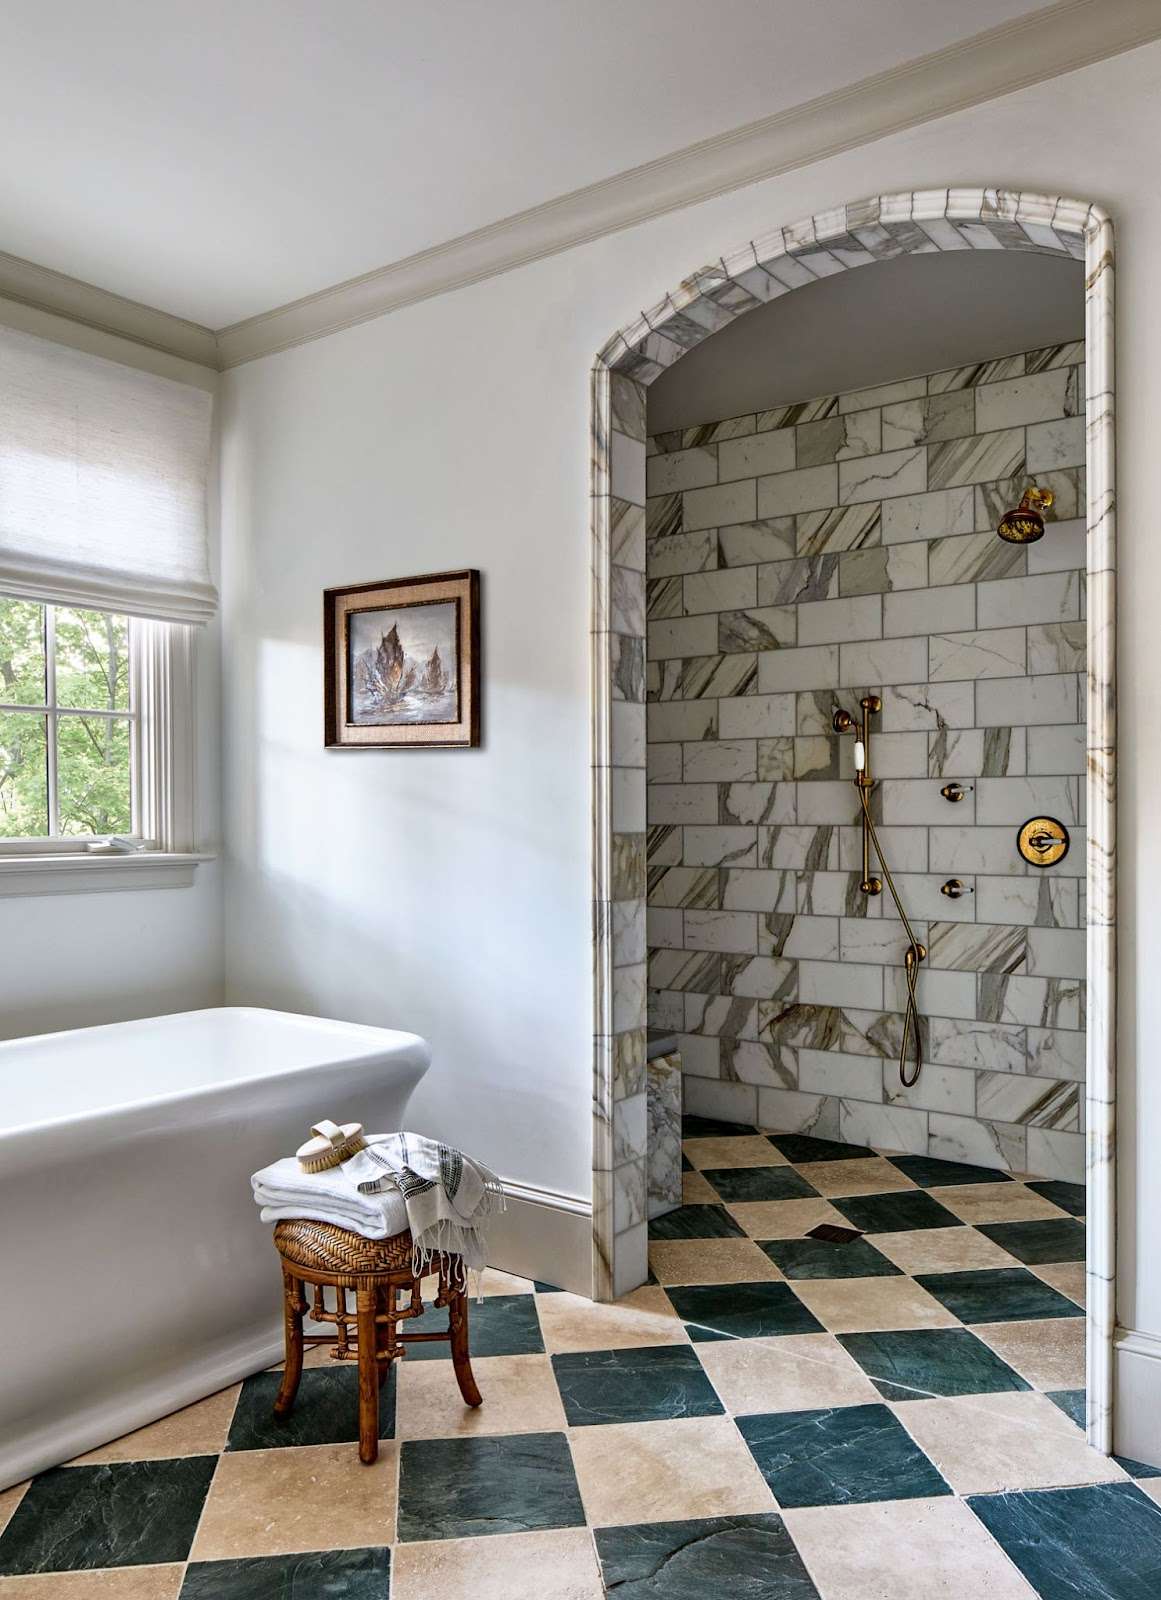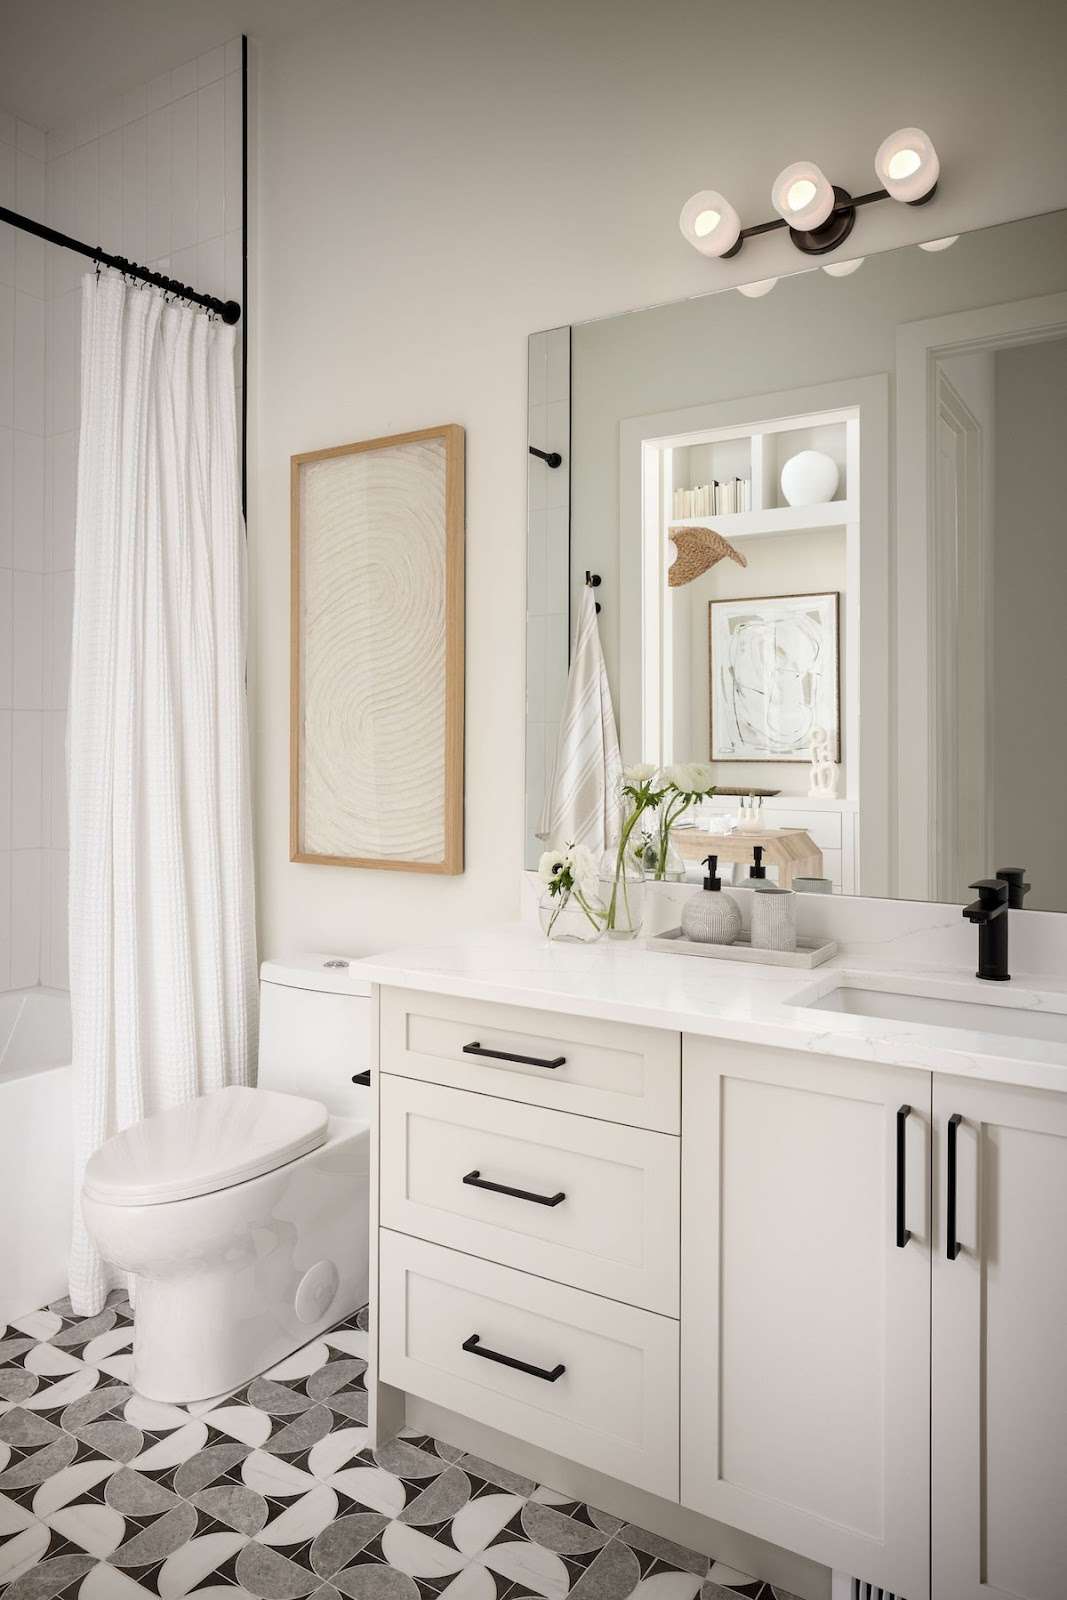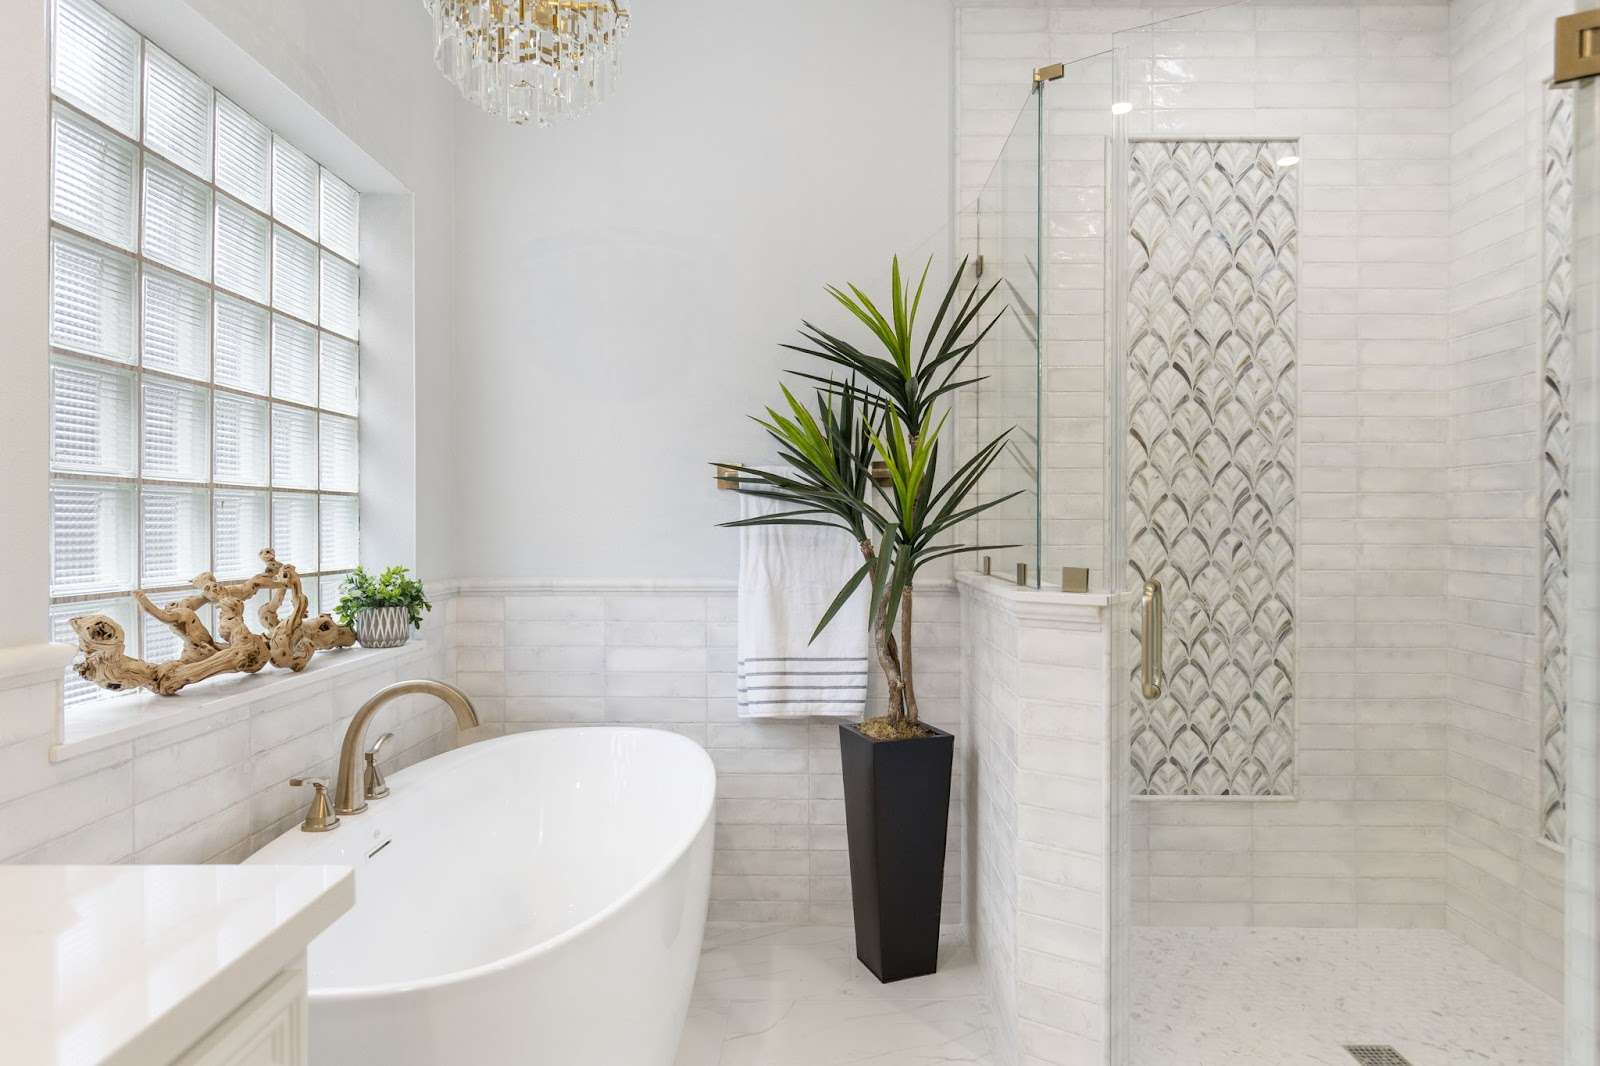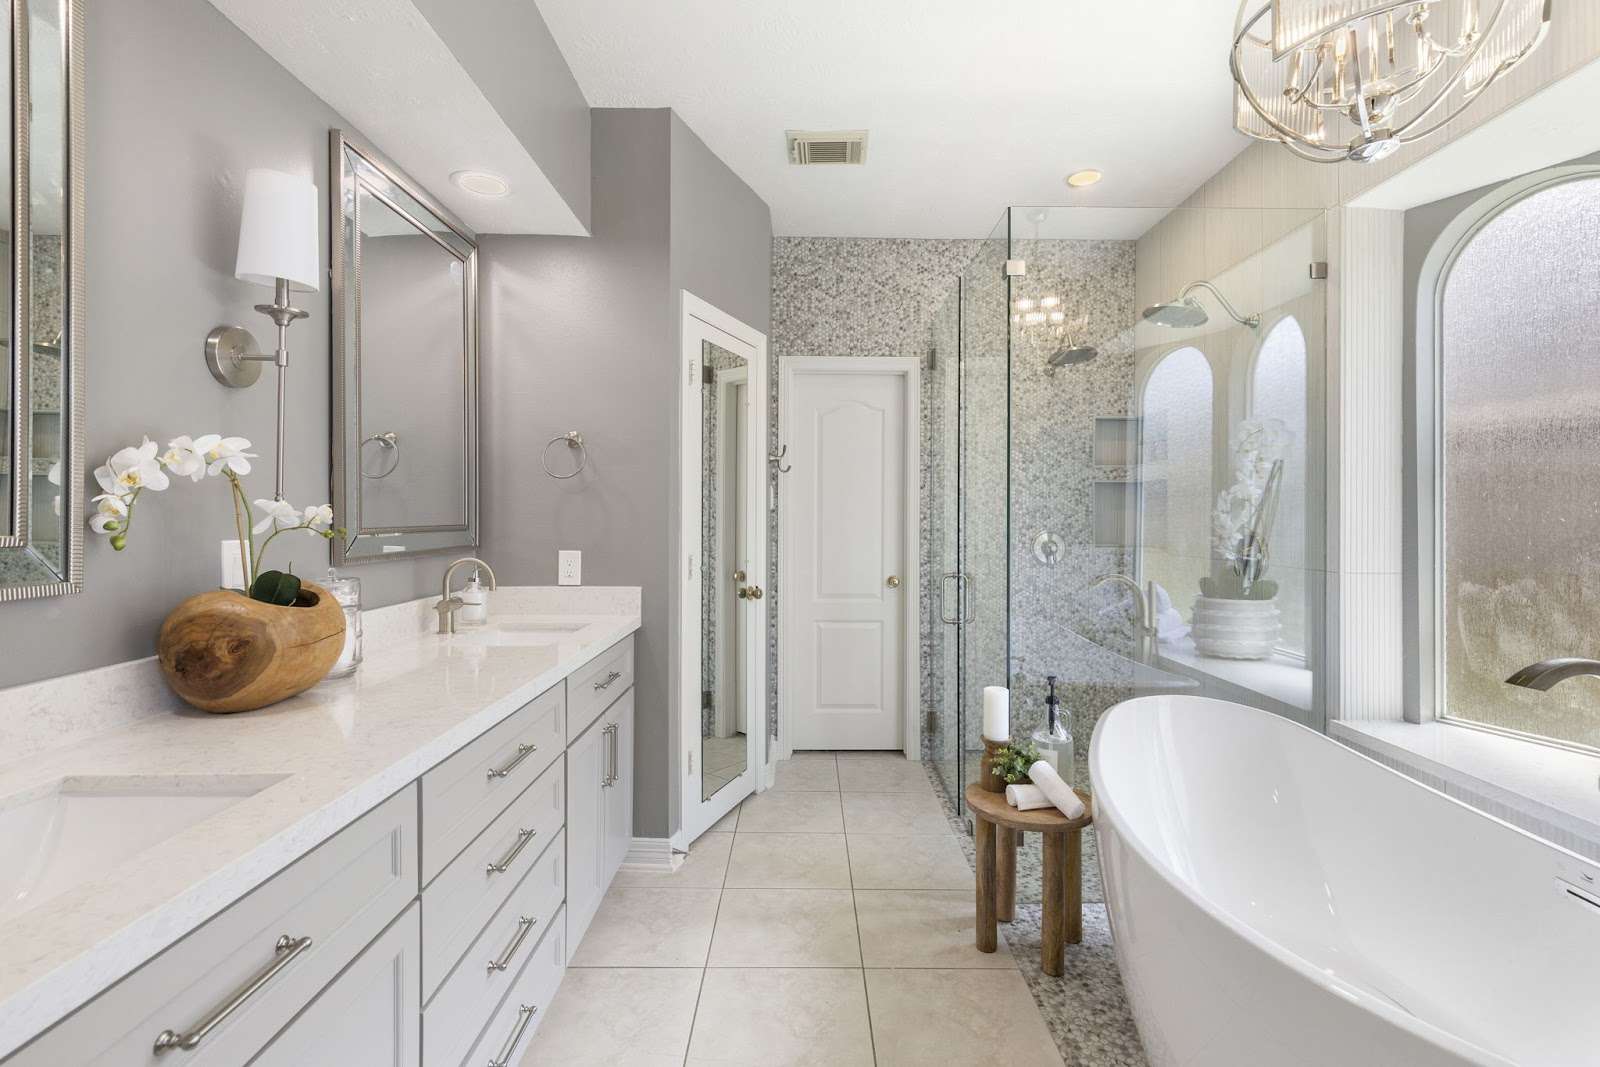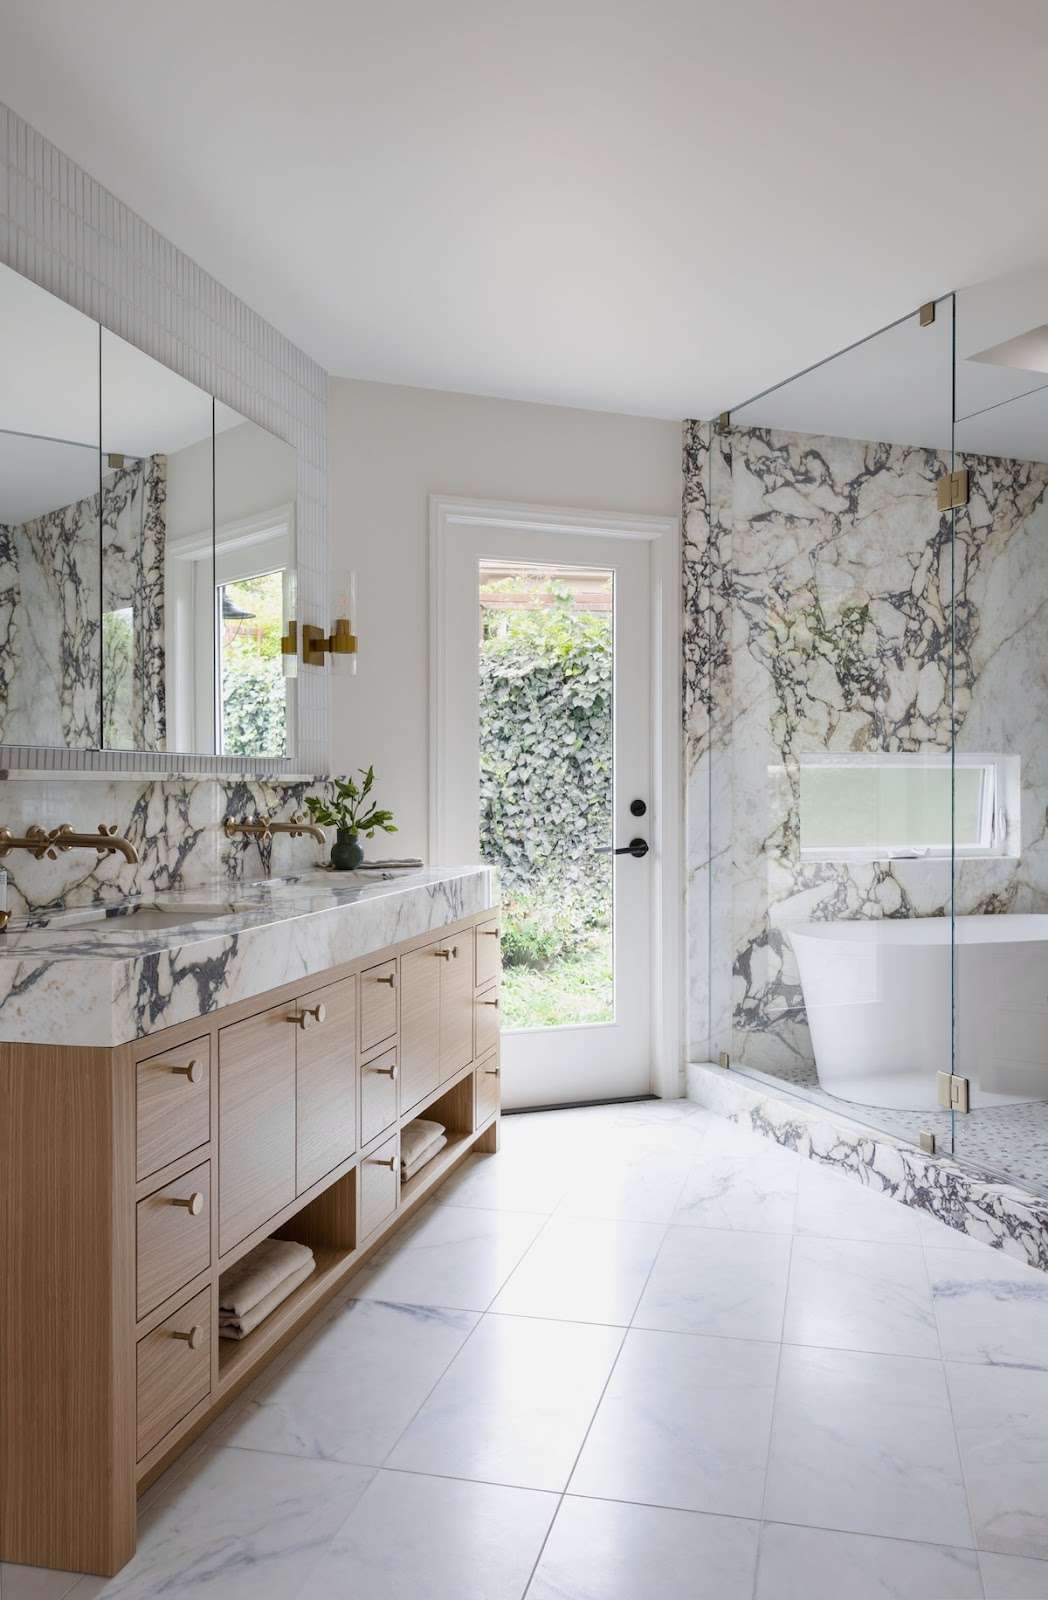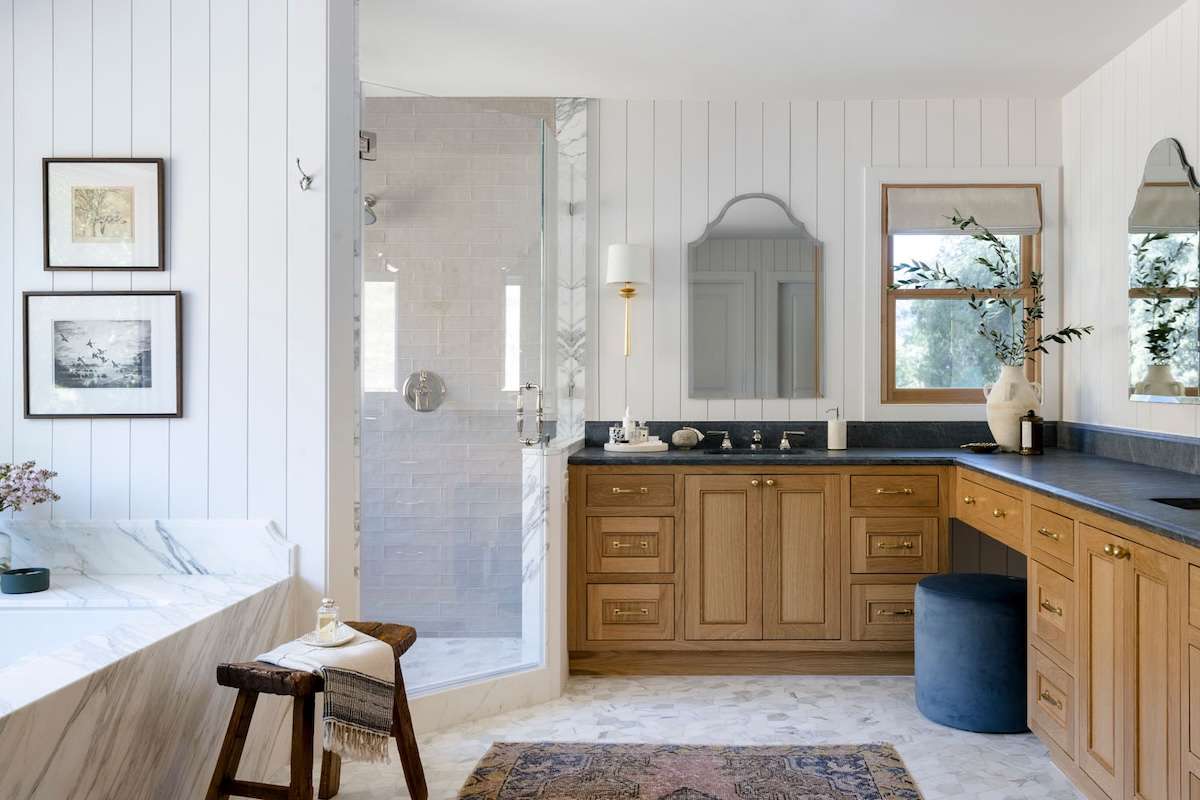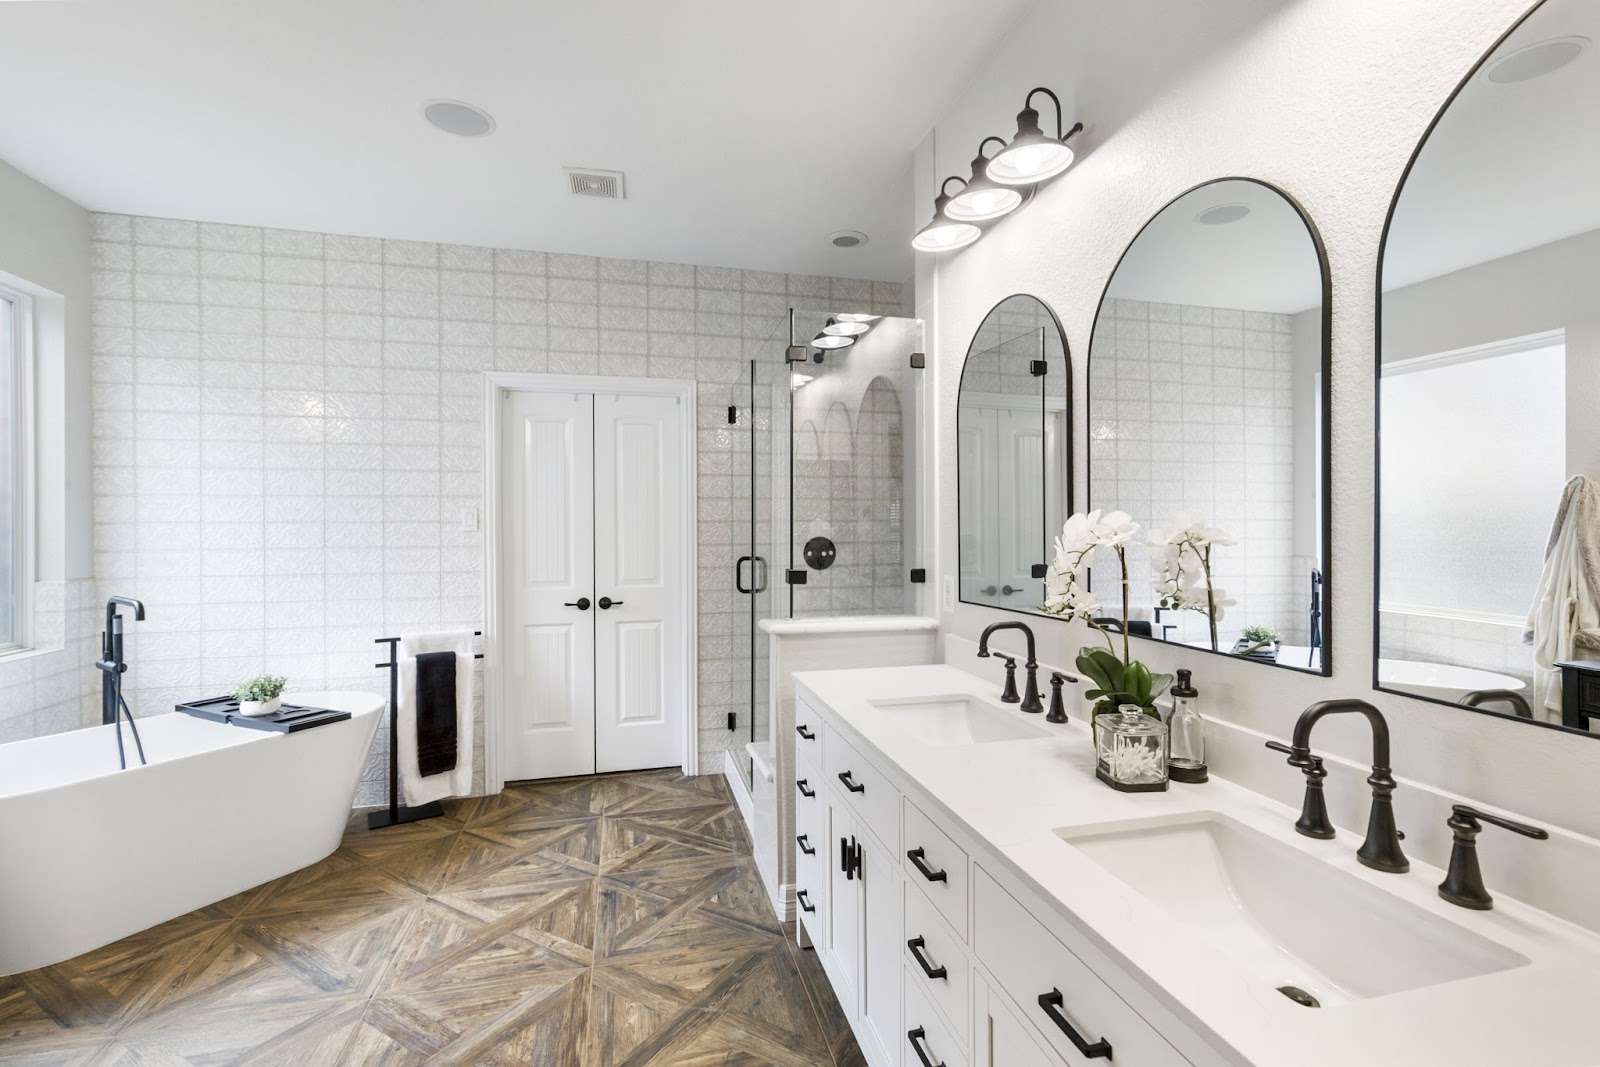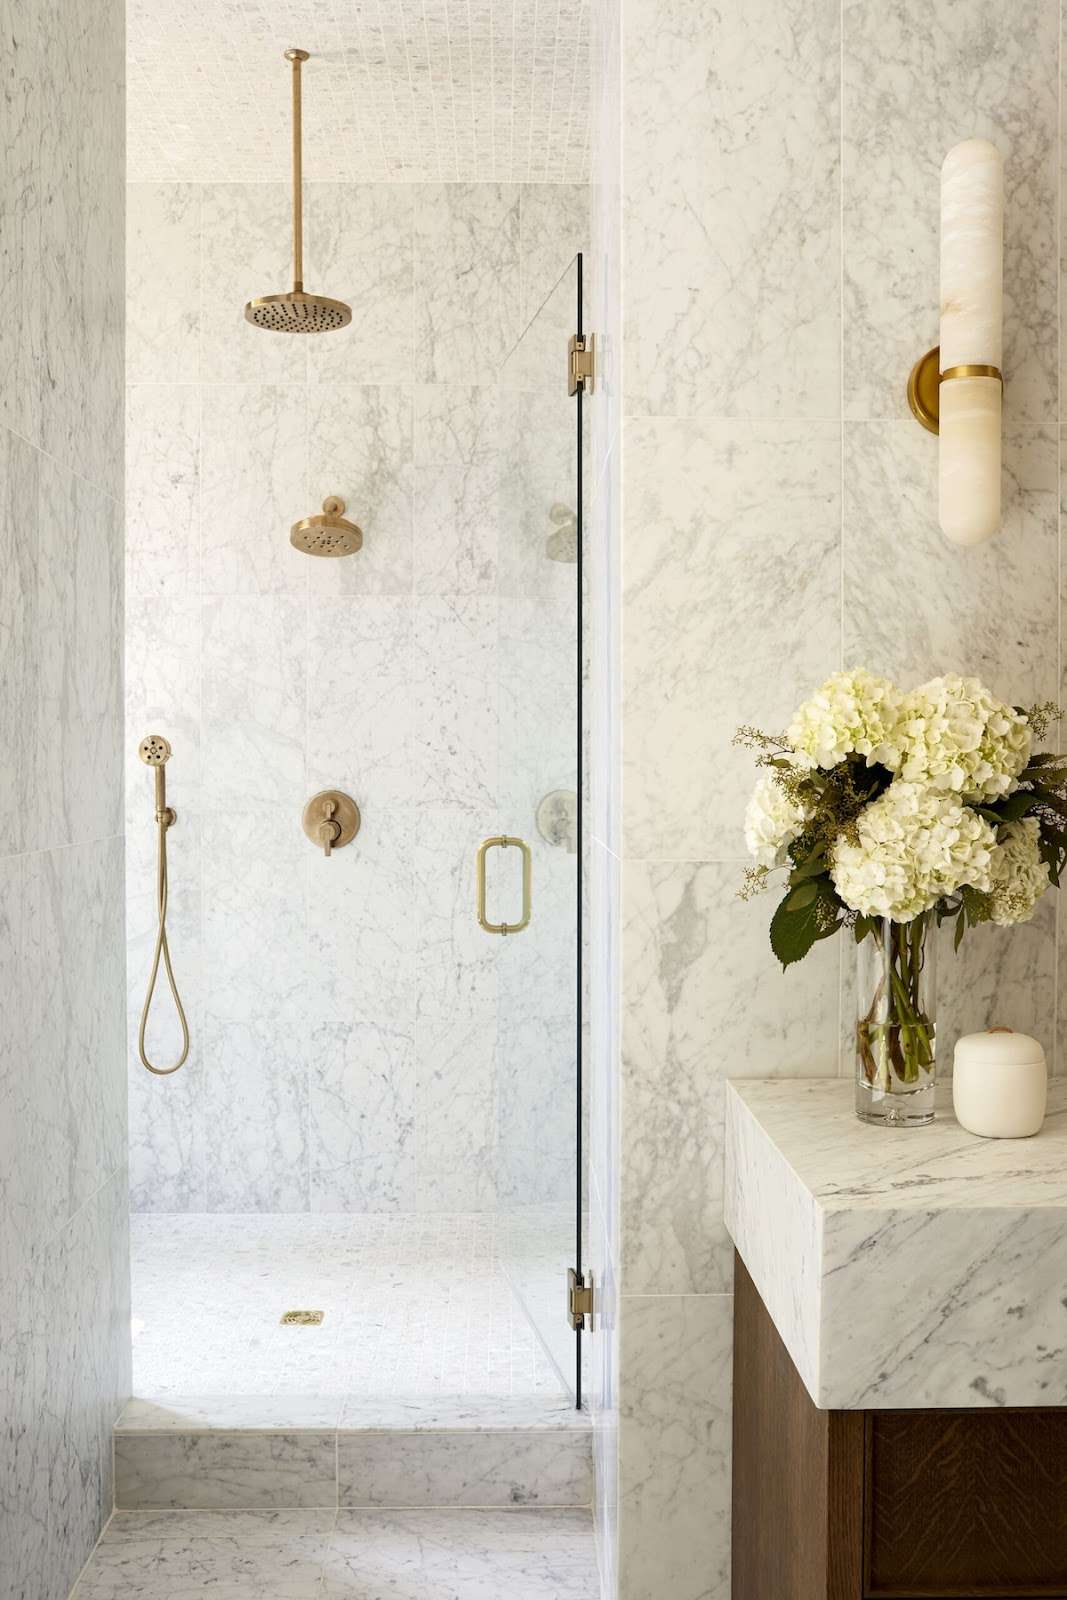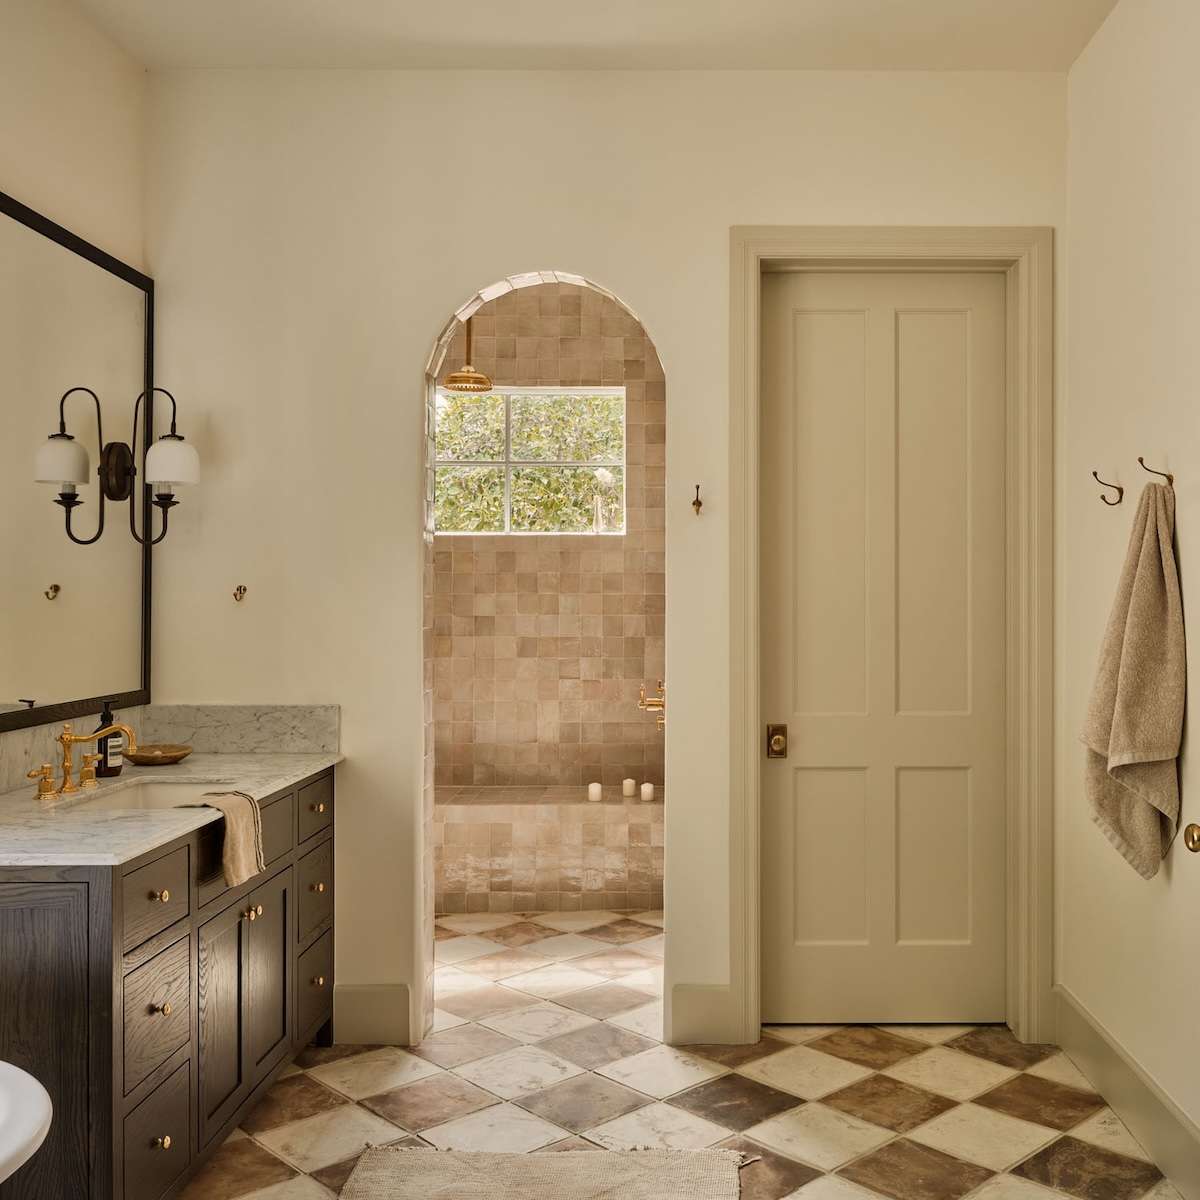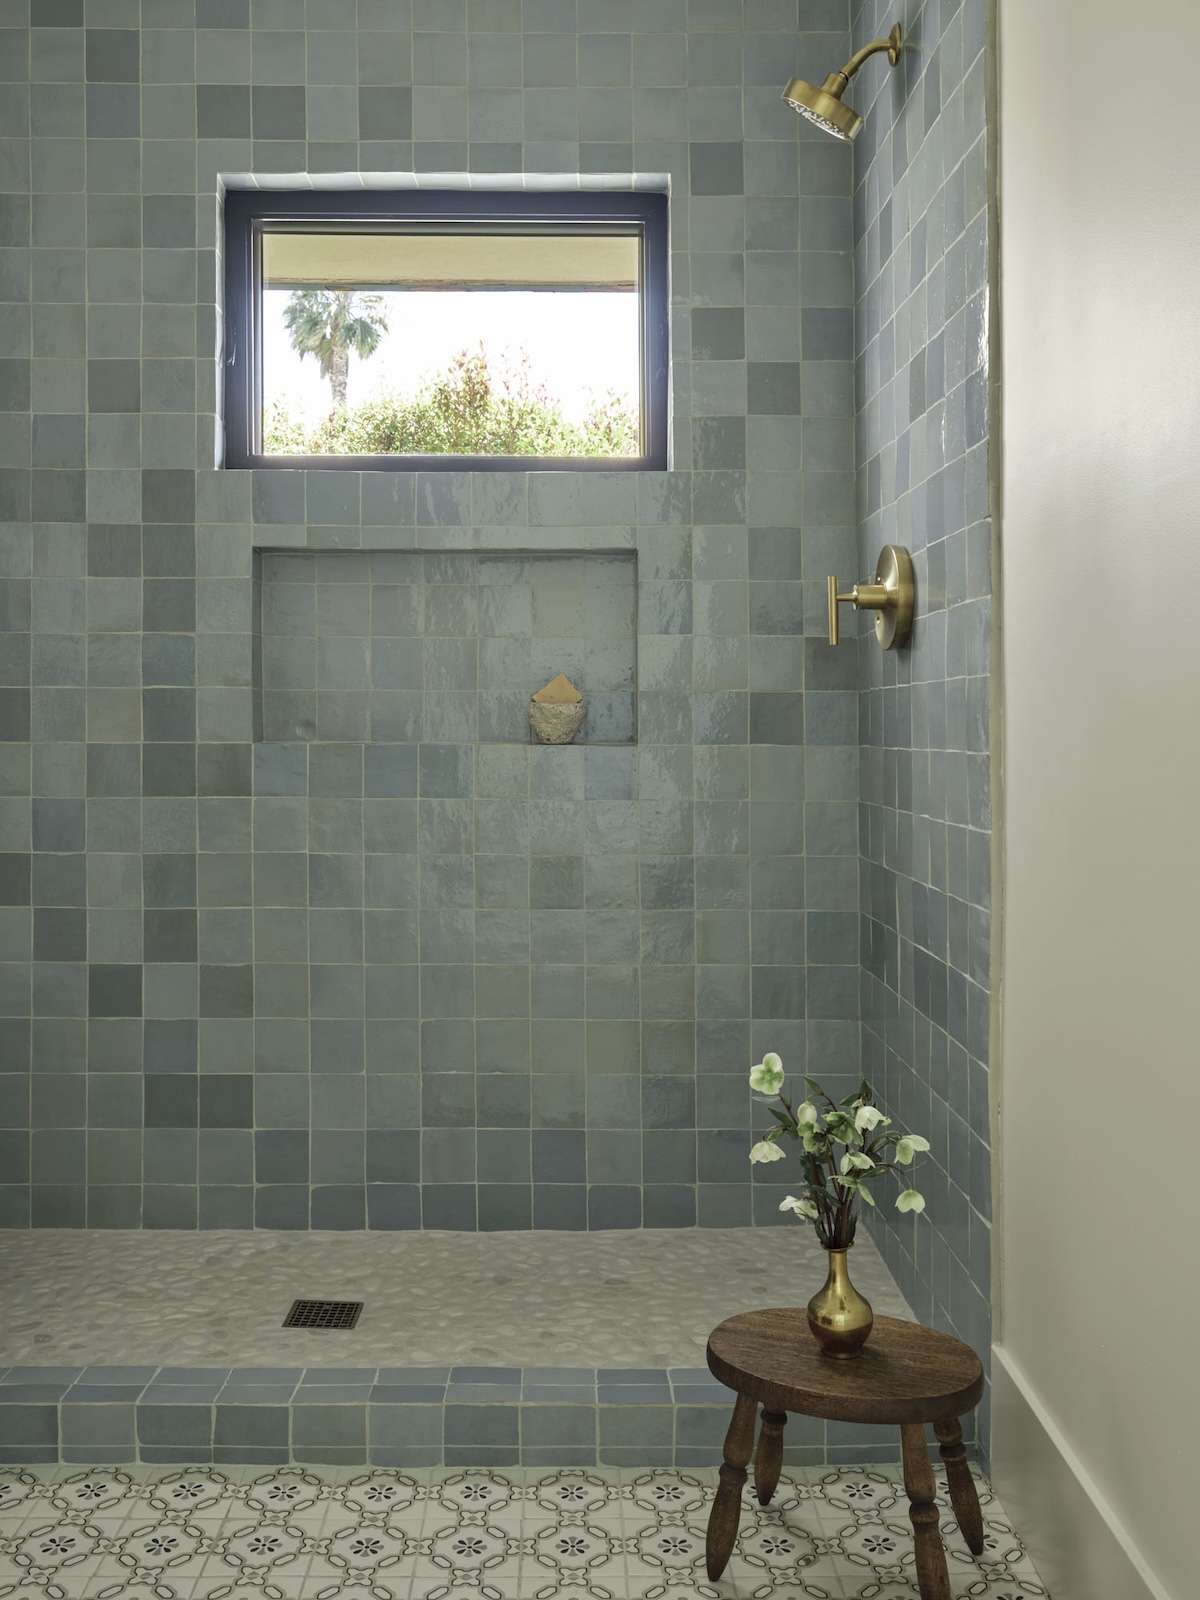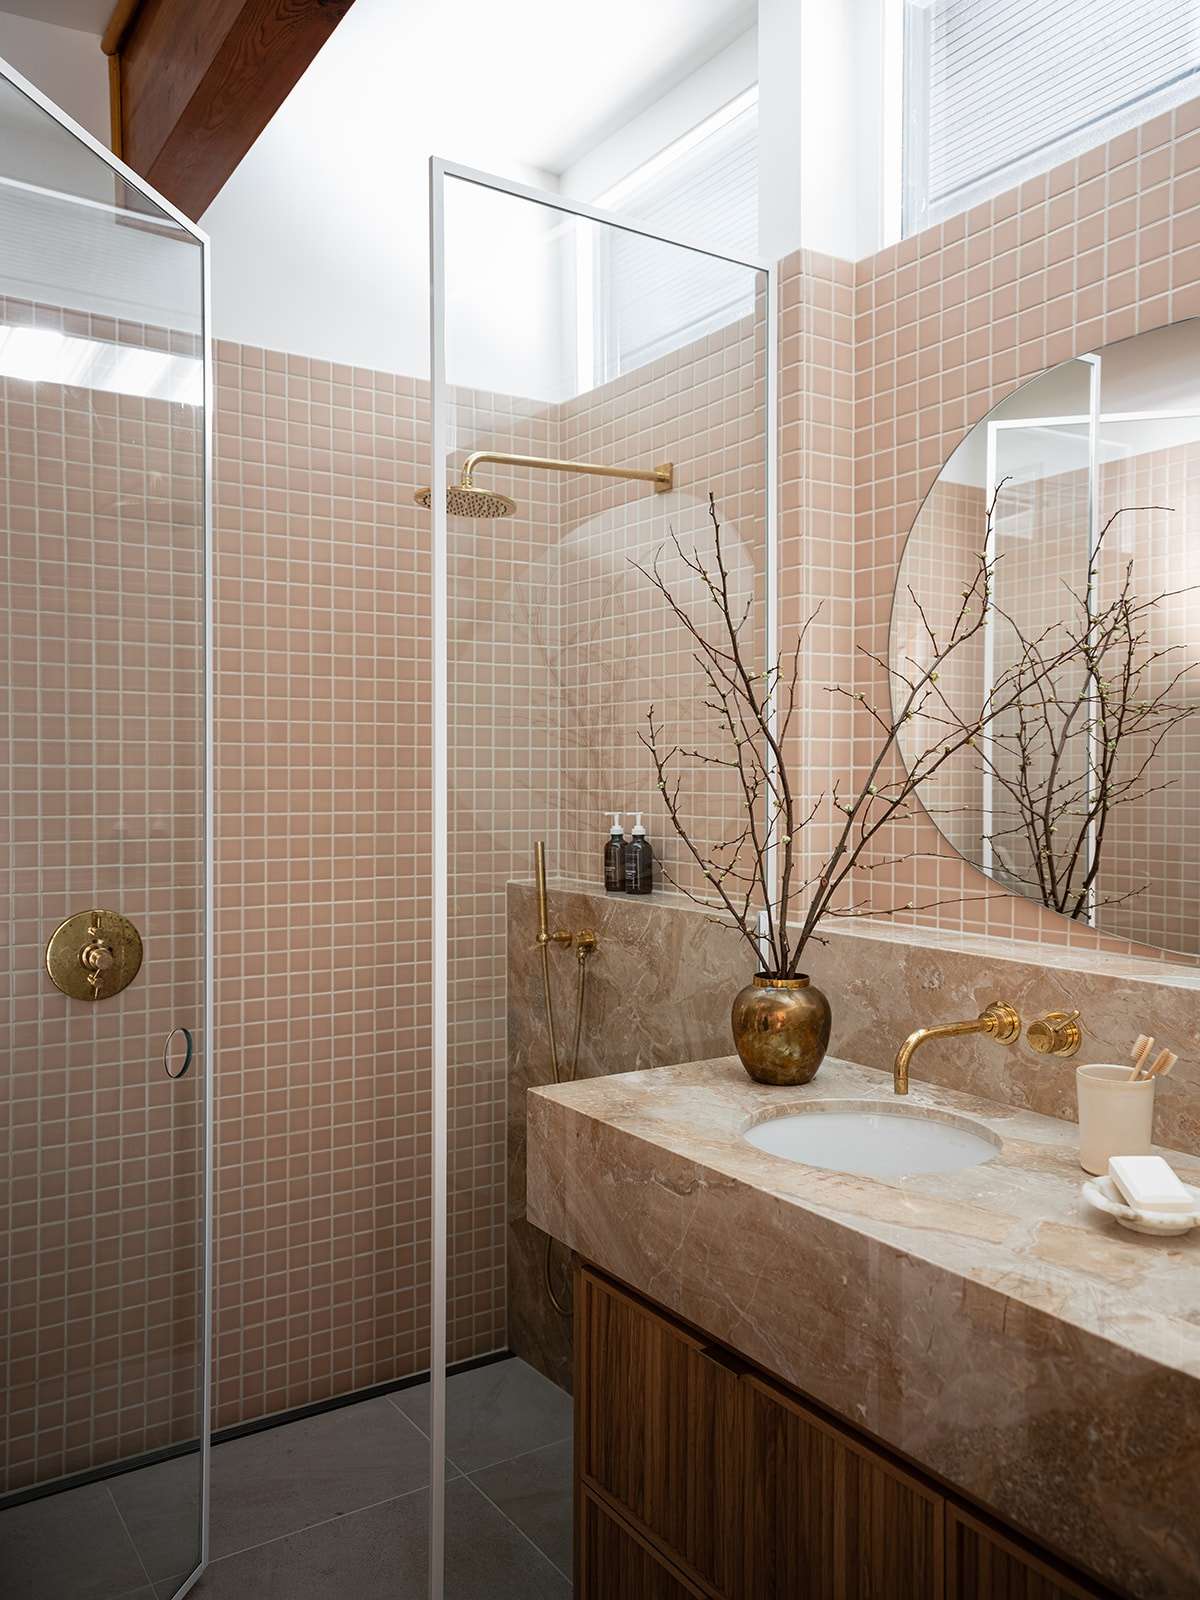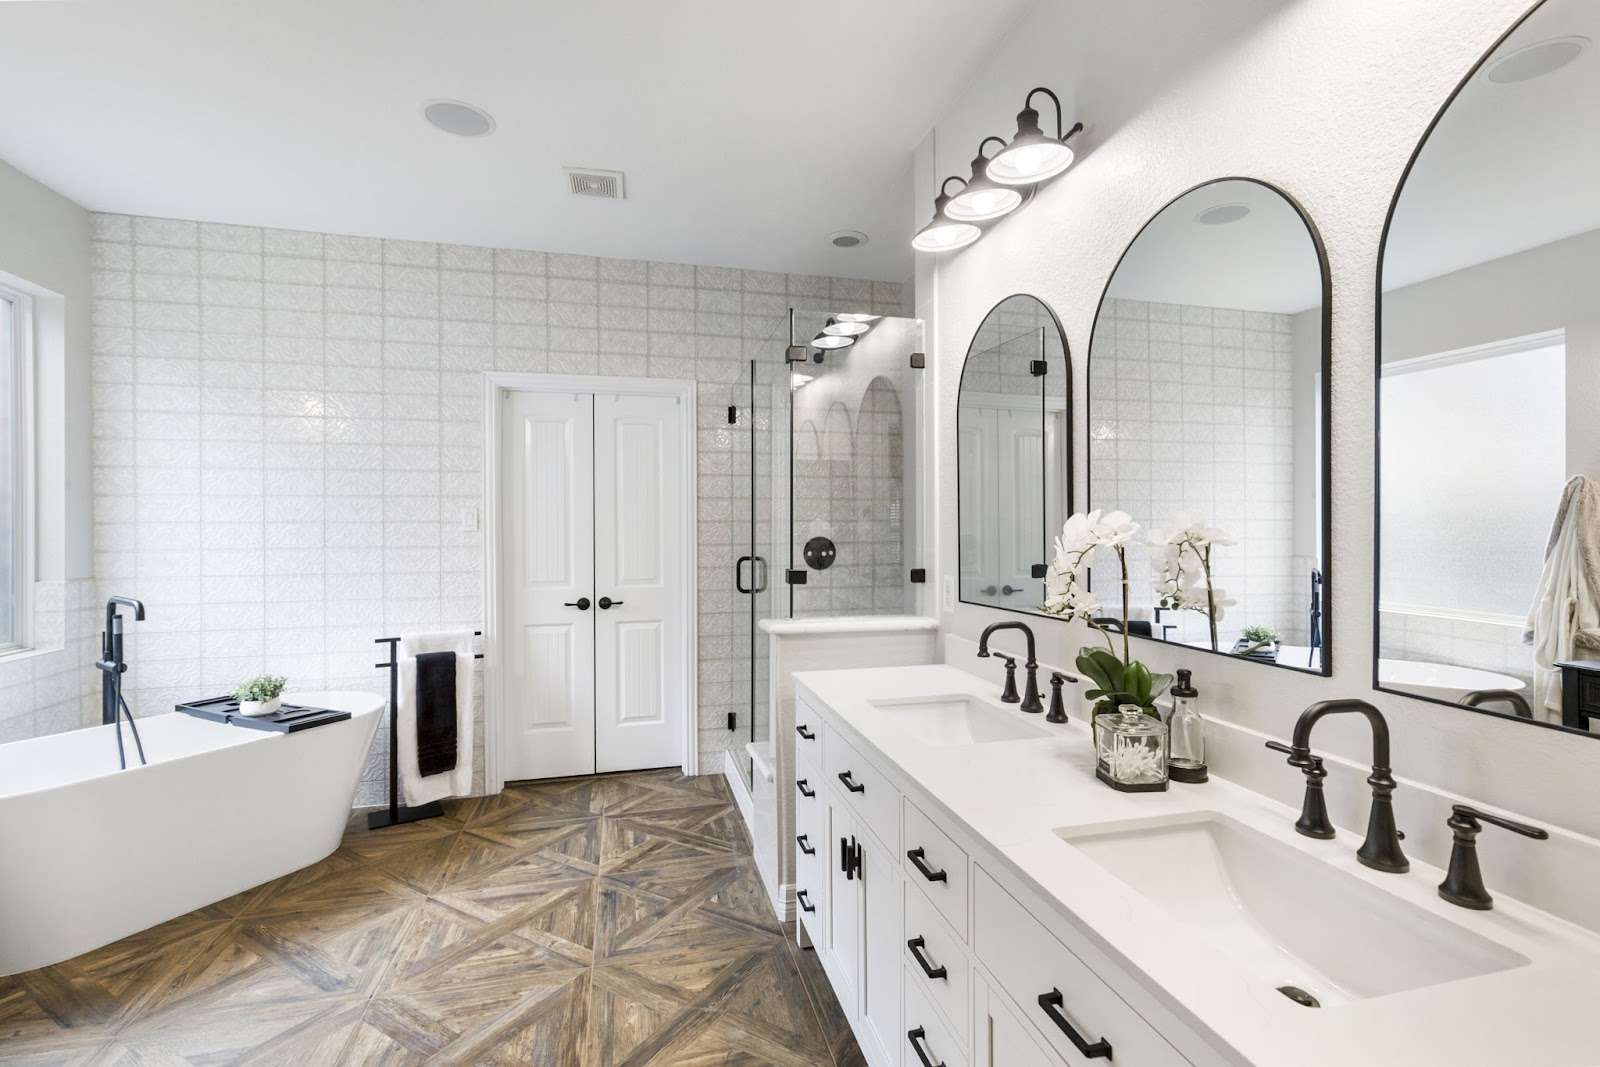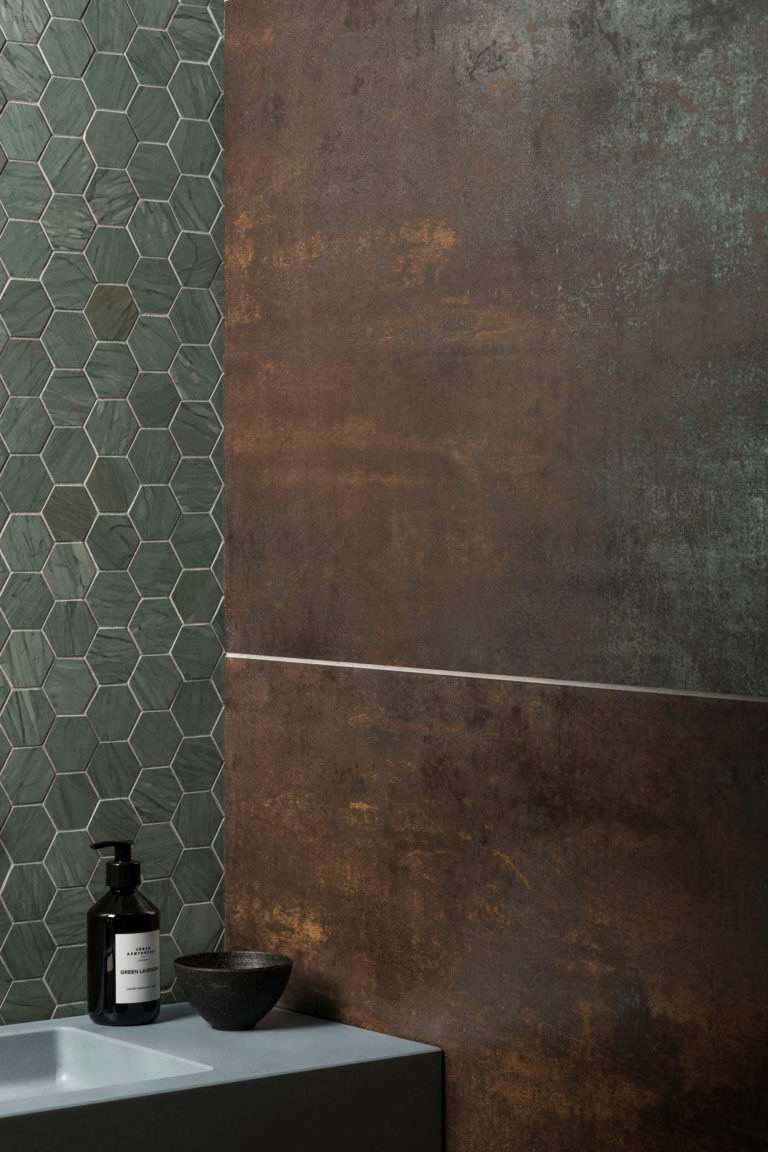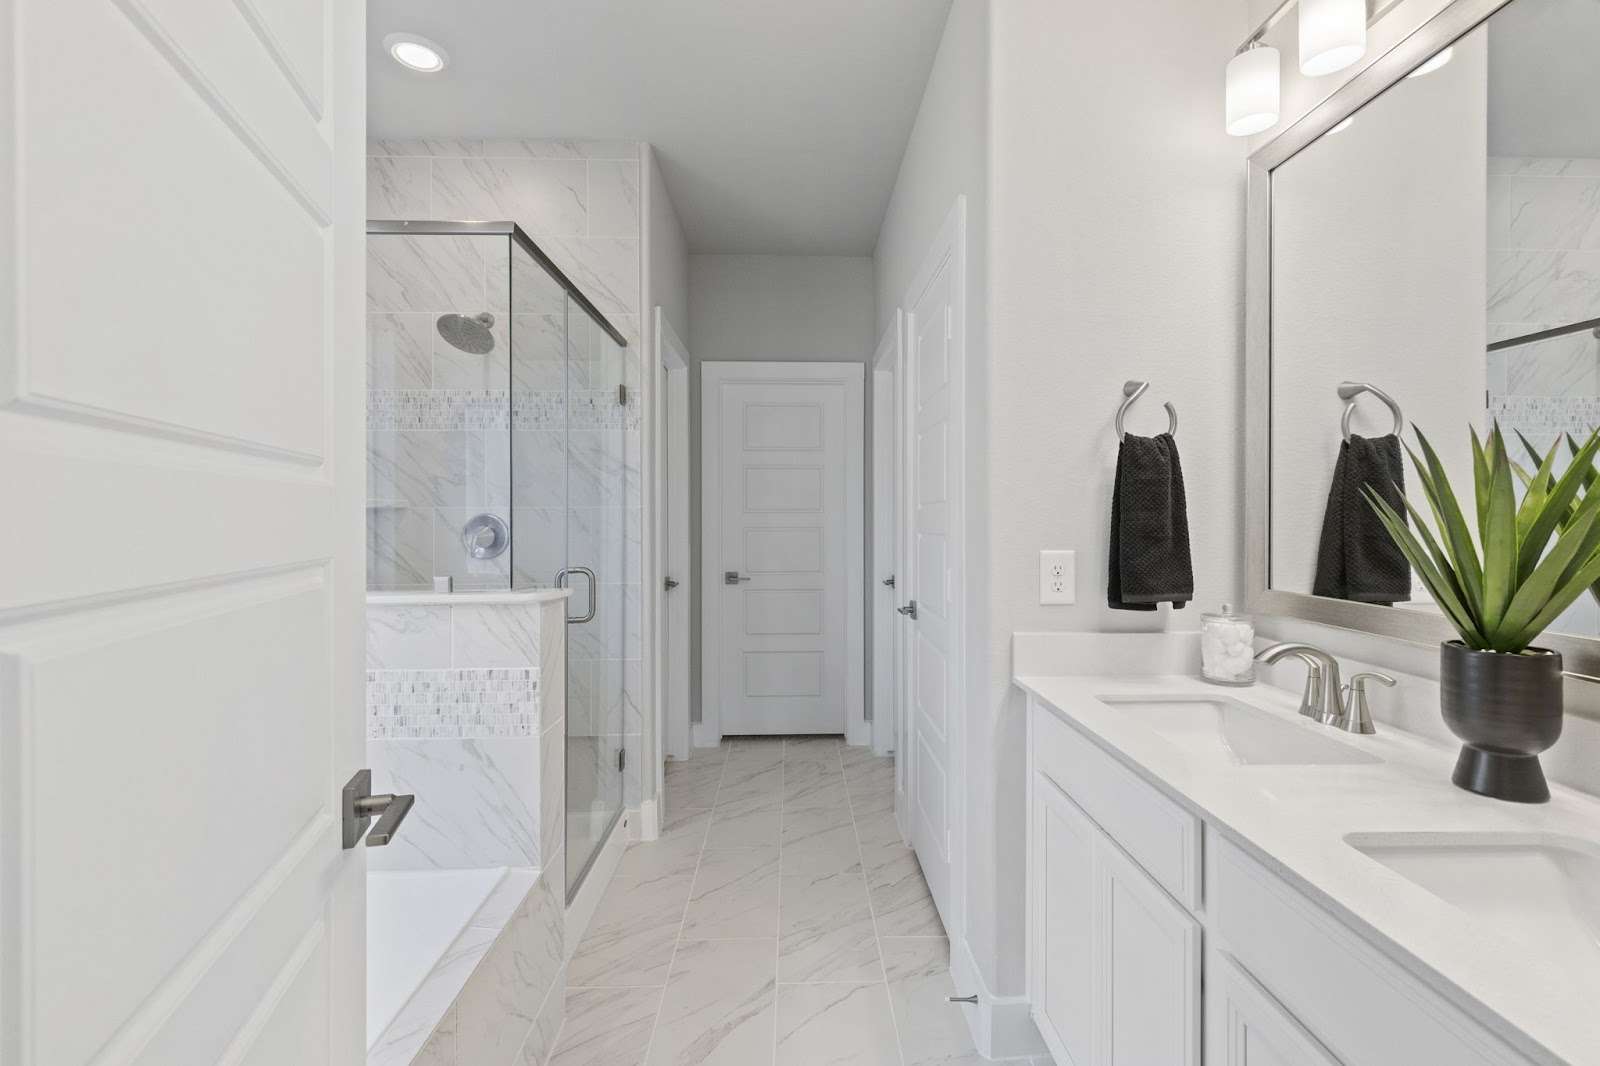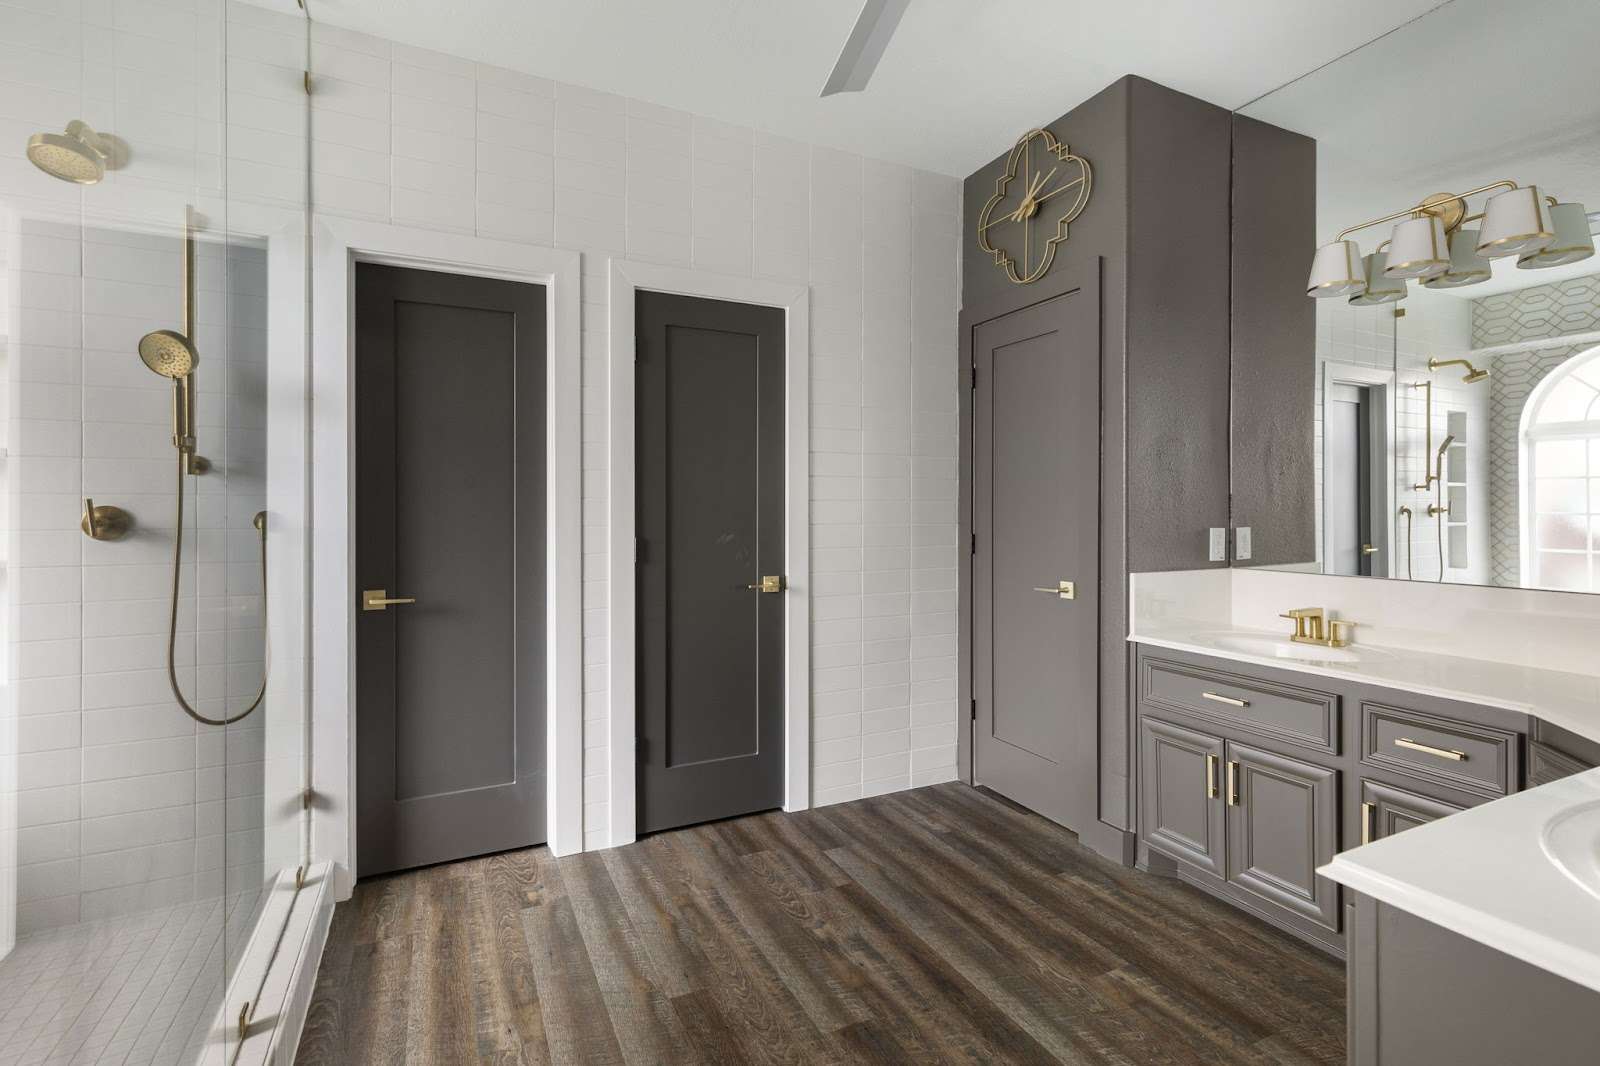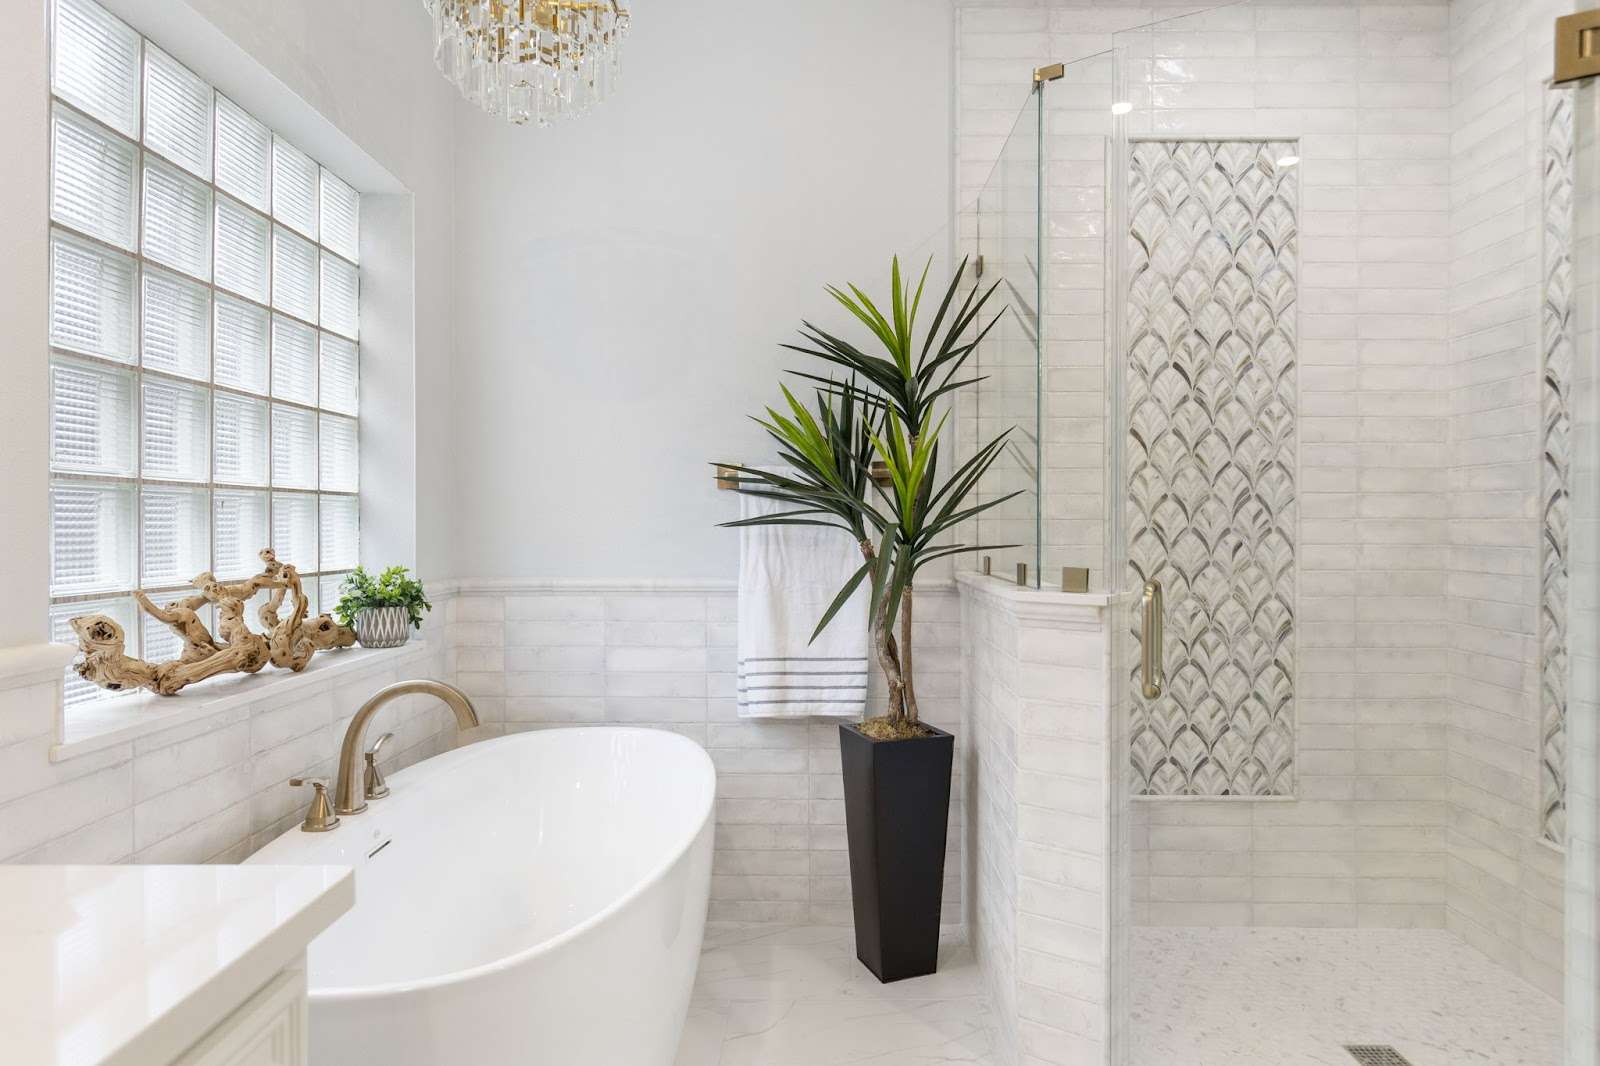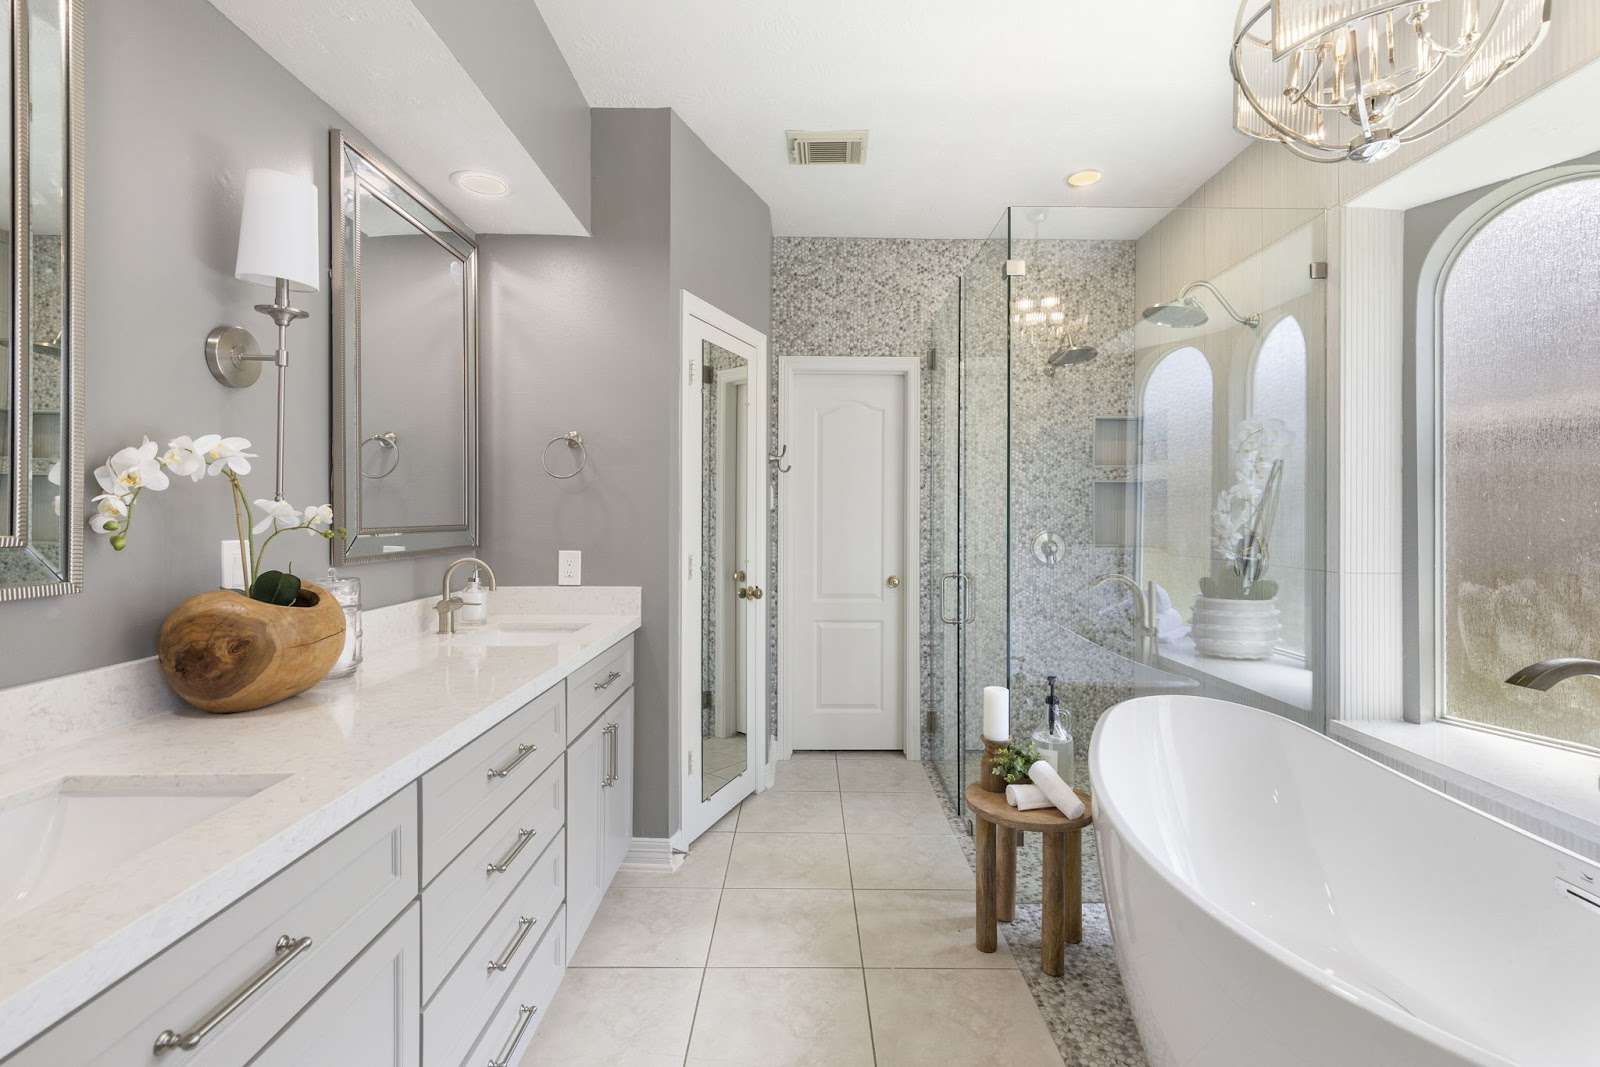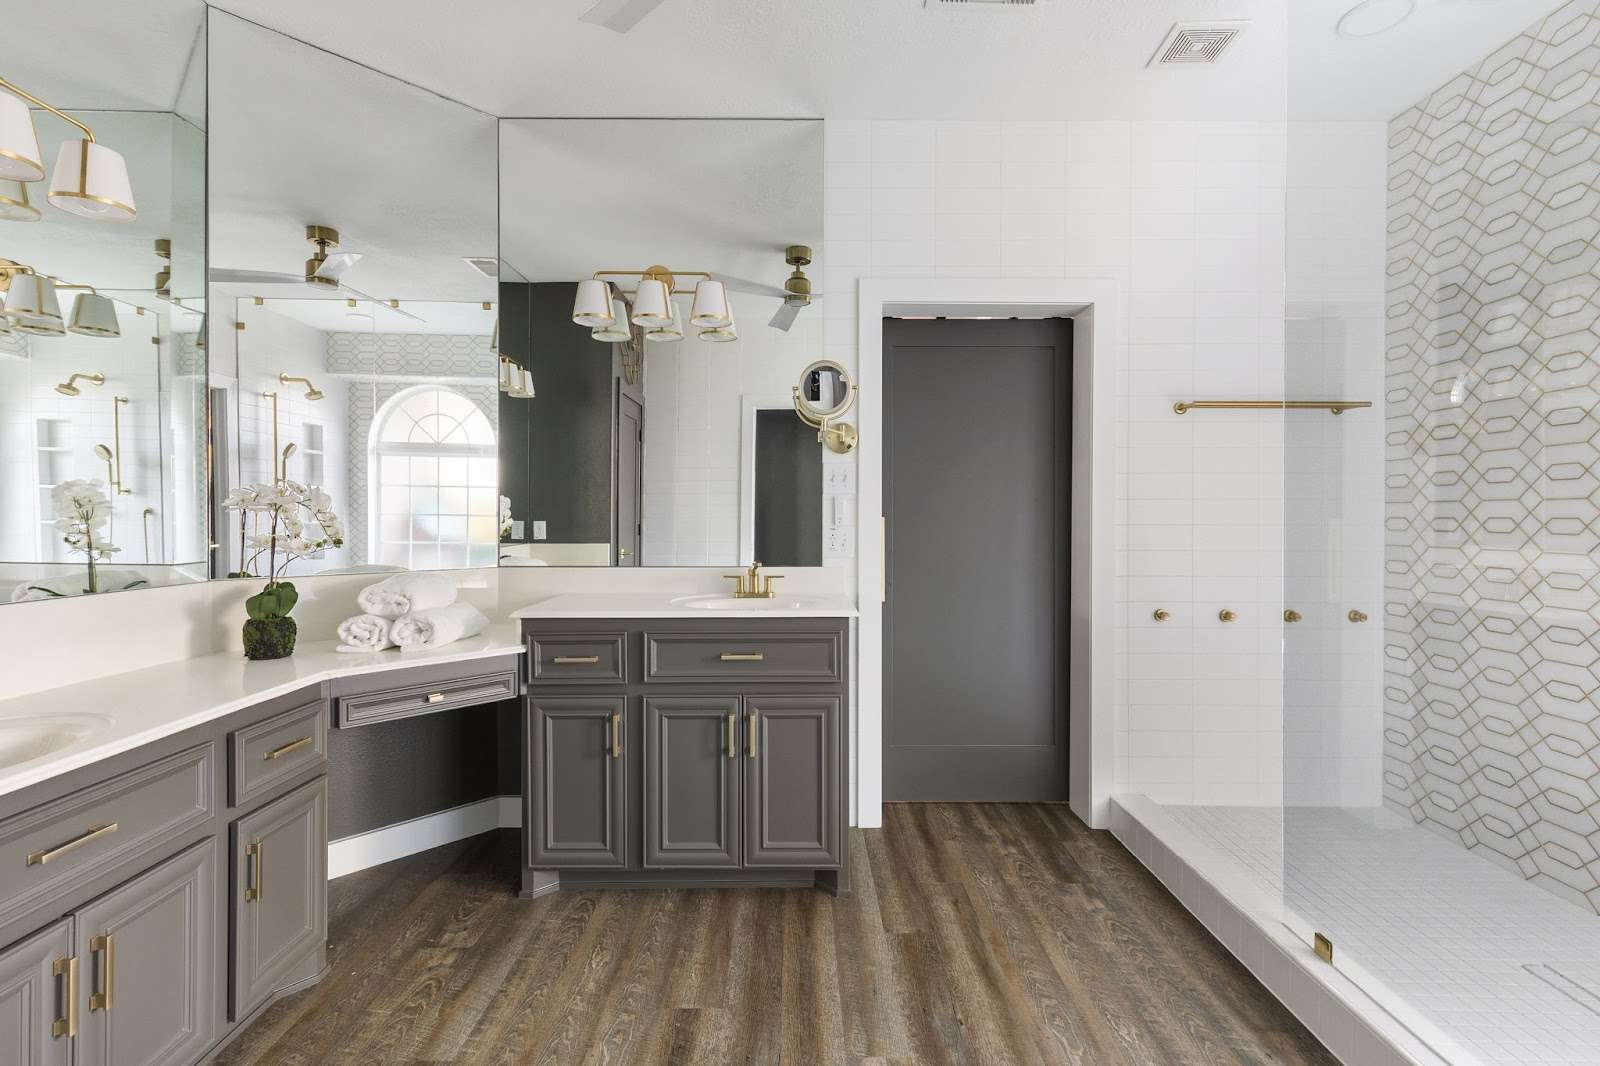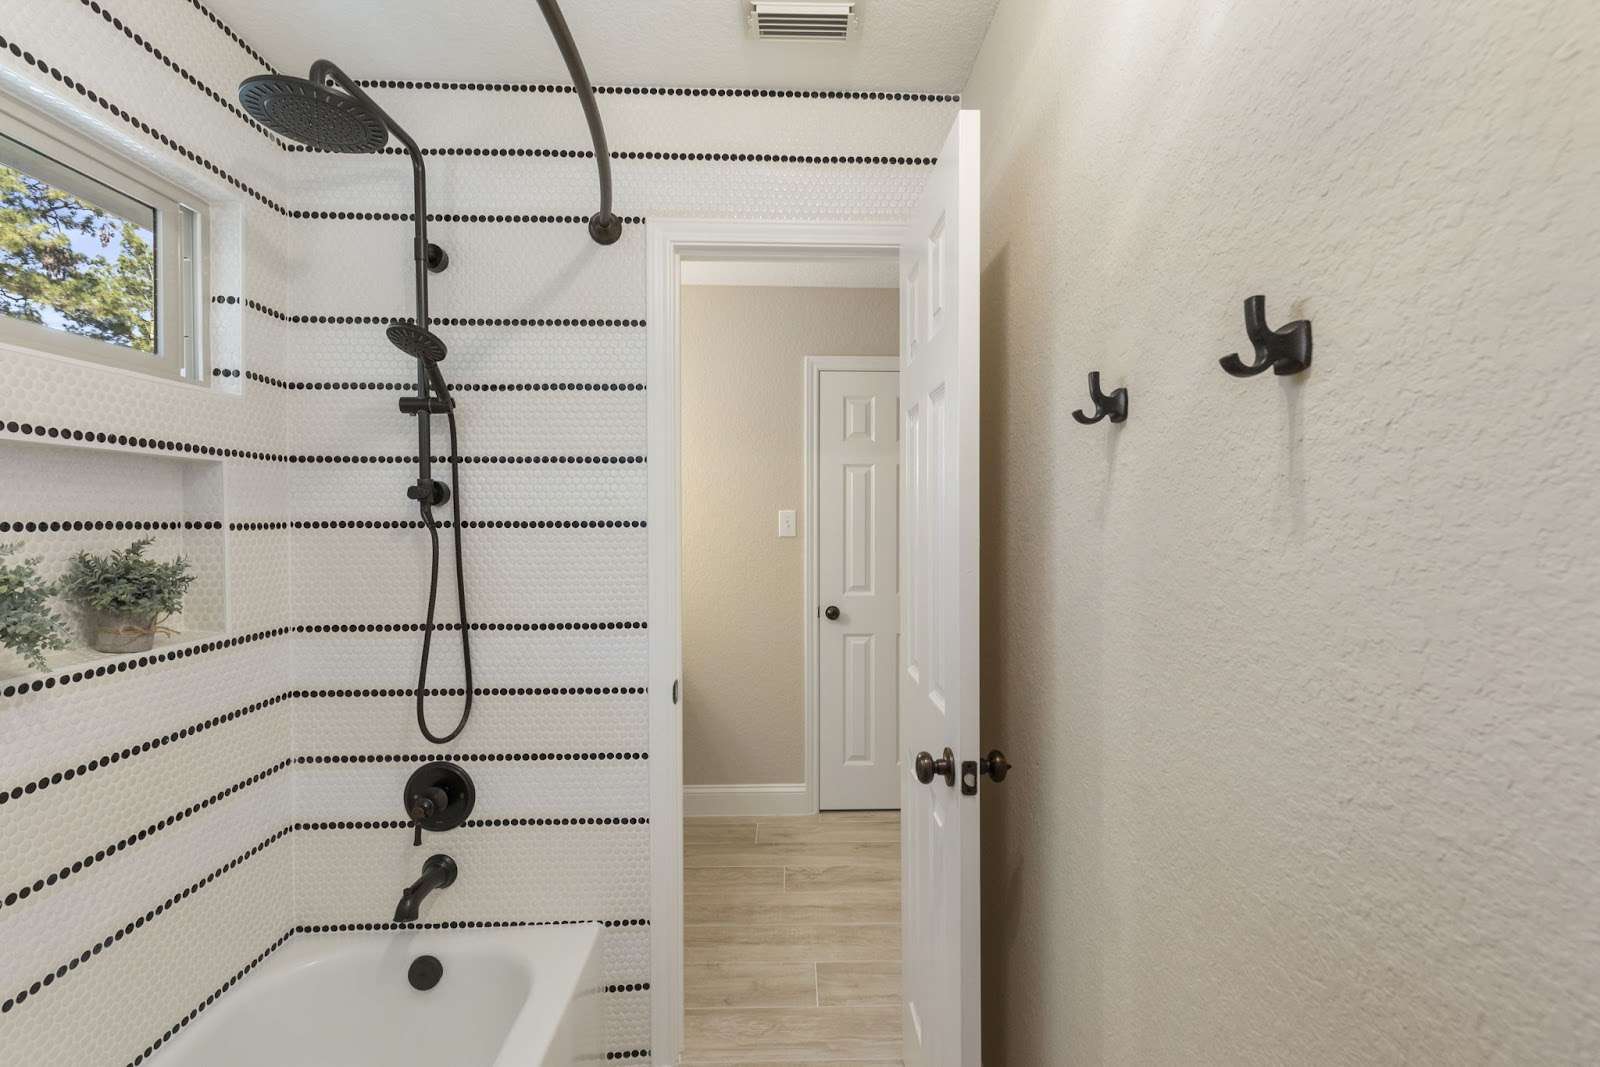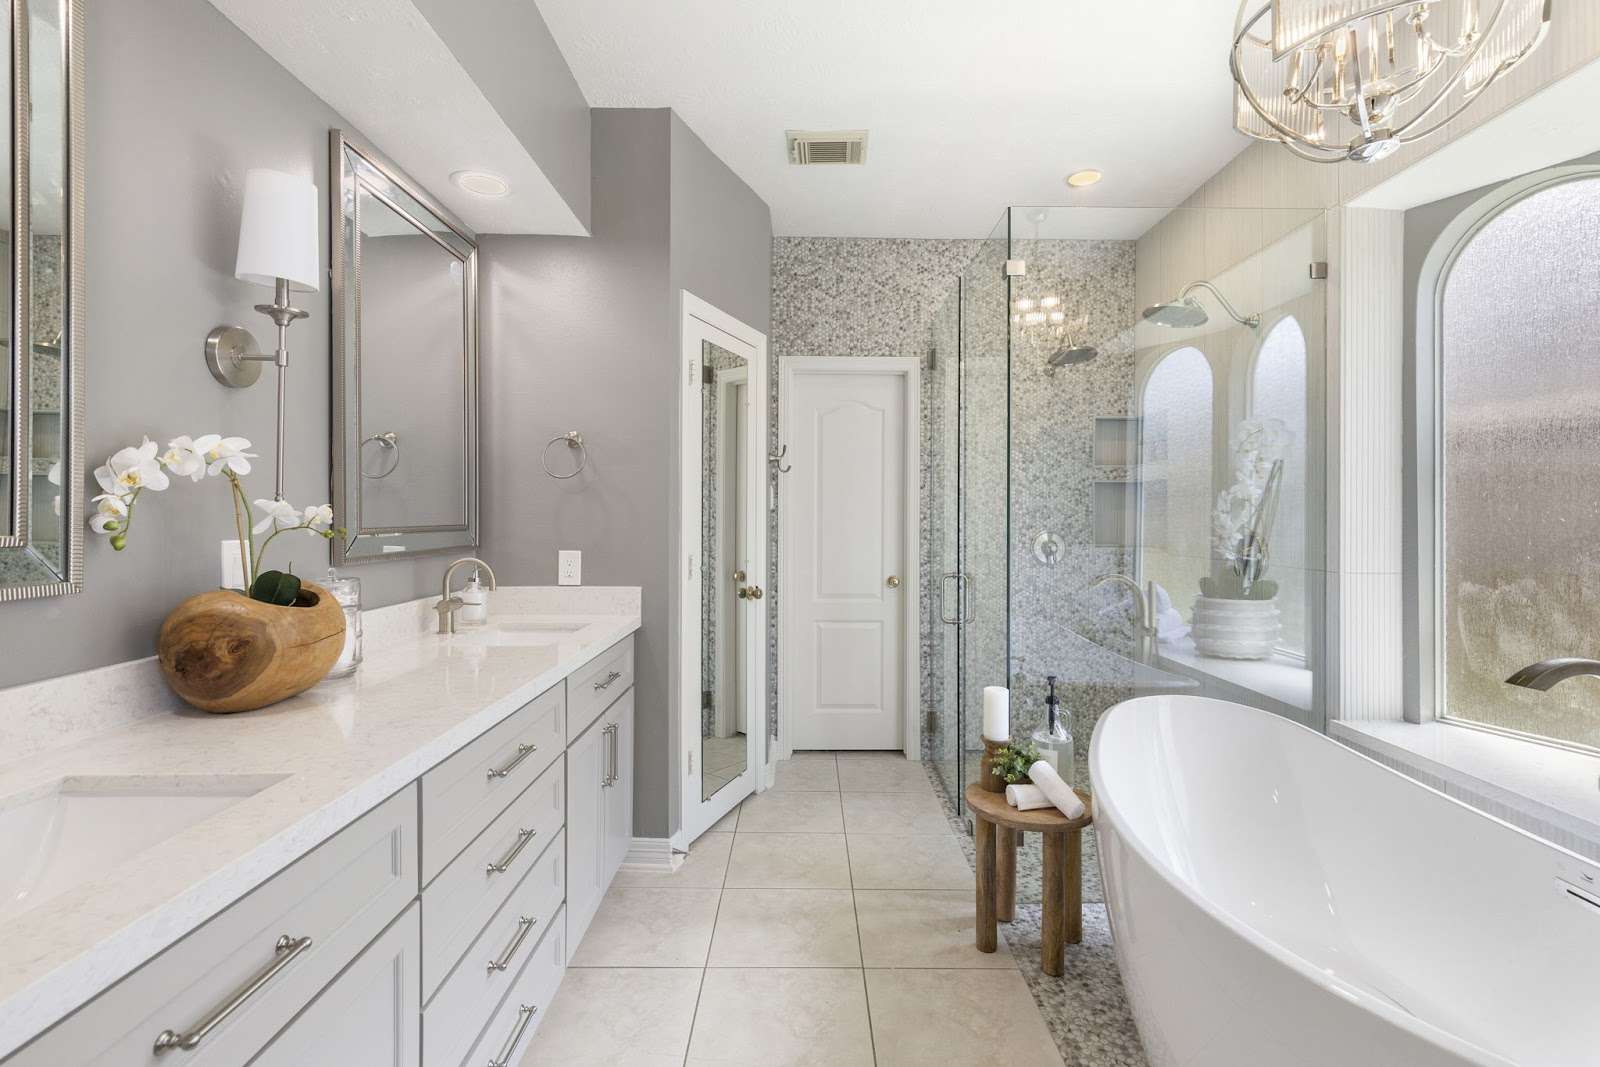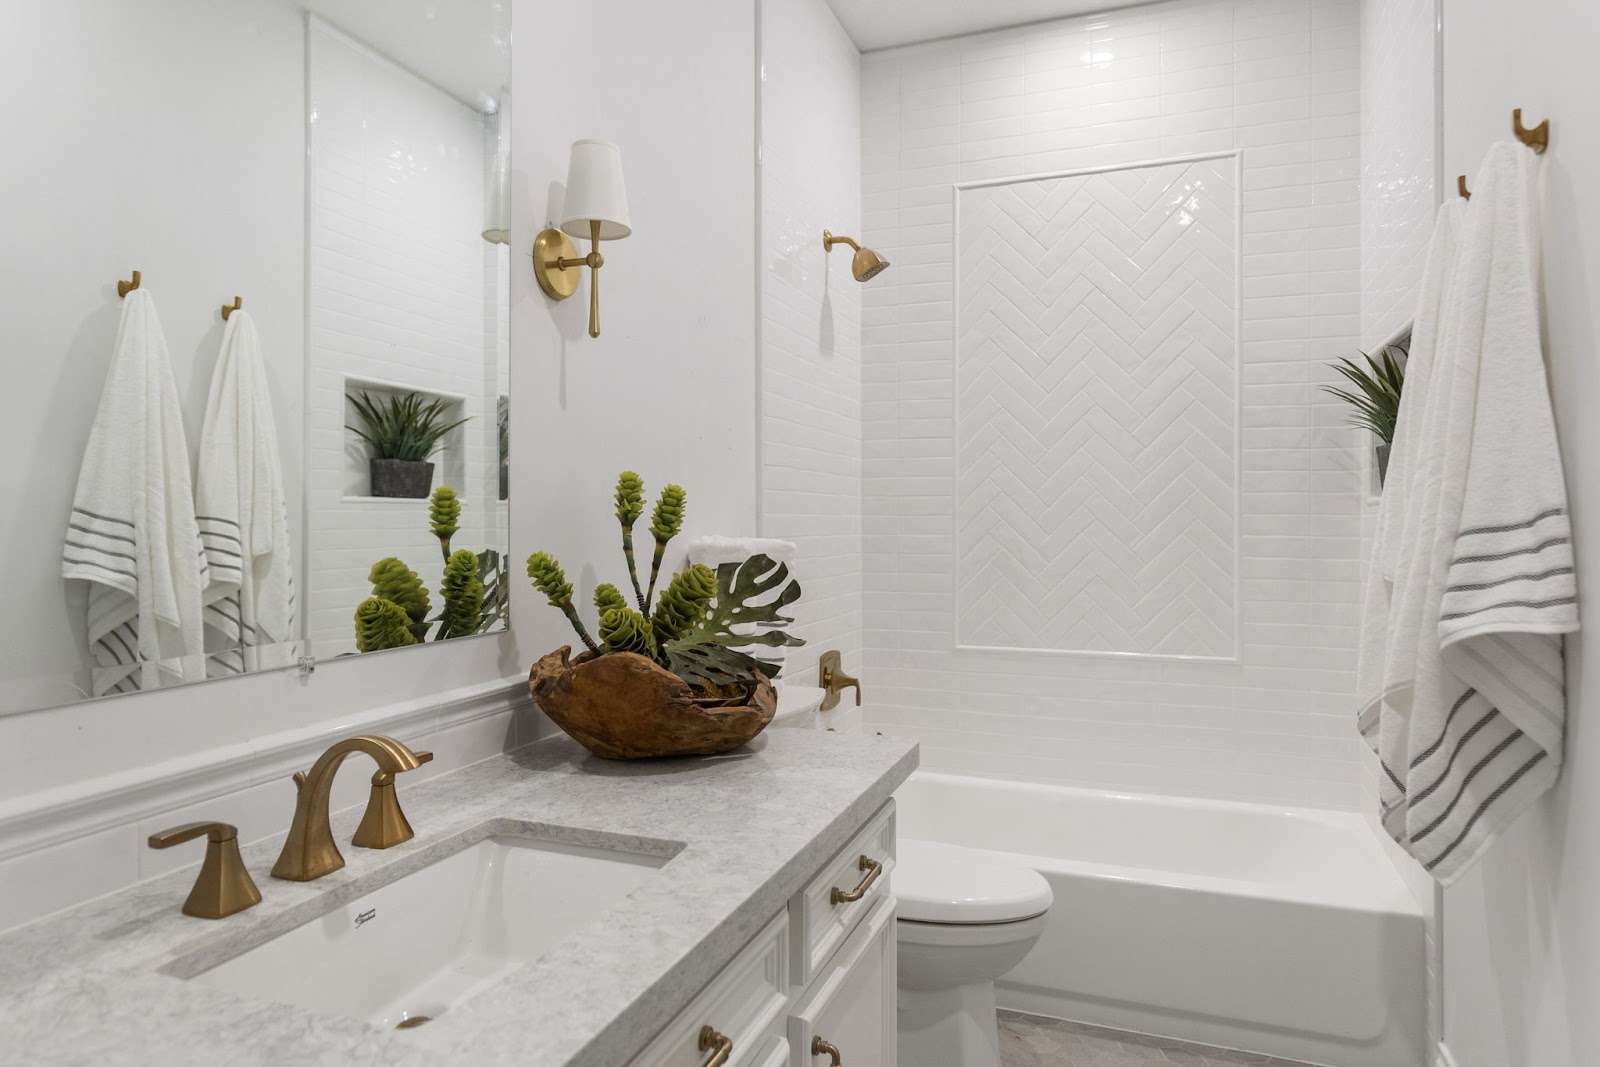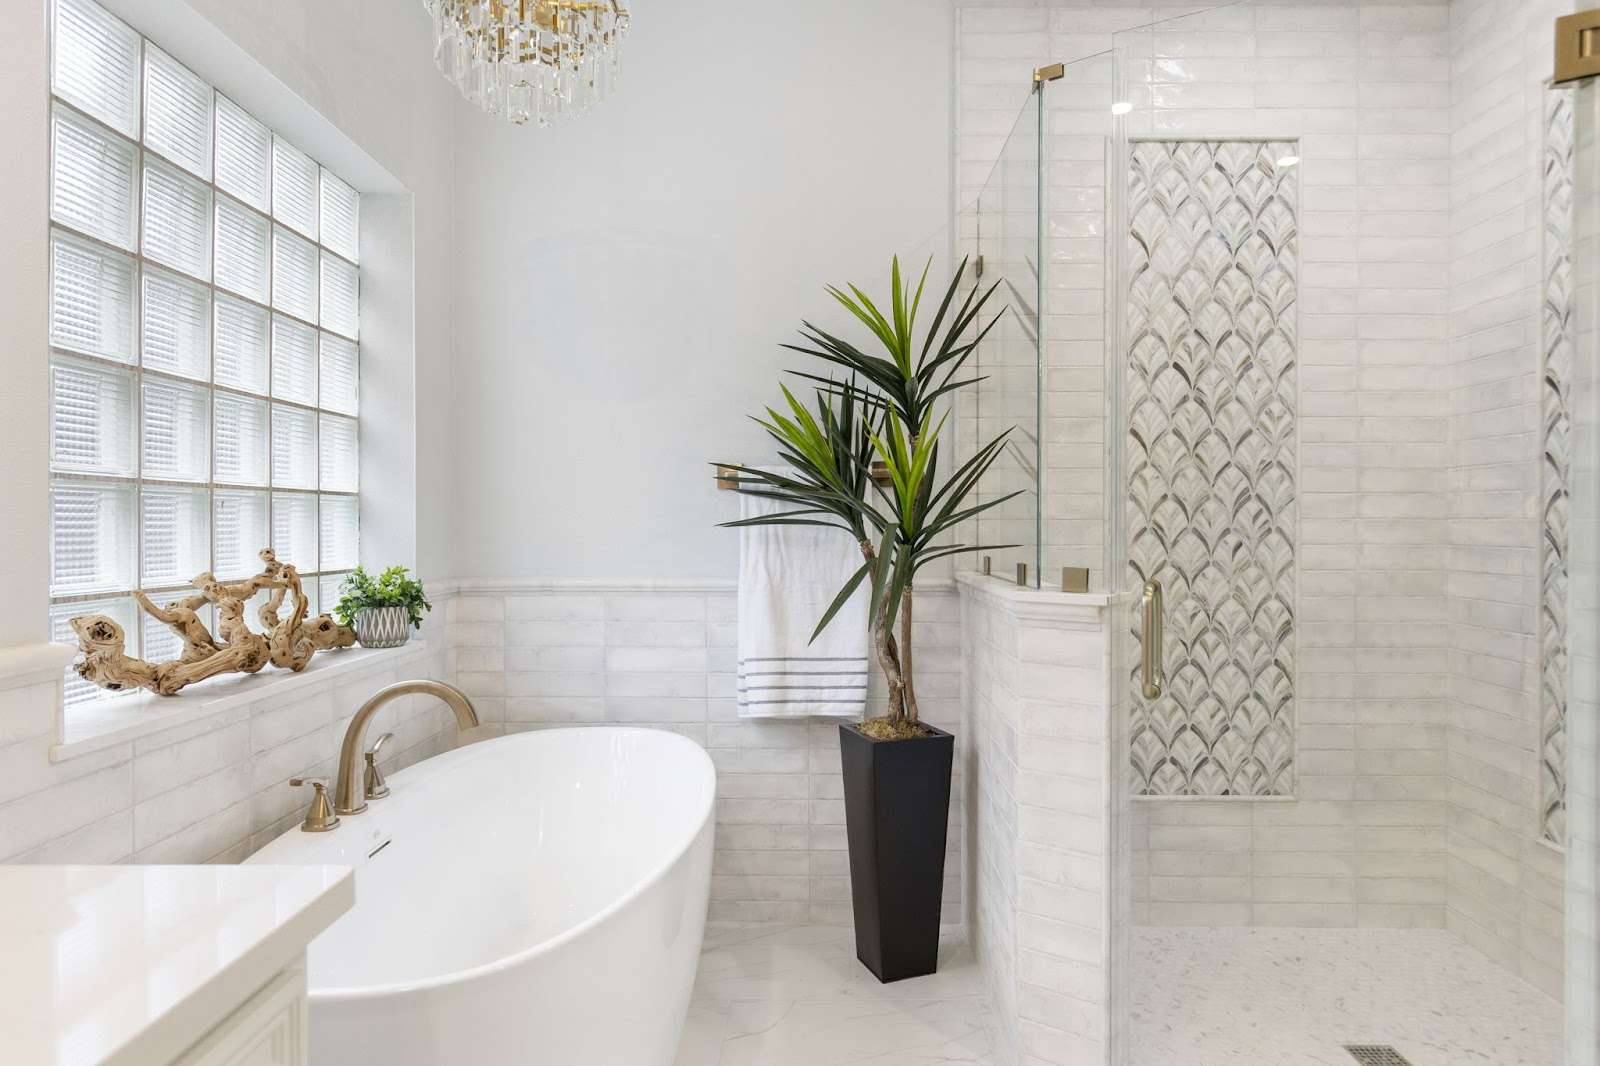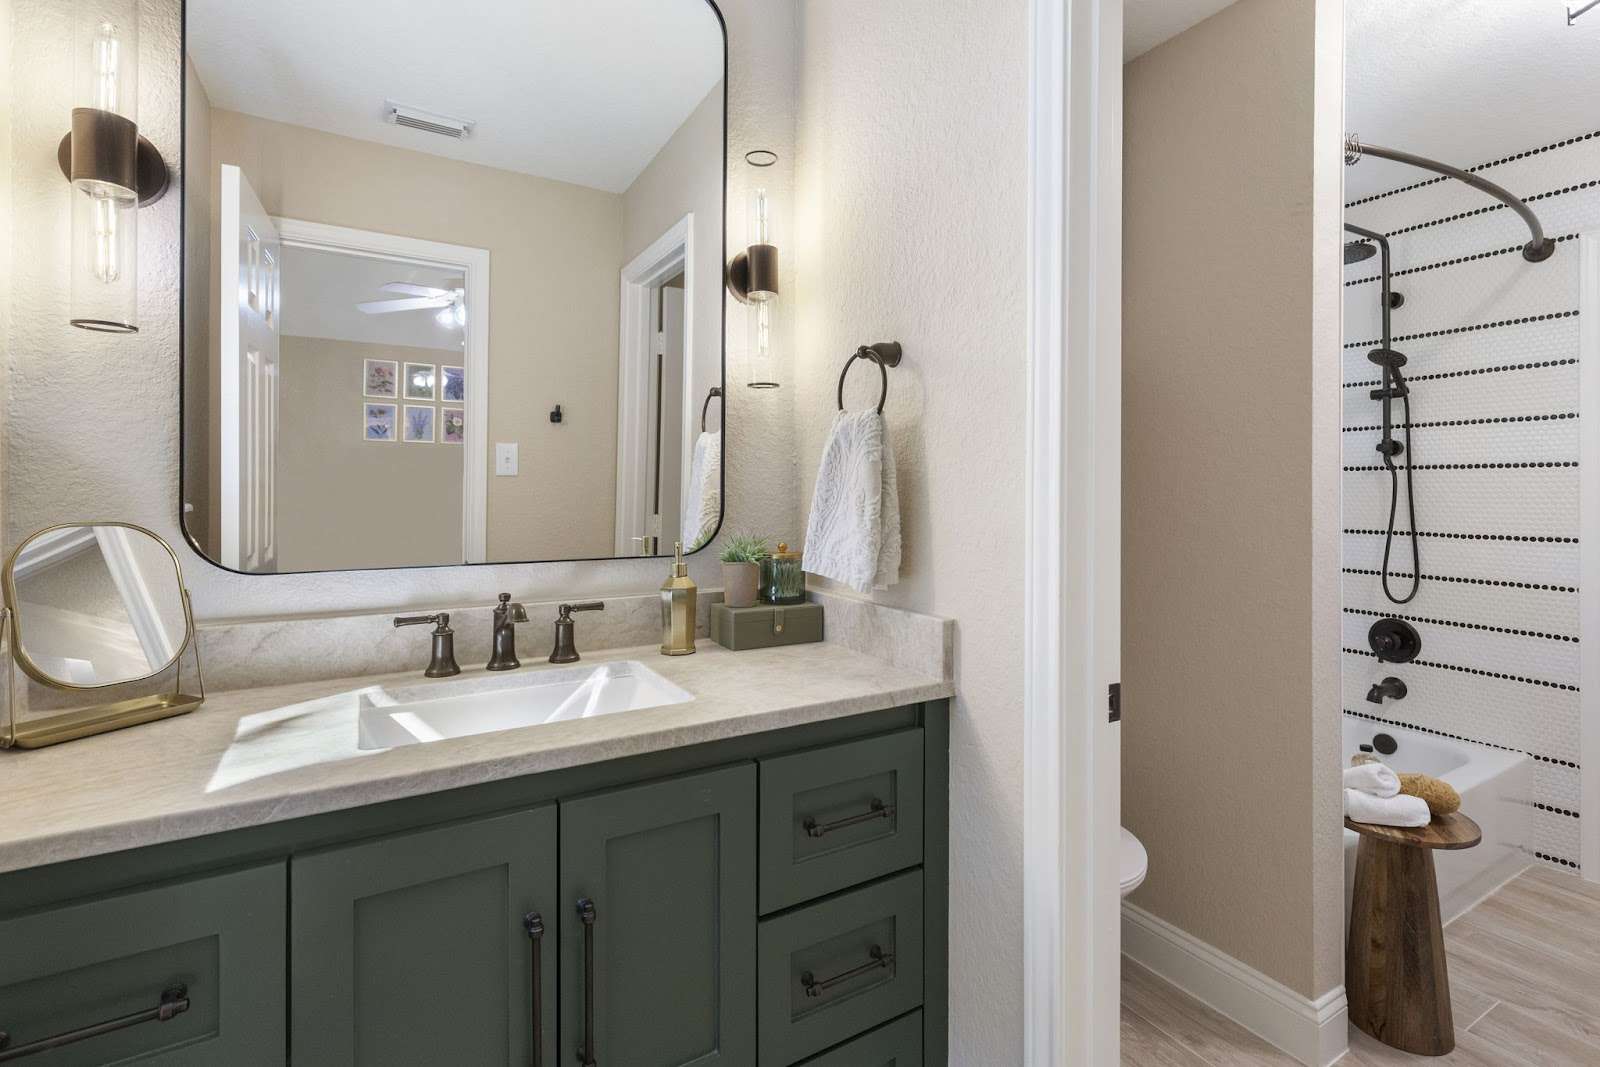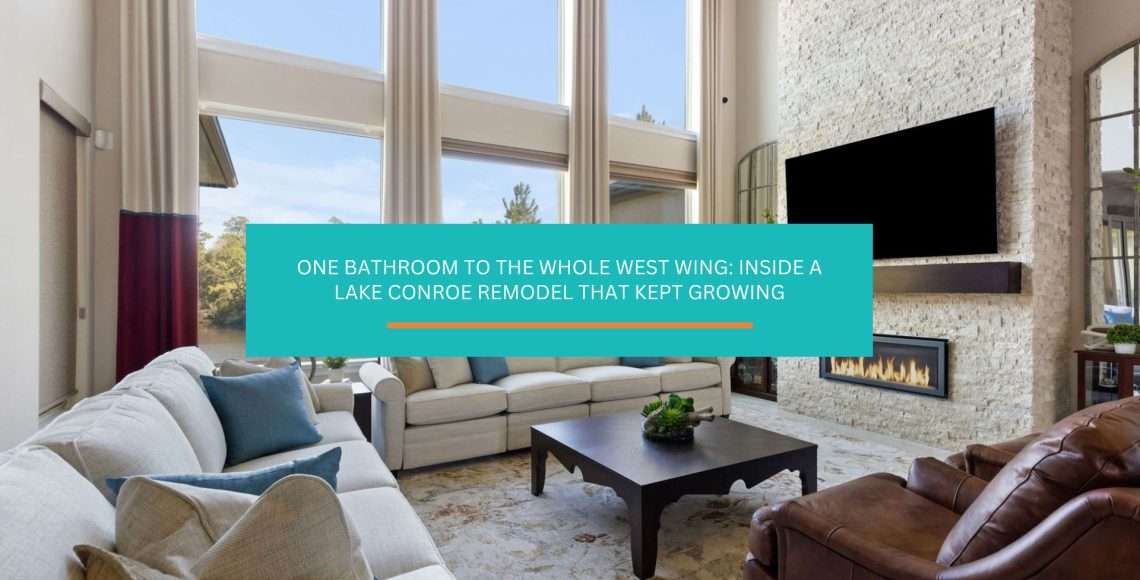
One Bathroom to the Whole West Wing: Inside a Lake Conroe Remodel That Kept Growing

There’s a particular kind of client who hires us for one room and ends up rebuilding half the house, and it usually starts the same way: with a homeowner who wants to understand exactly what’s happening in their home. Honey, engineers are the best example of this. A Lake Conroe engineer first brought us in for a single bathroom. He wanted precision, and more than that, he wanted to be part of the process, not just approve a plan from the sidelines. One bathroom became a kitchen. Then a half bath. Then the dining room. Then the entire West Wing of the house. He calls it his Design on a Dime model home now.

Why One Bathroom Turned Into the Whole West Wing
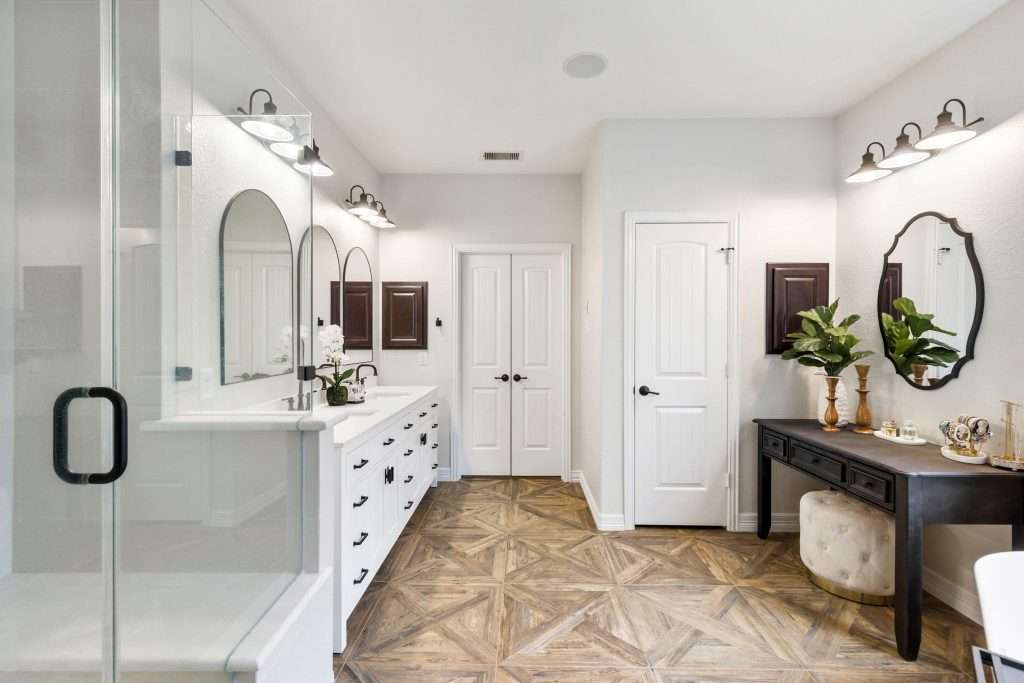
modern bathroom design

Most remodels stay the size they started as. A homeowner books a bathroom, gets a bathroom, and the relationship ends at the final walkthrough. This one didn’t, and the reason has less to do with the house than with the client.

Engineers, in our experience, want two things that don’t usually come packaged together on a remodel: precision in the plan, and genuine involvement in the build. Most contractors solve for the first and ignore the second, which leaves a technical client feeling shut out of a process happening inside his own home.

We solved for both. Every morning before our crews arrived, we handed him a checklist: specific items to review or complete before the day’s work started. Nothing complicated. Confirm a delivery. Check a measurement. Look over a finish sample. It gave him a real role in a project he was paying for and living inside, darling, and it changed the entire relationship.

What a Lakefront Home Actually Changes About the Design Brief
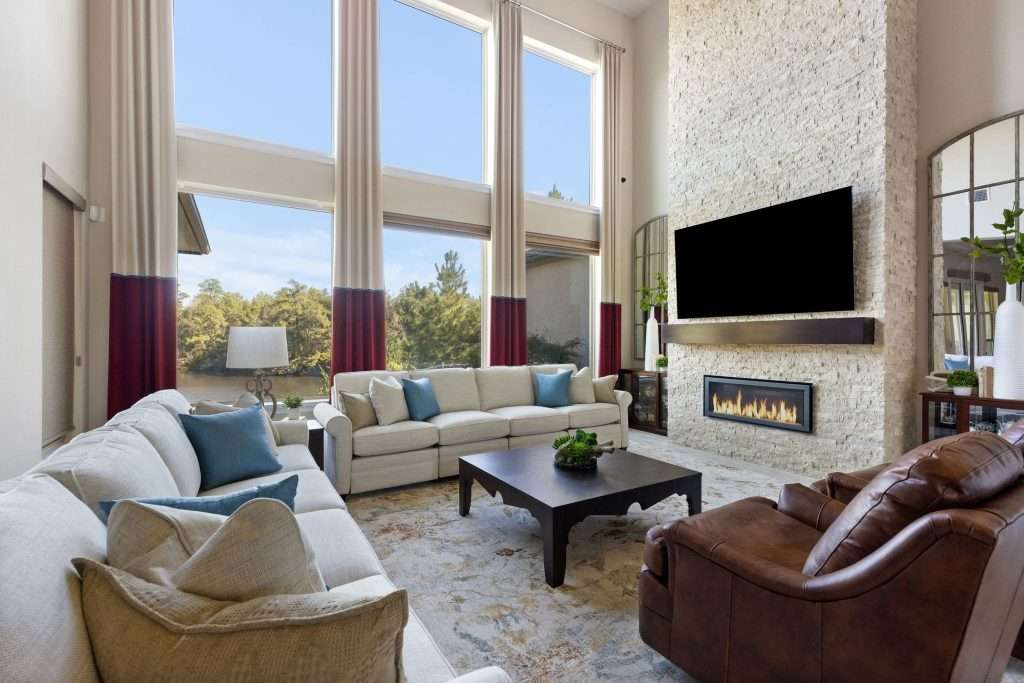
lake house

Lake Conroe living isn’t the same design problem as a Conroe subdivision a few miles inland, and treating it like one is where a lot of lakefront remodels go flat. The clientele here tends to entertain, and entertain seriously: weekend gatherings, sunset drinks on the dock, guests who show up expecting the water to be part of the evening, not just the view.

That changes the design moves. Cleaner lines. Touches of blue and aqua that pick up what’s already sitting outside the window. Seating built around adult conversation and a working bar setup, not a formal dining room nobody actually uses. A kitchen designed in a school-district subdivision in Conroe would feel out of place on the water, and a lakefront kitchen dropped into a subdivision would feel like it was trying too hard.

The San Jacinto River Authority, which manages Lake Conroe’s water levels and shoreline, puts the lake at roughly 21,000 surface acres, which is a big enough body of water that it genuinely shapes daily life for the families who live on it. Sugar, that’s not a detail we treat as decoration. It’s the reason the whole brief changes.

Compare it to the other end of our footprint. A young couple in a Greater Houston townhouse is designing for an intimate dinner for four, not a dock party for twenty. The footprint is smaller, so every piece of furniture has to do double duty, and the design leans toward a tighter, more curated feel rather than the open, entertaining-first layout a lakefront home calls for. Neither approach is right or wrong. They’re answers to two different ways families actually live, and the National Association of Home Builders has tracked exactly this kind of divergence in how regional buyers prioritize entertaining space versus efficient footprint depending on lot type and location.

The Daily Habit That Turned a Technical Client Into Our Best Kind of Repeat Client

The daily checklist wasn’t a customer-service gesture. It was a specific answer to a specific problem: a detail-oriented client who needed to feel the process, not just receive the result.

Here’s what it actually did. It gave him ownership of the parts of the project that genuinely benefit from a second set of eyes, a delivery confirmation, a measurement double-check, without pulling him into decisions that needed our crews working uninterrupted. He wasn’t watching over anyone’s shoulder. He had his own job to do each morning, and our team had theirs.

By the time the kitchen remodel in Montgomery County was underway, that rhythm was already established. Trust builds fastest when a client has a real task, not just a phone number to call if something looks wrong.

Why a Small Remodel Growing Into a Big One Isn’t a Red Flag
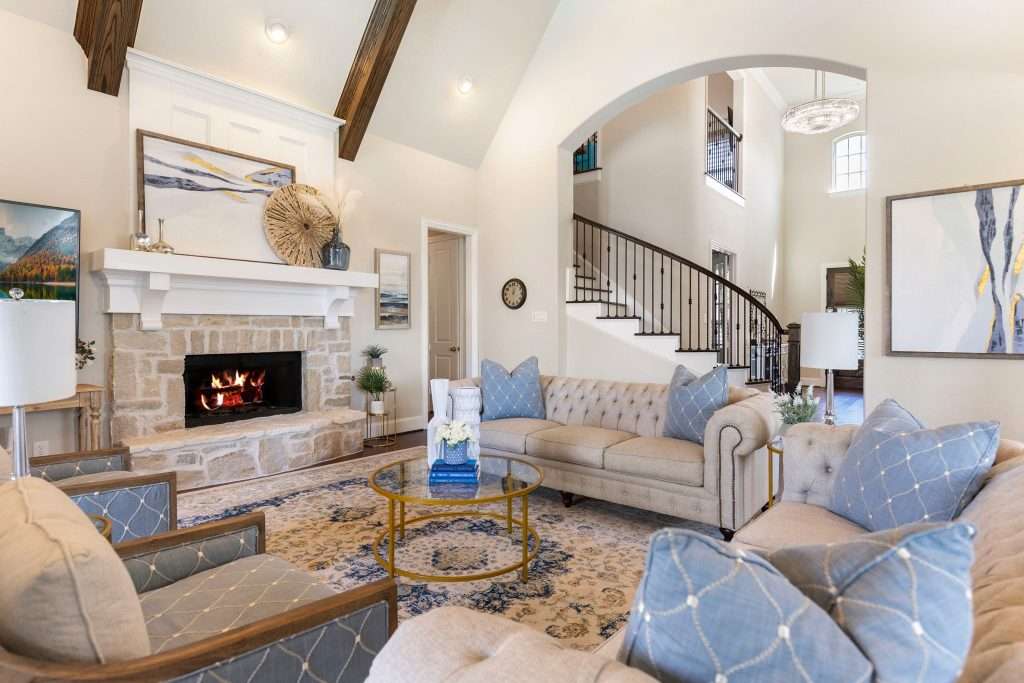
traditional living room design

Homeowners sometimes worry that scope creep on a remodel means something went wrong with the plan. Our piece on why remodeling one room often reveals problems in another covers the structural side of that question. This project is the other version of the same pattern: nothing was wrong with the bathroom. The client simply trusted the process enough to keep going.

That’s a different kind of scope growth than the kind driven by a demo-day surprise. It’s driven by confidence, and confidence is something a first project either earns or doesn’t. Once a client has lived through one room done right, the half bath and dining room that followed stop feeling like a leap and start feeling like the obvious next step. Our home addition planning guide walks through the same decision from the other direction, for homeowners who know upfront they want more than one room.

What to Ask Before You Let a Small Remodel Grow
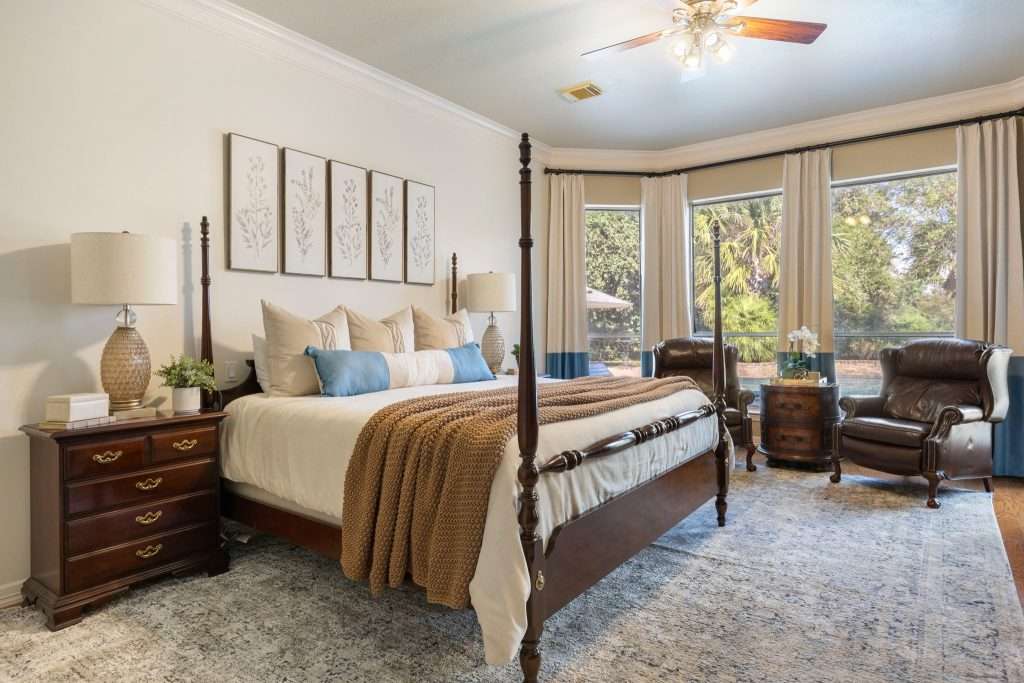
bedroom design

Not every remodel should expand, hun, and knowing the difference up front saves everyone a harder conversation later.

  • Did the finished room actually change how you use the house? If a new kitchen makes you want to host more, that’s a real signal. If it just looks nicer, expansion is optional, not inevitable.
  • Is the next room a genuine priority, or does it just feel available? The National Kitchen and Bath Association points to sequencing kitchens and primary bathrooms first precisely because they carry the most daily use. A guest room addition rarely earns that same urgency.
  • Can your budget absorb a second phase without straining the first one? A phased remodel only works when each phase is fully funded on its own terms, not borrowed against the next.
  • Does the same design language carry forward? Matching tile families, hardware finishes, and color logic from room to room is what makes a multi-phase project read as one home instead of a patchwork of separate jobs.

You can see the same growth pattern play out in our Lake Conroe project gallery, where a single starting point became a much larger story over time. If the room in question happens to be the kitchen, our piece on when a kitchen remodel makes sense is worth reading before that first phase even gets scheduled, and our breakdown of how remodeling decisions affect each other goes deeper on the sequencing question once more than one room is on the table.

What Lakefront and Inland Houston Homes Ask For Differently
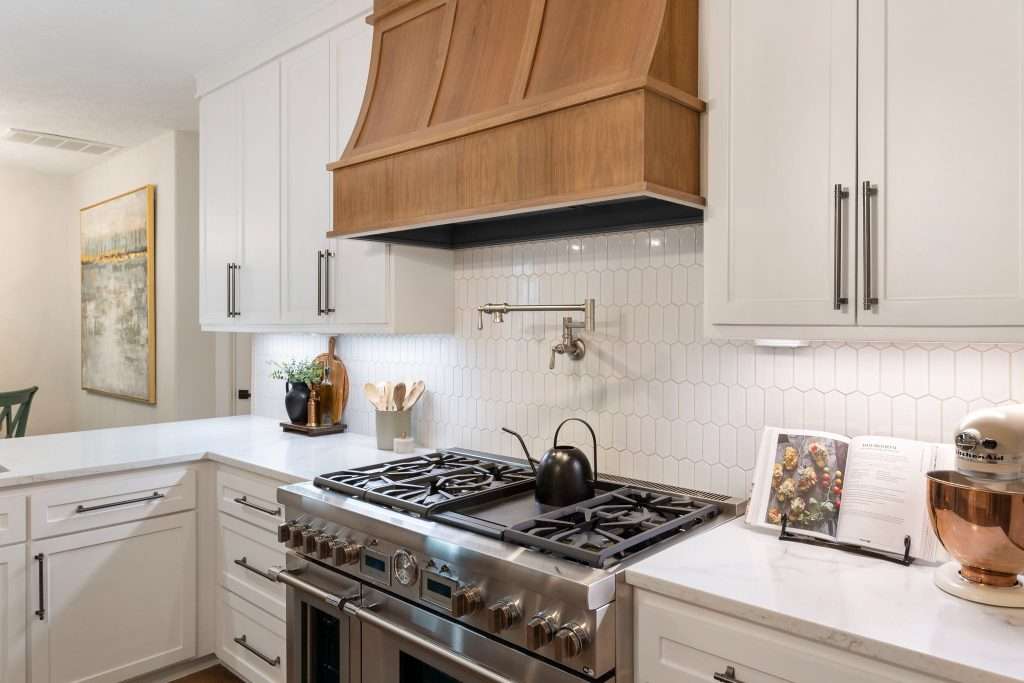
modern kitchen tiles

Houston’s heat and humidity shape material choices everywhere in our footprint, but a lakefront home adds a second layer: proximity to water changes how a family actually uses every room. A subdivision family plans a kitchen around school mornings and homework at the counter. A lakefront family plans the same room around a weekend crowd walking in from the dock, wet feet and all.

That’s part of why we lean on tile and LVT flooring across our lake and near-lake projects. It handles moisture tracked in from outside without flinching, and it holds up to the traffic a waterfront home sees that a landlocked house never does.

Frequently Asked Questions About Designing for Lakefront Living

Does a lakefront home need a different design approach than a subdivision home?

Yes. Lakefront homes tend to center on entertaining and the view, which shifts color choices toward blues and cooler tones and shifts furniture layout toward group seating and bar setups rather than formal, closed-off rooms.

Can a small remodel really turn into a whole-home project?

It can, and it usually happens for a good reason rather than a bad one. When a client trusts the outcome of the first room, expanding to additional rooms becomes a natural next step rather than a scope-creep problem.

How do you keep a multi-phase remodel from feeling disjointed?

Consistency in material language, the same tile family, the same cabinetry hardware, the same color logic, carried from room to room, is what makes a phased remodel read as one cohesive home instead of a series of unrelated projects.

Is a bar area a good addition to a lakefront home?

For homes that see regular entertaining, yes. A bar setup built into the main gathering space supports the way lakefront families actually host, rather than routing every drink order back through a kitchen already busy with food.

What flooring holds up best in a home near the water?

Tile and luxury vinyl tile handle moisture and foot traffic from outdoor activity better than materials that stain or warp when they get wet repeatedly, which makes them a strong default for lakefront living rooms and entries.

A Model Home That Started With One Room

Here’s the thing about trust on a remodel, baby. It’s not something you can shortcut, and it’s not something a contract guarantees on its own. It gets built one finished room at a time, one morning checklist at a time, until a client who started cautious ends up calling his own house a model home.

That’s the real story behind a project like this one. Not the square footage it grew into, but the reason it grew at all: a client who felt like part of the work, not a bystander waiting for an invoice.

If your home near Lake Conroe, Montgomery County, or anywhere across Greater Houston has one room that’s been quietly waiting to become the first of several, reach out to our team and let’s talk about where it could go.
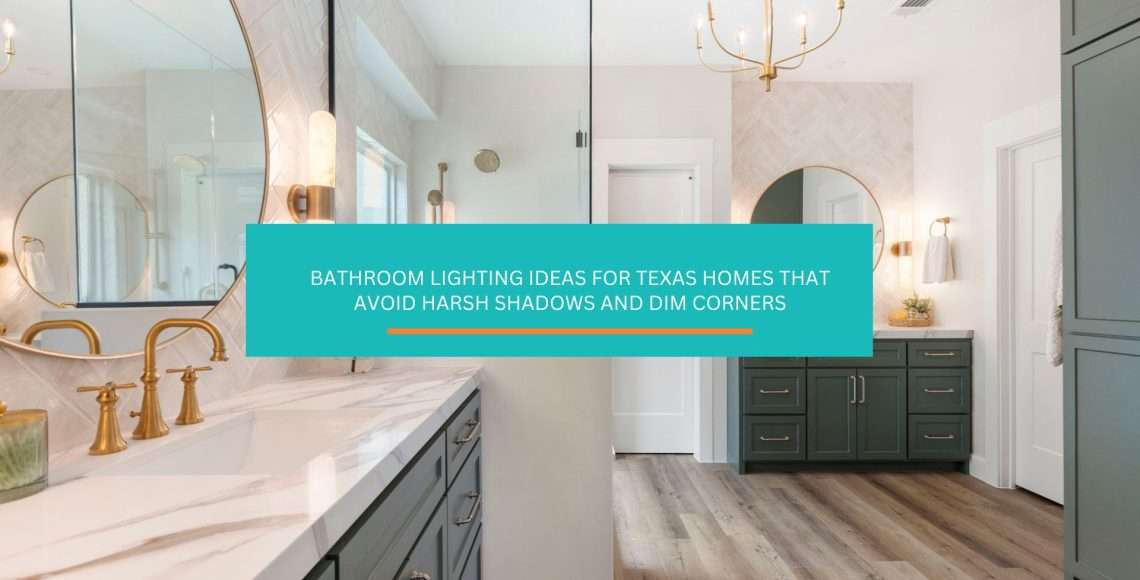
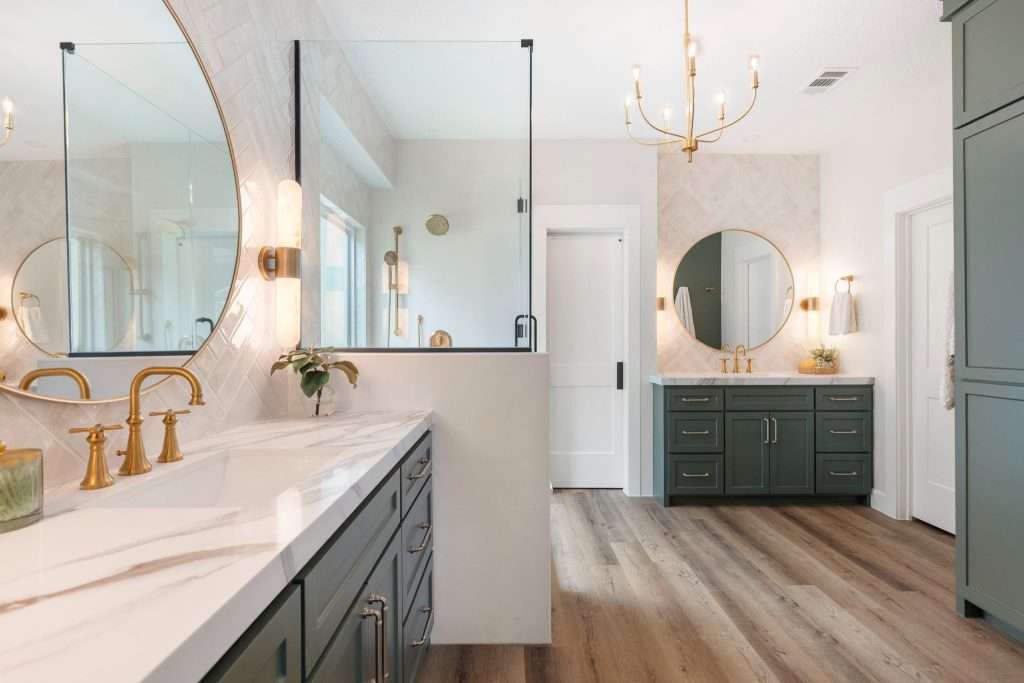
Bathroom Lighting Ideas for Texas Homes That Avoid Harsh Shadows and Dim Corners

Bathroom lighting that’s working against you shows up the same way every morning. You lean toward the mirror, tilt your head, and hunt for an angle where the shadow isn’t falling across your face. The fixture itself looks fine. The room looks finished. But the light isn’t doing what you need it to do, honey.

Most Texas builder bathrooms shipped with one overhead can and a single vanity bar above the mirror. That combination falls apart the second real life walks in. Too dim in the morning. Surgical at 10 p.m. when you’re trying to wind down. T

he fixture isn’t the problem, darling. The plan behind it is. Stick around, ’cause this is one of the easiest fixes most homeowners overlook.

Why Your Bathroom Lighting Feels Wrong (Even When the Fixture Looks Pretty)

Why Your Bathroom Lighting Feels Wrong

The problem is rarely the fixture itself. Most bathrooms are lit with only one or two layers when they need three. A standard builder bathroom in the Greater Houston area arrives with a single recessed can over the center of the room. Add a vanity bar mounted above the mirror, and that’s it. Two fixtures, both pointing down, both fighting each other to do every job at once.

What That Light Actually Does to Your Face

Light coming straight down from above casts shadows under your brow bones, your nose, your chin, and your jawline. That’s the raccoon-eye effect, darling. It’s why your makeup never looks the same in your bathroom as it does in your car. The bar light above the mirror makes it worse. It adds a second top-down source pointing right at your scalp instead of at your face. Lighting frustration is one of those everyday bathroom stress points that has nothing to do with style. It has everything to do with planning.

Why It Feels Wrong After Dark

Builder lighting was designed for one mode: full on. You walk in at 6:30 a.m., flip the switch, get hit with crisp white light, and start your day. That works fine at 6:30 a.m. The same setting hits you at 10 p.m. when your nervous system wants to wind down. It hits again at 3 a.m. when you just need to splash water on your face. One light level, all the time. No flexibility for how you actually use the room.

You can swap that vanity bar for a $400 fixture and still have all the same problems. The fix isn’t a prettier light. The fix is a layered plan.

The Three Light Layers Every Texas Bathroom Needs

The Three Light Layers Every Texas Bathroom Needs

A complete bathroom lighting plan has three layers working together. Ambient is the overhead light that fills the room. Task is the focused light at the vanity that flatters faces. Accent is the low, warm light for night use and atmosphere. Skip any one of them and the room never quite works. The American Lighting Association uses this same three-layer framework as the foundation of every well-designed space. Bathrooms might be where it matters most. The room asks more of its lighting than almost any other room.

Here’s what each layer is actually doing.

  • Ambient: the room’s baseline. This is the general fill light. It lets you walk in, find the towel, and not bump into anything. In most Texas bathrooms, it comes from one or two recessed cans in the ceiling. The fix usually isn’t adding more cans. It’s putting the ones you already have on a dimmer so you can pull them down at night. Ambient light should set the floor of brightness in the room, not the ceiling.
  • Task: the work light around the vanity. This is the layer that decides whether you can actually see your face. Task lighting at the bathroom mirror is the most demanding job in the whole house. You need light that renders skin tones accurately, hits from the right direction, and avoids casting shadows on your face. The short answer is sconces flanking the mirror, not a bar light above it. We’ll get into specifics in the next section.
  • Accent: the night-and-mood layer. Accent light is the low, warm glow that lets the room function at 10 p.m. or 3 a.m. Most bathrooms skip this layer entirely. Toe-kick LEDs under the vanity work. So does a small dim sconce on a separate switch. So does a smart bulb in a corner fixture at five percent brightness. The difference between a bathroom that feels finished and one that just feels lit comes down to whether this layer exists.

Most homeowners don’t realize that lighting changes are often what stretches a remodel budget mid-project. Adding electrical for a third layer means cutting drywall and routing new circuits. Knowing what you’re working with matters. Our Texas bathroom remodel cost calculator gives you a starting point in about 60 seconds. Pricing breaks down by scope, so you can see how layered lighting fits the broader budget. Once you understand what each layer adds, every other decision in the room gets easier.

If your bathroom is running on a single overhead and a bar light, our bathroom remodel team in Conroe can walk you through a layered plan before any electrical work starts.

Vanity Lighting That Stops the Shadow Problem

Vanity Lighting

The single most effective fix for unflattering bathroom lighting is moving the task light from above the mirror to either side of it. Sconces mounted at eye level on both sides illuminate your face from the front, not from above. That eliminates the shadows that make skin look tired and makeup look uneven. Designers have known this for decades. Builders just don’t install for it. It requires planning the electrical before the drywall goes up.

Here are the specs that matter, sugar.

  • Height. Mount sconces at roughly 60 to 66 inches from the finished floor to the center of the fixture. That lands them at eye level for most adults. Kichler’s lighting guide puts the centerline of a traditional vanity bar at 72 to 80 inches from the floor. That’s when an overhead is the only option. Side sconces work better and sit lower. Rule of thumb: the bulb should land at eye level when you’re standing in front of the mirror.
  • Spacing. Place the sconces 36 to 40 inches apart, center to center. Flank the mirror evenly. That spacing puts light on both sides of your face at once. It’s what kills the side-cast shadow. The Lightsonline bath light sizing guide breaks the spacing down further by mirror size. For most Texas builder vanities, the 36-inch spacing works without modification.
  • Color temperature. Pick bulbs in the 2700K to 3000K range. That gives you warm, flattering light that doesn’t make your skin look gray. The crisp 4000K and higher temperatures read clinical. They’re wrong for any room where a human face is the subject. I’ve seen homeowners install gorgeous fixtures with the wrong bulbs and wonder why the room still feels off. The fixture isn’t doing it. The bulb is.
  • Color rendering. Look for bulbs labeled CRI 90 or higher. CRI stands for color rendering index. It measures how accurately a light source shows the true color of what it’s illuminating. Lower-CRI bulbs distort color and turn grooming into guesswork.
  • Dimming. Every task light in the bathroom should be on a dimmer. Full brightness for grooming. Lower for ambient evening use. Lowest for nighttime transitions.

If your vanity wall isn’t already wired for side sconces, that decision gets easier when planned alongside everything else. A bathroom remodel in The Woodlands starts with the lighting plan, not the tile. Electrical decisions affect every other choice that follows.

For a deeper look at how this plays out, our piece on choosing the right bathroom vanity covers how vanity selection and lighting design work together. It matters most in primary bathrooms where two people share the space.

Wet Zone Lighting: Showers, Tubs, and What Code Actually Requires

Wet Zone Lighting: Showers, Tubs,

Any light fixture located over a bathtub or shower needs a damp or wet location rating. The National Electrical Code defines a specific zone where this applies. The zone is 3 feet horizontally and 8 feet vertically measured from the top of the tub rim or shower threshold. Any fixture inside that zone must carry at least a damp rating. Fixtures actually subject to shower spray must be wet-rated under NEC 410.10(D). Your inspector will check it.

Here’s what that means in practice.

  • Damp-rated fixtures. These handle humidity and occasional moisture, but no direct water contact. They work for the general bathroom environment beautifully. Use them for most overhead recessed cans, sconces near the shower (not in it), and vanity lighting in a separated wet/dry layout.
  • Wet-rated fixtures. These are sealed against direct water spray. Use them for any recessed can inside the shower enclosure. They’re also required for any pendant over a freestanding tub open to the ceiling above, and for any fixture that could see water during normal use.

The most common mistake we see in Conroe bathrooms is a beautiful chandelier hung over a freestanding tub without anyone checking the rating. The fixture looks gorgeous on the showroom floor. It looks gorgeous in the bathroom too. Then an inspector flags it, or moisture damage shows up two years later. Always check the rating label before you fall in love with a fixture, darling. The National Kitchen and Bath Association recommends additional task lighting in every functional area of the bathroom, including showers and tubs. So this isn’t about reducing fixtures. It’s about choosing the right ones for each zone.

Layout planning matters too. Side-lit vanity sconces stay outside the wet zone in most builds. That’s one more reason they’re easier to install than a vanity bar centered over a mirror near the wet wall. We’ve worked on more than one bathroom remodel in Spring where the lighting plan got reshuffled at the last minute. The original layout had a fixture sitting just inside the prohibited zone.

For homeowners thinking through a full bathroom redo, our piece on why bathroom remodels fail without a functional plan covers where lighting fits in the larger sequence. A lot of decisions need to happen before the first tile goes up.

The 3 a.m. Layer Most Texas Bathrooms Skip

bathroom lighting tips

The single biggest comfort upgrade in a bathroom remodel is the layer of light that activates for night use. Most builder bathrooms don’t have one. Toe-kick LED strips under the vanity work. So does a low-wattage sconce on its own switch. So does a smart bulb dimmed to five percent in a corner fixture. The goal is letting the room function at 10 p.m. or 3 a.m. without a slap of full overhead light.

Why This Layer Matters More Than You’d Think

That overhead recessed can helps you put on mascara at 7 a.m. It’s the wrong tool at midnight when you’re brushing your teeth. It’s actively bad at 3 a.m. Cool white light at that hour tells your brain it’s morning. Your body’s circadian rhythm reads light temperature as a clock signal, baby. The room should know the difference between dawn and 2 a.m. even when you don’t.

Options That Actually Work in Texas Builder Bathrooms

A few approaches we use regularly:

  • Toe-kick LED strips. A continuous strip of warm white LED tape under the front edge of the vanity cabinet. Wire it on its own switch or a motion sensor. It gives you enough light to navigate without waking anyone up. We use these in nearly every bathroom remodel. They’re inexpensive, easy to wire during renovation, and they change how the room feels at night.
  • A second sconce circuit on a separate dimmer. If your vanity sconces are already wired, run them on a dedicated dimmer. Drop them to 10 or 15 percent for evening use. That alone solves half of the night-bathroom problem without adding new fixtures.
  • Smart bulbs in existing fixtures. For homeowners who don’t want to open walls, a smart bulb in the overhead can or vanity bar lets you create a “midnight” scene. Set it to warm dim light. It’s not as elegant as proper toe-kick lighting. It works as a retrofit and costs almost nothing.
  • A small plug-in night light with a warm bulb. The lowest-effort version. Place it near the doorway or below the vanity. Plug it in. Let it run on a dusk-to-dawn sensor.

The bathroom that handles all four moods well feels finished in a way no single fixture upgrade can match. Those four moods: morning grooming, evening winding down, late-night returns, and middle-of-the-night navigation. Our team designs bathrooms alongside the remodel itself for families across Katy and Cypress. The lighting plan is one of the first conversations we have. Changing it after drywall is up costs three times what it costs to plan right the first time.

Want to see how layered lighting plays out in a finished space? Our Ben project bathroom remodel shows the result when ambient, task, and accent all work together. For more on warm dim light shaping a room, our post on mood lighting covers how those soft layers shift the feel of any space. Smaller bathrooms benefit just as much as large ones. The quiet luxury of a well-designed powder bath is built largely on lighting choices.

Frequently Asked Questions

What color temperature is best for bathroom lighting?

For grooming and makeup, choose bulbs in the 2700K to 3000K range. That’s a warm white that flatters skin tones and reads accurately. Pair every fixture with a high color rendering index. The U.S. Department of Energy recommends a CRI of 80 or higher for interior lighting, with CRI 90+ for excellent color fidelity at the vanity. Avoid 4000K and higher temperatures in any bathroom where someone will look at their own face in the mirror. Cool white light makes skin look gray and washes out detail.

How high should bathroom vanity sconces be installed?

Bathroom vanity sconces should be mounted between 60 and 66 inches from the finished floor to the center of the fixture. That puts the bulb at roughly eye level for most adults. Space them 36 to 40 inches apart, center to center. Flank the mirror evenly. Mounting them higher than 66 inches reintroduces the overhead shadow problem. Side-mounted sconces exist to solve that problem.

Do I really need separate switches for each lighting layer?

Yes. Each layer of bathroom lighting (ambient, task, and accent) should have its own switch. Ideally its own dimmer too. Separate controls let the room shift between morning grooming mode, evening winding-down mode, and middle-of-the-night mode. Morning is everything on, full brightness. Evening is ambient and task at 30 percent with accent on. Late night is accent only, dimmed low. Without separate switches, the room defaults to one setting. That setting won’t fit every moment.

Why do Texas builder bathrooms often need a lighting overhaul before they feel finished?

Most builder bathrooms across the Greater Houston market were wired with only ambient and task lighting. The task light often sits above the mirror rather than flanking it. That layout creates raccoon-eye shadows during grooming. It produces harsh light at night. It leaves the room with zero atmosphere for evening use. A lighting upgrade during a remodel is one of the highest-impact changes per dollar spent. It affects how the room feels every single time you walk in.

When Your Bathroom Finally Lights Itself the Way You Live

A great bathroom isn’t the one with the most expensive fixtures. It’s the one where the light shifts with your day. The mirror flatters instead of fights you. 3 a.m. doesn’t feel like a hospital corridor. That kind of room takes a plan, not a bigger budget. The three layers, the right heights, the right ratings, the right switches: all of it adds up to a bathroom that feels finished from the moment you walk in. Every time you walk in.

If you’re rethinking a bathroom in Montgomery County or anywhere across Greater Houston, we’d love to walk through how layered lighting fits into your space and your budget. Start a conversation with us, darling, and let’s build a room that works the way real life actually unfolds.

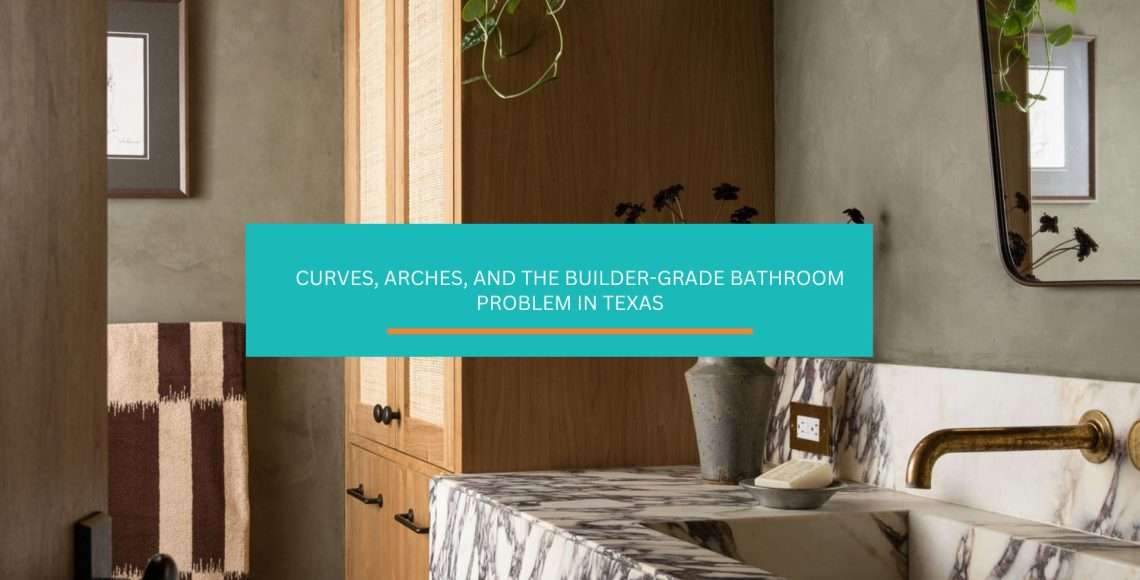
Curves, Arches, and the Builder-Grade Bathroom Problem in Texas

Curved bathroom design has been quietly taking over 2026 renovation Pinterest boards for a reason, honey. Most Texas builder bathrooms from the last fifteen years were built at right angles. Flat slab counter. Rectangle mirror. Square shower niche. Boxy tub alcove.

Every single surface meets the next at 90 degrees. On paper, that reads as clean and modern. In real life, it reads as cold. You know that feeling when you walk into a bathroom that looks fine in listing photos but feels vaguely clinical on a Tuesday morning? That’s what a room of right angles does to us, darling.

The fix that’s sweeping bathroom design right now has nothing to do with expensive materials. Everyone’s softening the shapes. Stick around.

Why Bathrooms Built Ten Years Ago Started Feeling Hospital-Like

Bathrooms built in the 2010s started feeling hospital-like because every element in them was pulled from the same right-angle catalog. Straight-edge rectangular mirror. Slab countertop with sharp 90-degree corners. Square shower niches. Boxy alcove tubs. No single choice was wrong on its own. Stacked together in a small room, they turned the bathroom into the hardest-edged space in the house.

We spend a lot of time in our bathrooms. Morning and evening. Good days and rough days. Every surface we look at sends a signal to our nervous system, sugar, whether we realize it or not. When every surface is a sharp right angle, the signal is “efficient workspace,” not “calm retreat.”

Designers in the trade press have been flagging the shift for a couple years now. Writing for Livingetc, designer Sofia Charalambous of Origins Living put it plainly: arches, ovals, and irregular organic outlines are everywhere, and they soften the straight lines of tiles and cabinetry to create a calming flow that makes even small bathrooms feel more inviting. That’s the opposite of the builder-grade default.

The practical result? Small Texas bathrooms hit the hardest. Half-baths tucked under the stairs. Secondary bathrooms off guest bedrooms. Master baths in 2,500-square-foot builder homes with three actual rooms. Every one of those spaces amplified the visual hardness because there wasn’t enough square footage to break up the right angles.

That’s exactly the kind of design tension a small layout tweak can shift without a full renovation.

What’s Actually Changing: The Soft-Shape Shift Across 2026 Bathroom Design

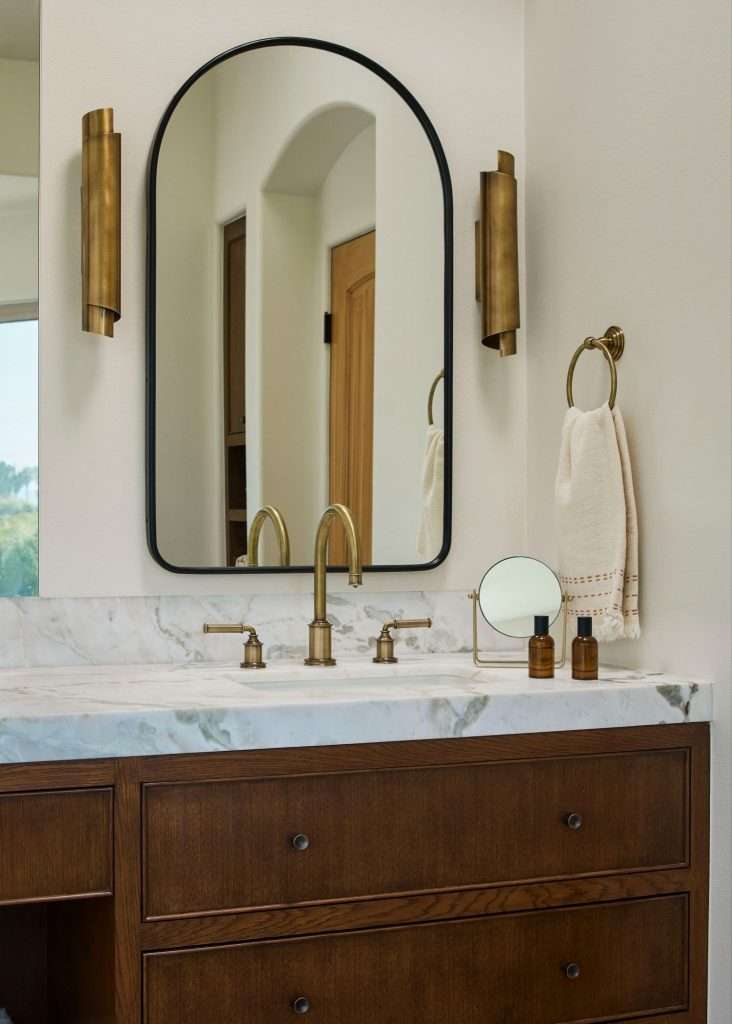
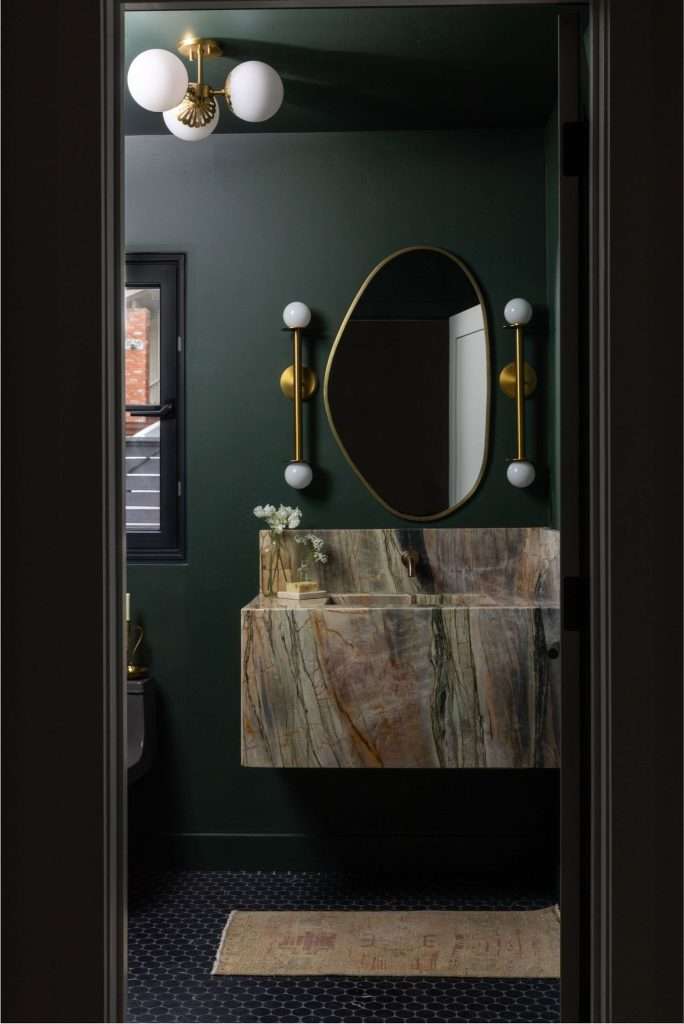
arched mirror
Source: Carian Design

The 2026 bathroom design shift centers on replacing sharp geometric edges with curved, organic, and arched forms across mirrors, vanities, tubs, and architectural openings. This isn’t one trend. It’s five related trends moving in the same direction at the same time, and together they’re reshaping how bathrooms feel.

Here’s what trade designers are actually calling out for 2026:

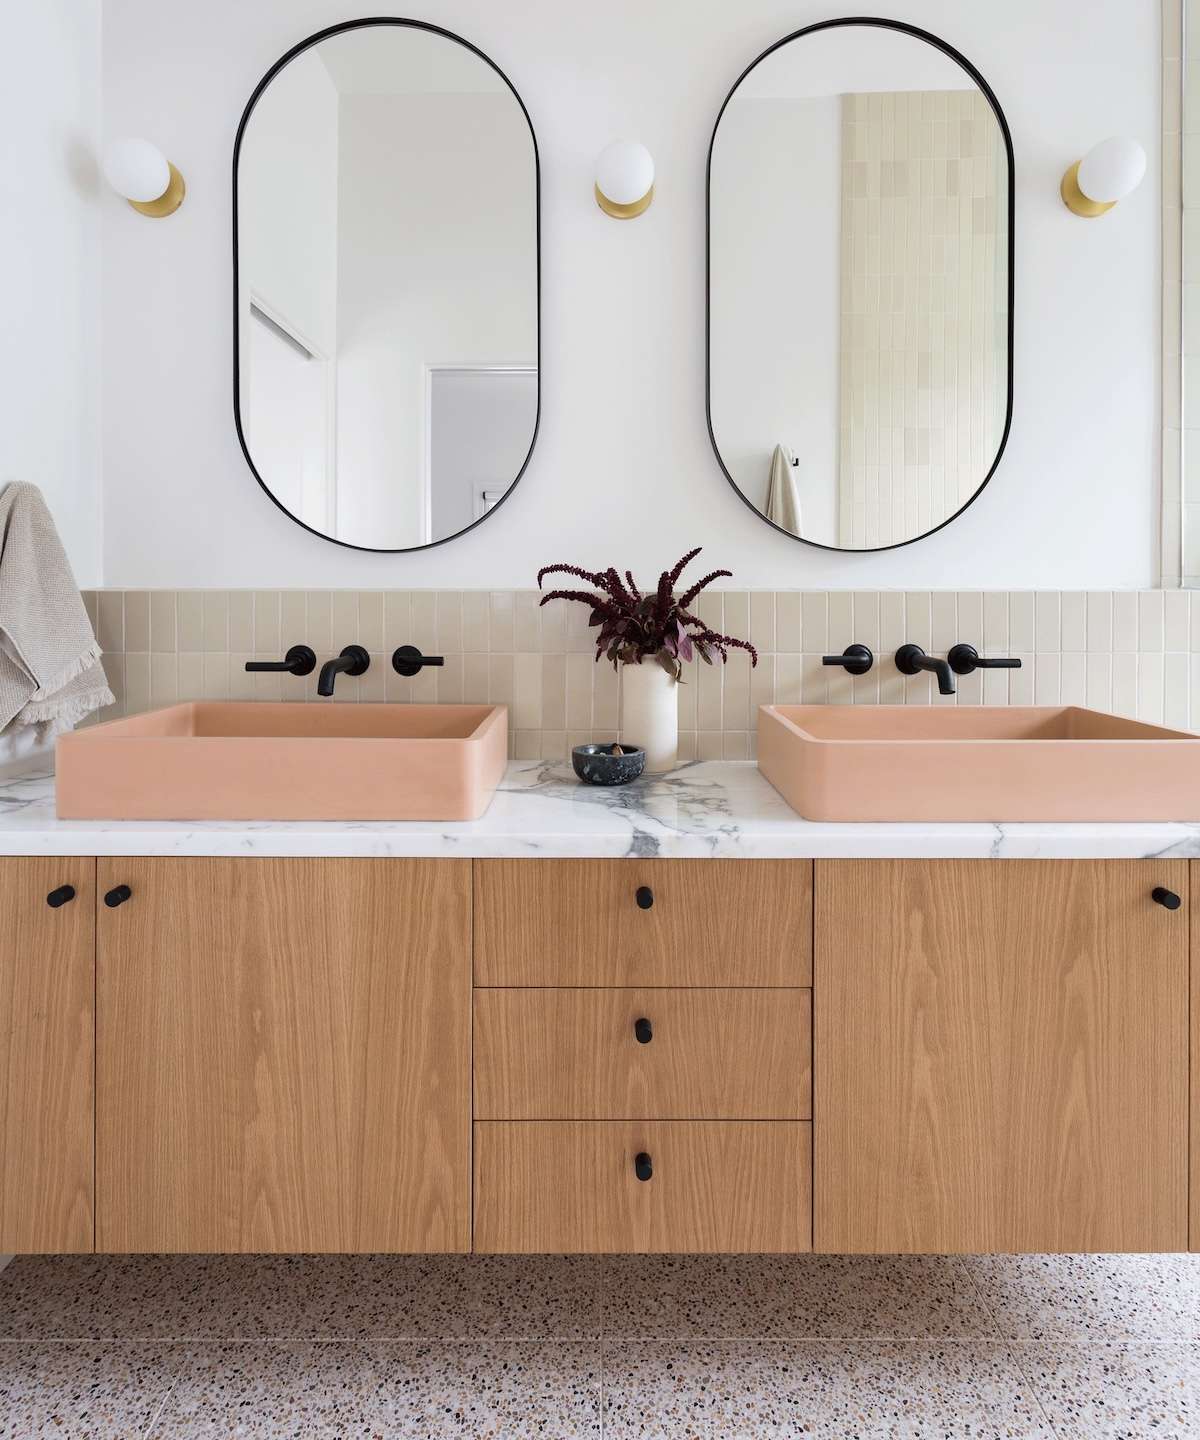
  • Arched and organic-shaped mirrors. The rectangular builder mirror is the first thing most homeowners swap out, because it’s the cheapest change with the biggest visual payoff. House Digest’s 2026 mirror coverage identifies arch-shaped, oval, and irregular organic mirrors as the dominant look, with designers framing them as a calming counterweight to straight tile and cabinetry lines.
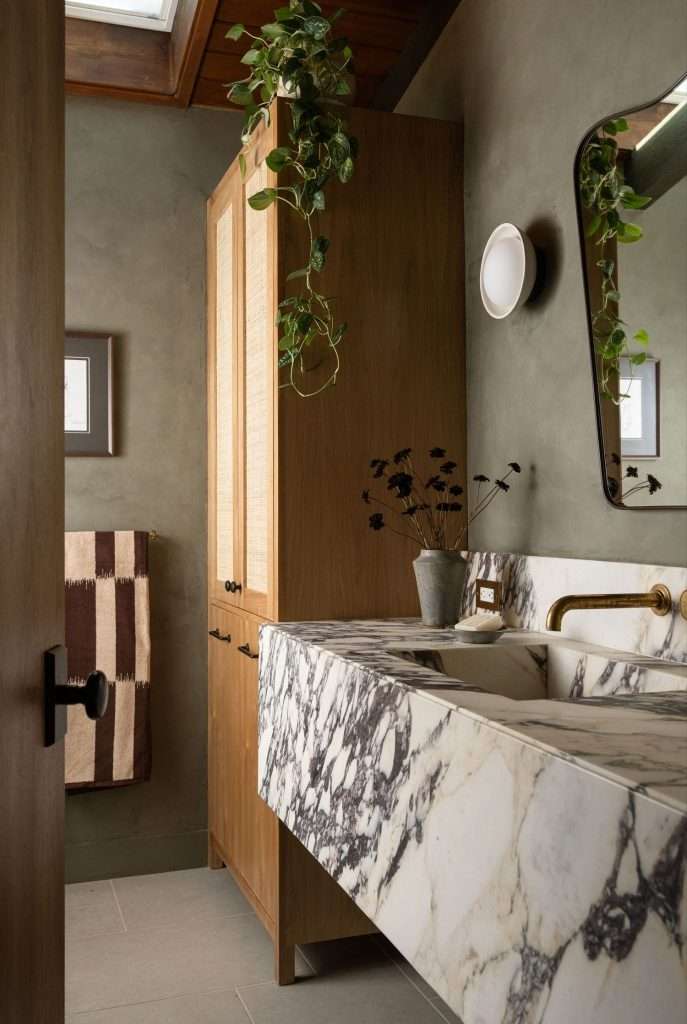
  • Curved and carved stone vanities. Decorilla’s 2026 bathroom trend analysis highlights basins curving inward and countertops tapering at the edges. Honed stone replaces polished. Rounded profiles replace 90-degree overhangs. Everything feels easier on the eye.
  • Fluted vanity fronts. These are ripple-textured cabinet fronts that catch light and add tactile interest without adding cleaning headaches. They bridge curves and straight lines, which is why they’re showing up in transitional Texas homes more than almost any other 2026 element.
  • Arched shower niches and doorways. A simple arched opening in place of a squared-off niche or a standard door frame changes the entire visual rhythm of a bathroom. It’s also surprisingly affordable during a remodel because it’s a framing decision, not a materials decision.
  • Softened tub silhouettes. Freestanding tubs with curved chubby profiles have replaced the sharp-edged alcove look. Designer commentary documented by Porcelanosa’s 2026 trendbook notes that tactile, wave-inspired surfaces paired with smooth finishes define the new bathroom aesthetic.

All five trends share one underlying idea: a bathroom should feel calming, not clinical. That’s the whole shift in one sentence, baby. The direction tracks with what the National Kitchen & Bath Association’s 2026 Bath Trends Report found across nearly 700 industry designers, where organic and natural design ranked as the second most popular style direction for the next three years, right behind transitional and timeless.

Our team helps families across Conroe and The Woodlands figure out which of these five moves actually fits their existing bathroom bones. Not every trend belongs in every room.

Five Places Curves Show Up in a Real Bathroom, and What Each One Does

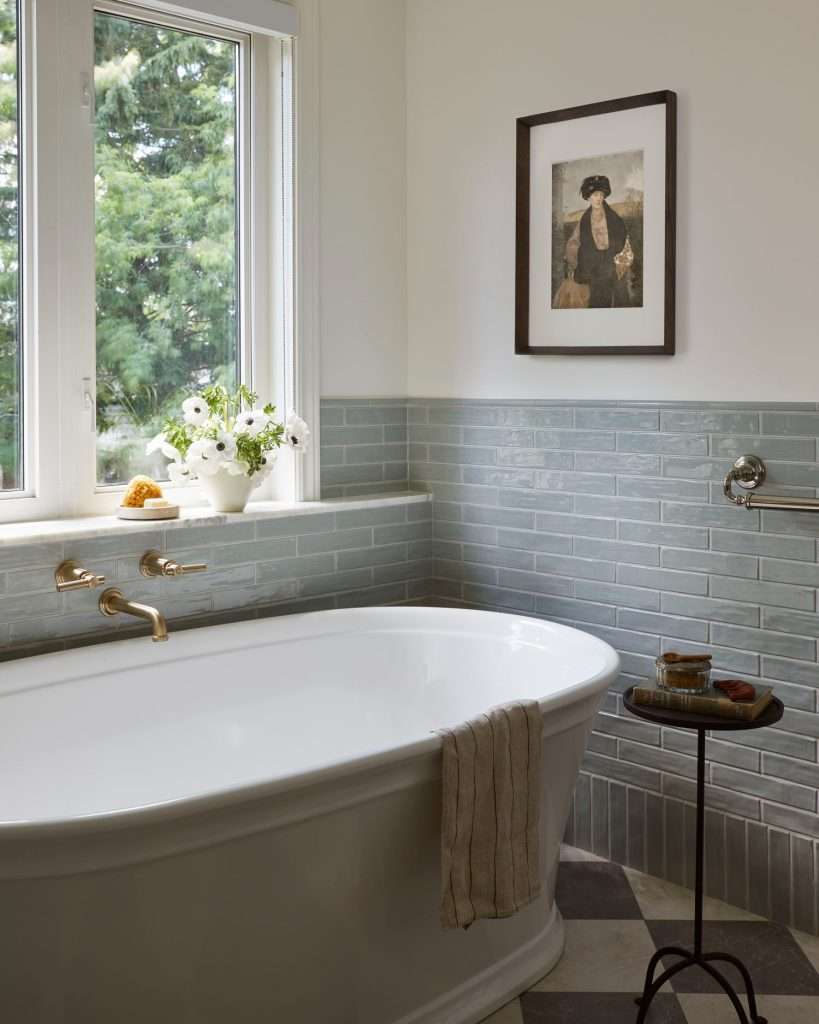
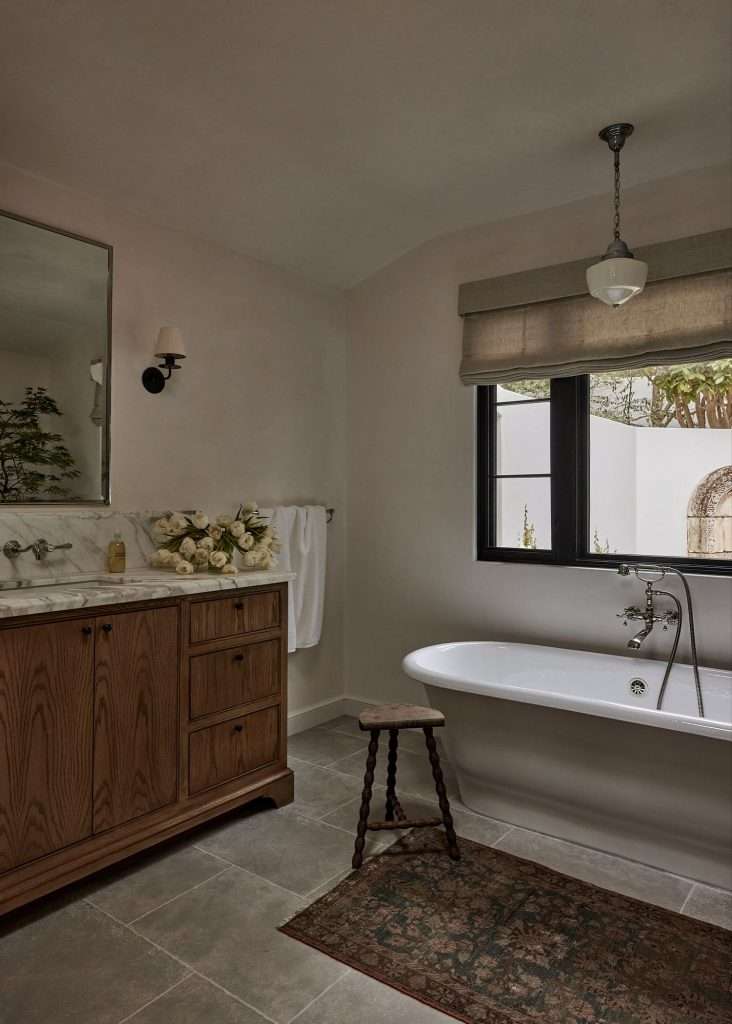
tub with a rounded, organic shape
Source: Stafford House Studio

Curves and arches show up in five distinct places in a typical bathroom renovation, and each one serves a different design purpose. Knowing which placement delivers the visual shift you’re looking for helps you decide where to spend and where to hold back.

  • Mirrors. The single highest-impact curve move, hands down. Swapping a builder-grade rectangle for an arched or oval mirror changes the visual center of gravity of the whole room. Your eye stops at the mirror, which is the focal point, and the curve becomes the first thing you notice instead of the hardest edge.
  • Vanity fronts. Fluted or curved vanity cabinet fronts add texture without shouting. They work especially well when the mirror stays simple, because the vanity takes over as the feature. In small Texas powder baths, this is often the one move that transforms the space.
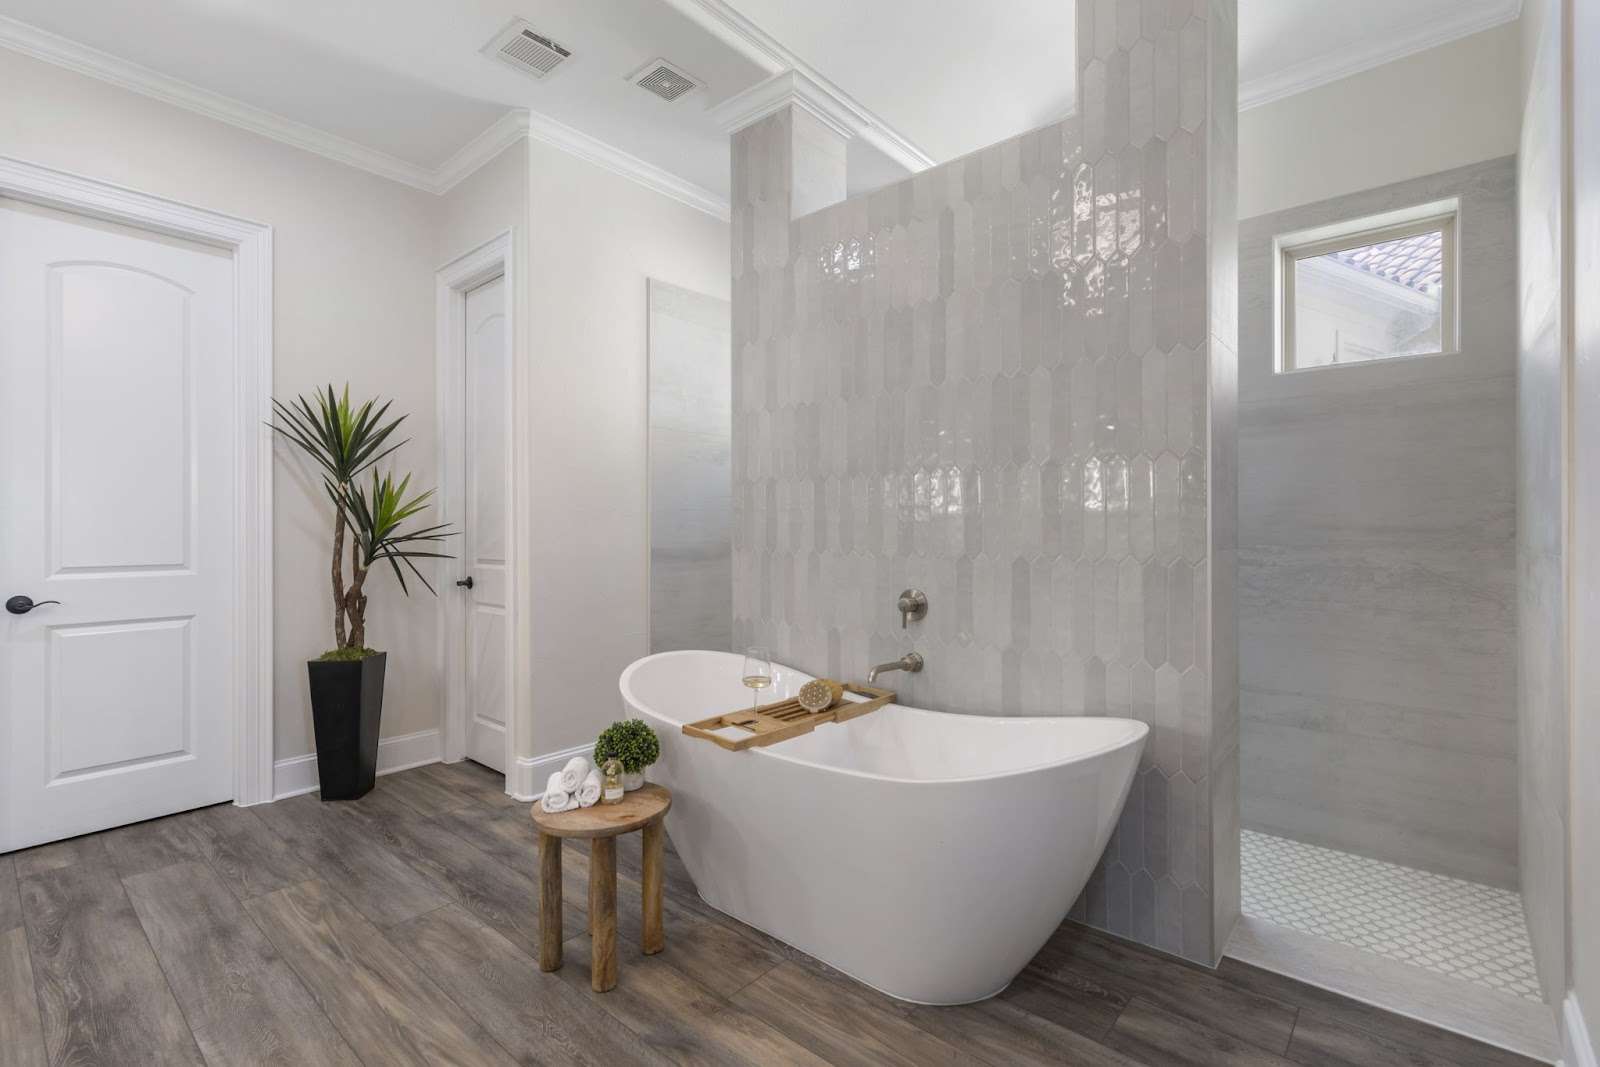
  • Tub silhouettes. A freestanding tub with a rounded, organic shape reads as sculpture, not plumbing. In master baths, it becomes the focal point the whole room orients around. The tradeoff is cost and space; freestanding tubs need floor clearance that alcove tubs don’t.
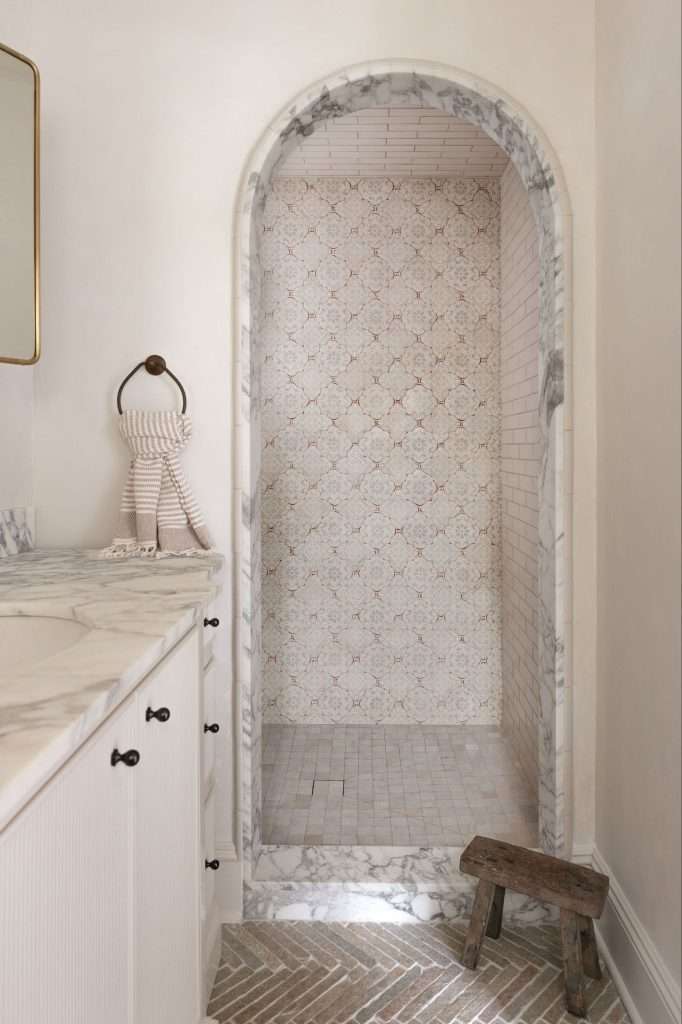
  • Shower niches and shampoo nooks. An arched niche instead of a squared-off rectangle softens what’s often the most visually jarring element in a shower. This is the cheapest curve move to add during a shower remodel. It’s a tile-layout decision, not a fixtures decision.
  • Arched doorways. A curved doorway into the bathroom, or an arched passage between a bedroom and an ensuite bath, changes how the entire room reads from the hallway. It’s the most architectural of the curve moves and the one that requires the most commitment during a remodel.

The rule to hold in your head, hun: pick one or two places for the curve, not all five. A bathroom where every element is curved starts looking like a cartoon version of itself. Restraint is what makes this trend work.

For a look at how these elements integrate in a real remodel, our Ben bathroom project shows the thinking behind where to soften and where to keep clean lines. The team at Design on a Dime Interiors helps Spring-area families work through these tradeoffs before any tile goes up.

When Curves Work in a Builder-Grade Bathroom, and When They Look Bolted On

marble vanity design
Source: Backup Design

Curved and arched elements work in a builder-grade bathroom when they’re integrated with at least one other design change, and they look bolted on when they’re introduced as a single swap into an otherwise untouched space. That’s the core rule. Everything else is details.

Here’s how the math actually plays out:

  • Single-swap curves rarely land. Changing only the mirror in an otherwise all-rectangle bathroom makes the mirror look like it wandered in from another house. The eye immediately registers the mismatch. You can get away with one swap if the rest of the room already has some visual softness (natural materials, warm lighting, textured tile), but not if everything else is still builder-beige and right-angled.
  • Two-element changes create coherence. Arched mirror + fluted vanity. Curved tub + arched shower niche. Two curve elements read as intentional design, not a one-off purchase.
  • Three or more changes feel fully designed. This is the remodel tier. Arched doorway + curved vanity + organic mirror shapes a room that feels completely current. Usually the budget tier too.
  • Pairing curves with natural materials helps. Wood, stone, and natural-texture tile soften the whole room before the curves even go in. Curves against high-gloss builder-white tile and chrome fixtures can still read clinical.
  • Lighting carries more weight than people realize. Recessed can lights kill the curved-mirror effect because the light flattens the shape. A sconce, a pendant, or a backlit mirror brings the curve to life. Fixing hard-edged lighting is one of the underlying bathroom stress points that homeowners often miss when they focus only on finishes.

This is the exact kind of calculation worth running before you commit. Our bathroom remodel cost calculator helps you see what a full renovation costs against a lighter-touch update, so you’re choosing based on actual numbers instead of guessing. Families across Cypress and the broader Greater Houston market use it to sanity-check scope before any tile gets ordered.

The Quiet Advantage in a Small Powder Bath

powder room tips
Source: Design for Living

Small Texas powder baths benefit disproportionately from a single curved element because the whole room can be transformed with one swap, without the integration math that larger bathrooms require. Tuck one curve into a 20-square-foot half-bath and the entire space feels different. Honey, this is where the trend delivers the most bang for your buck.

Powder baths are everywhere in Texas homes. Under the stairs. Off the foyer. Tucked beside the dining room. Most of them are 20 to 40 square feet, which means every surface is within 6 feet of every other surface, and every design choice amplifies.

The two moves that consistently transform a small Texas powder bath:

  • An arched or organic-shaped mirror. In a small space, the mirror is visually the biggest element in the room. Changing its shape changes the whole room. This alone is often enough.
  • A fluted or curved vanity front. If you’re not ready to replace the mirror, a fluted vanity front delivers the textural softness the same way. When guests come in, it’s the one element their hand touches, so texture matters disproportionately.

One curve is enough in a powder bath. Two can work if they’re in harmony. Three starts looking over-designed in a small footprint. There’s more on getting the small bath right in our breakdown of what makes a well-designed powder bath.

For homeowners in Magnolia looking at a curved or fluted vanity as part of a powder bath refresh, custom cabinetry gives you the shape and the size exactly right for the space, rather than forcing a stock vanity into an odd footprint.

How to Mix Curves and Straight Lines Without Creating a Mess

How to Mix Curves and Straight Lines in Bathroom Without Creating a Mess
Source: Platner Studio

Mixing curves and straight lines works when the curves are concentrated in one or two elements and the straight lines handle everything else, creating a clear hierarchy instead of visual competition. The failure mode is treating every element as equal. That creates chaos.

Here’s the framework:

  • Pick the hero curve. Decide which element is the curved focal point before anything else, darling. Mirror, tub, or doorway. Usually just one. That element gets to be loud.
  • Let the supporting cast stay simple. If the mirror is the hero, the vanity should be clean-lined. If the tub is the hero, the mirror stays classic. Everything else serves the hero, not competes with it.
  • Keep the tile straightforward. This is where folks go wrong most often. Curved elements against busy patterned tile is too much. Classic subway tile, large-format slabs, or simple hex patterns let the curves do the work.
  • Match metal finishes and tonal families. Mixing curves and straight lines is already a visual contrast. Don’t add metal-finish contrast on top of it. One warm metal (brass, bronze) or one cool metal (brushed nickel, matte black) running through the whole room.
  • Consider scale. A small curve in a big bathroom gets lost. A big curve in a small bathroom feels overwhelming. Match the scale of the curve to the scale of the room.

There’s a real parallel here to what designers notice when walking into a room, which is mostly about visual hierarchy and whether one element is clearly leading. When mixing curves and straight lines, the hierarchy is the whole game.

Getting the vanity shape and scale right for a specific bathroom is exactly where custom cabinetry pays off. Our team at Design on a Dime builds custom vanities sized to the exact footprint, which makes the hierarchy easier to control.

The Shortlist of Curve Choices That Actually Age Well

arches in the bathroom
Source: Colette Interiors

Four curved bathroom elements have a strong track record of aging well, and three trendier moves carry more aesthetic risk over a five- to ten-year horizon. Separating the two matters more than most homeowners realize, because bathrooms don’t get updated often, honey. The shape you pick today has to last.

The four that consistently age well:

  • Arched mirrors. Arches are architectural. They’ve been used in buildings for thousands of years. An arched mirror will not look dated in 2036. The specific frame finish might cycle, but the shape is classical.
  • Fluted or reeded vanity fronts. Fluted texture shows up in architecture across every century. It’s subtle enough that it reads as detail, not statement. Easy to live with long-term.
  • Softly curved countertop edges. A quarter-inch or half-inch radius on a slab edge is barely visible as a trend move. It reads as good craftsmanship. Bathroom countertops with softened edges have been specified by designers for decades.
  • Arched doorways and passages. Architectural curves integrated at construction level are permanent design moves. They don’t date because they’re structural, not decorative.

The three that carry more aesthetic risk:

  • Highly organic “blob” mirror shapes. Irregular asymmetrical shapes are photogenic but peak in specific style cycles. A curvy organic mirror picked today may read as distinctly 2025-to-2027 in the future. That can be fine if you plan to swap mirrors. It’s a problem if you’re building the whole bathroom around it.
  • Chubby or wavy freestanding tubs. Sculptural tubs with exaggerated curves read as statement pieces. Statement pieces date. A cleaner rounded silhouette ages better than a dramatic one.
  • Scalloped or cloud-shaped tile patterns. These are having a moment. The moment will pass. If you love them enough to re-tile in eight years, great. If not, hold back on this one.

Scalloped or cloud-shaped tile patterns. These are having a moment. The moment will pass. If you love them enough to re-tile in eight years, great. If not, hold back on this one.

The honest test for any curve move: picture it in 2036. If the answer is “yeah, that still looks fine,” it’s worth doing. If the answer is “eh, probably dated by then,” save it for lower-commitment elements like decor and mirrors you can swap.

For families looking at a bathroom renovation, our team at Design on a Dime helps Montgomery County homeowners separate the lasting moves from the trendy ones before finalizing scope.

Frequently Asked Questions

Are curved fixtures harder to clean than flat ones?

Curved fixtures are not meaningfully harder to clean than flat ones in most cases. Smooth rounded surfaces actually shed water and soap residue more easily than square corners where buildup collects. The exception is heavily fluted or scalloped surfaces, which add seams that trap more residue. For day-to-day cleaning, curved countertop edges, rounded basins, and arched mirrors are no harder to maintain than their square counterparts.

Do curved elements make small Texas bathrooms feel bigger or smaller?

Curved elements generally make small Texas bathrooms feel larger, not smaller. Soft shapes reduce the visual weight of individual elements and eliminate the harsh corners that emphasize a room’s small footprint. An arched mirror reflects more usable light than a rectangular one of the same surface area. A rounded vanity front reads as lighter than a sharp-edged box. In powder baths under 40 square feet, a single curved element often expands the perceived space more than any paint color or lighting change.

Can you add curves without a full bathroom remodel?

Yes. Three curve moves are possible without a full renovation. An arched or organic-shaped mirror swap is the easiest and typically requires no construction. A fluted vanity replacement uses existing plumbing if the sink location stays the same. A retrofit arched shower niche is possible during a shower re-tile without moving plumbing. More ambitious moves like arched doorways, freestanding tubs, or full vanity customization typically require a renovation-level scope.

Is this trend going to look dated in five years?

The trend itself is unlikely to look dated in five years because architectural arches and softened silhouettes have a long historical track record in interior design. Specific current expressions may cycle out, particularly exaggerated organic mirror shapes and heavily sculptural tub silhouettes. The underlying principle of soft shapes replacing sharp right angles has been returning to bathroom design repeatedly for a century. Classic executions of the trend (arched mirror, fluted vanity, curved-edge countertop) tend to age gracefully. Statement executions carry more risk.

A Bathroom That Feels Like a Retreat, Not a Utility Closet

Look, baby, the reason curves are having a moment in bathroom design isn’t because designers got bored of rectangles. It’s because most of us spend real, intimate time in our bathrooms, and sharp right angles send the wrong signal for a room where we’re trying to start and end our days calmly.

A single curved element can shift a whole room. A thoughtful mix of two or three changes the bathroom entirely. The key is knowing where to soften and where to keep the clean lines that make the curves stand out in the first place.

Builder bathrooms don’t have to stay hospital-hard. Most of them respond beautifully to one or two strategic curve moves without a down-to-studs remodel.

That’s the kind of judgment call where a professional design perspective pays for itself.

Design on a Dime Interiors helps families across Montgomery County and Greater Houston rework bathrooms so they actually feel like retreats, not the hardest-edged room in the house.

If you’re thinking about softening your bathroom with curves or arches, reach out to our team today.

How to Plan a Bathroom Layout Before You Touch a Single Tile in Texas

You finally have the budget, the vision, and the contractor lined up. You’ve saved your inspiration photos, picked out the tile, and you’re ready. Then the remodel wraps up and you spend the next three years stepping around a door that swings into your shins every single morning, reaching past your partner to get to the sink, and wondering why your gorgeous new bathroom somehow still feels like a chore to use.

Planning a bathroom layout isn’t the glamorous part of a remodel, darling, but it’s the part that determines whether your beautiful new space actually works for your real life. And I’m going to walk you through exactly what to think about before a single tile gets pulled off the floor.

Why Most Bathroom Layouts Fail Before Demo Even Starts

Why Most Bathroom Layouts Fail Before Demo Even Starts

Most bathroom remodels that end in regret didn’t fail because of the materials or the budget. They failed at the planning stage, before anything was touched.

Here’s what usually happens: a homeowner picks finishes first and figures out placement later. The tile goes on the mood board. The vanity gets ordered. The fixtures get chosen. And somewhere deep in the planning process, somebody eyeballs the floor plan and assumes the original layout is probably fine.

The original layout is almost never fine. Builder bathrooms in this part of Texas were designed to check code requirements and fit a floor plan, not to function well for two adults getting ready in the same 60 minutes. When you open up the walls, you have a real opportunity to rethink the entire thing, and most homeowners hand that opportunity back without realizing it.

The core mistake is treating a bathroom remodel as a cosmetic project when it’s actually a spatial one. New tile in the same broken layout gives you a prettier version of the same frustrations. The planning work, the part where you think through how your household actually moves through this room, is where the real return on your investment lives.

The Traffic Flow Question You Need to Answer First

bathroom traffic flow

Before you place a single fixture, answer this question: how do two people use this bathroom at the same time, and where do they get in each other’s way?

In most Texas builder homes, the primary bathroom gets used by two people during the same morning window. One person at the sink, one in the shower, somebody needing to get past somebody else to reach the toilet. The traffic pattern through that room is happening six or seven times before 8 a.m., and if the layout fights that pattern, every single day of the year is a little bit worse because of it.

Start with the door swing. This is the single most overlooked detail in bathroom planning. A standard door that swings inward can eliminate up to 9 square feet of usable floor space in a small bathroom, and if it opens toward the vanity or the toilet, you either have to squeeze behind it or leave it partially closed while someone else is in the room. A pocket door, a barn door, or even a simple door rehang to swing outward can completely change how the room feels.

Then trace the path from the door to each fixture:

  • From the door to the vanity. This should be a clear, unobstructed path. If you’re stepping around anything to get to the sink, that’s a layout problem, not a size problem.
  • From the vanity to the shower. In a shared bathroom, this path crosses constantly. If it also crosses the toilet area, you’ve got a peak-hour traffic collision built right into the floor plan.
  • The wet zone separation. The National Kitchen and Bath Association recommends at least 21 inches of clear floor space in front of every fixture, and at least 15 inches from the centerline of the toilet to any side wall or obstruction. These aren’t decorative standards. They’re the minimum clearances that make a bathroom feel functional rather than cramped.

If your current layout doesn’t pass this traffic check, that’s the first thing to fix, and it’s worth spending money on, even if it means moving a wall.

How to Decide Where the Vanity Wall Goes Before Anything Else

How to Decide Where the Vanity Wall Goes Before Anything Else

The vanity wall is the anchor of your bathroom layout. Once it’s placed, everything else organizes around it, and moving it later is expensive. Get this right first.

In most primary bathrooms in Greater Houston, the vanity runs along the longest wall opposite the door or along a side wall adjacent to the shower. Both can work. What makes the difference isn’t which wall you choose, it’s whether that wall has the right conditions to support a functional vanity.

Three things to evaluate before committing to a vanity wall:

  • Natural light and mirror placement. Vanity lighting that fights a window is a problem you’ll live with every day. If your vanity wall has a window, you’re working around it, not with it. Side-lit vanity lighting (sconces flanking the mirror rather than overhead) is far more functional for grooming, but it requires planning the electrical before the drywall goes up.
  • Counter space per person. The standard advice is 24 inches of counter width per person for a shared vanity. That gives each person room to set things down, use the sink without bumping elbows, and store what they need within arm’s reach. A 48-inch double vanity sounds roomy until you realize 8 inches of that width goes to the sinks themselves. If your wall can’t support at least 60 inches of vanity for a shared bathroom, a single sink with good storage planning is often a better functional choice.
  • Plumbing relocation cost vs. benefit. Moving plumbing is where bathroom remodel budgets expand quickly. If your current vanity is against a wall with easy access to the plumbing stack, staying close to that location keeps costs predictable. If you’re relocating the vanity to a different wall, get that cost in writing before you fall in love with the new placement.

The vanity wall also determines where your storage lives. A designer I know always says the vanity wall isn’t just where you put the sink, it’s where you decide how much of your bathroom counter is going to be covered in stuff six months from now. Plan the storage before you finalize the vanity, not after.

Families across Conroe and The Woodlands who’ve been through a bathroom remodel will tell you: the vanity placement decision feels small during planning and enormous once you’re living with it.

Shower Placement That Prevents the Cold Floor Walk

Shower Placement That Prevents the Cold Floor Walk
Source: Ling Interiors

The most common fixture placement regret I hear from clients isn’t about the vanity. It’s about the shower.

Specifically: the distance from the shower to the towel bar, and the distance from the shower to the rest of the bathroom. In a Texas summer, stepping out of a cool shower onto warm tile is fine. In January, when a cold front has dropped the overnight temperature to 38 degrees and that slab foundation has made your tile floors absolutely frigid, the 12 feet between your shower and your towel bar feels like a different problem entirely.

Shower placement should be driven by three factors.

First, proximity to the towel bar and robe hook. These should be within arm’s reach of the shower exit, not across the room. This sounds obvious, but in a lot of builder-style bathroom layouts, the towel bar ends up on the wall nearest the door because that’s where the blocking was originally placed. During a remodel, you can move it. Do.

Second, the orientation of the shower entry. A shower that opens toward the toilet or toward a shared traffic path creates awkward moments every single day. A shower that opens toward an open wall or toward the exterior wall gives you privacy, a clear path in and out, and room for a bench or a niche without cutting into usable floor space.

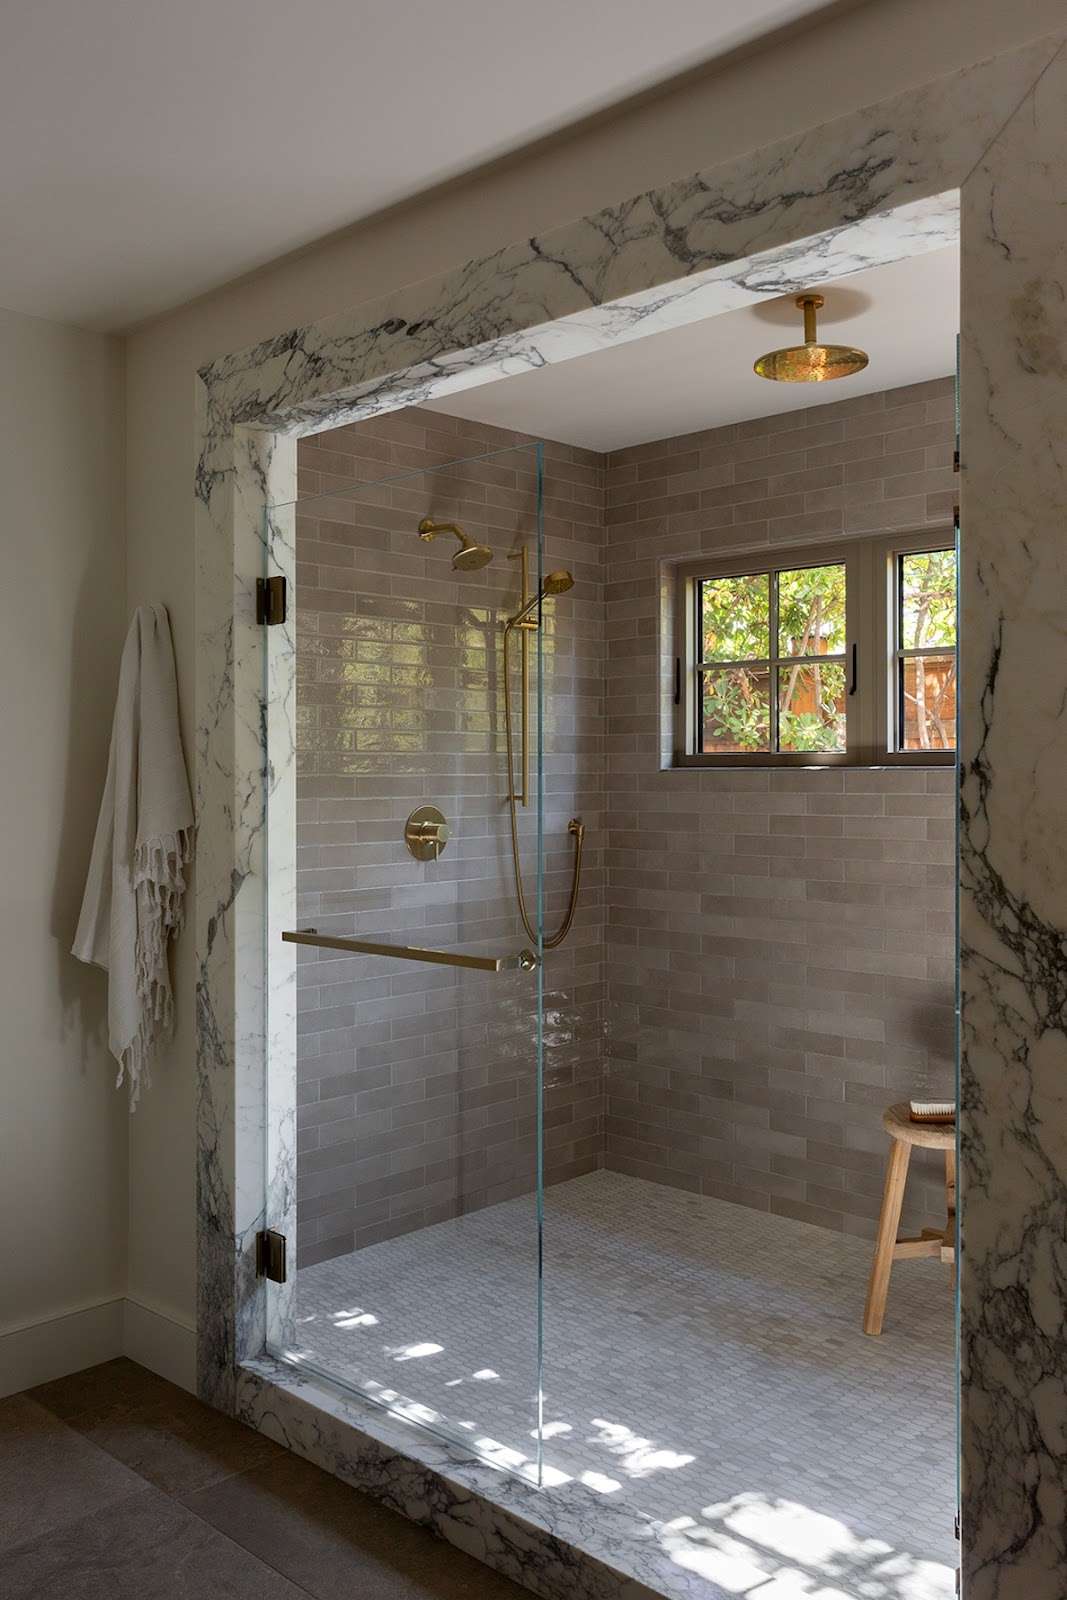
Third, natural light. A shower positioned against an exterior wall can support a small window or a solar tube without much additional cost during a remodel. That natural light makes a shower feel larger and more pleasant, and it’s dramatically harder and more expensive to add after the fact.

The National Association of Home Builders has long documented that walk-in showers with bench seating and accessible entry rank among the most valued features for long-term livability, not just for aging-in-place reasons, but because they make the daily routine more comfortable for everyone.

If you’re unsure whether your shower placement is working, check out our bathroom remodel cost calculator for a sense of what layout changes typically add to a project budget. It helps to know what you’re working with before you start moving things around.

Storage That Gets Used vs. Storage That Looks Good in a Photo

bathroom storage

A lot of bathroom storage plans look great on a mood board and fall apart in real life. Here’s why: most storage is planned around what the bathroom will look like on the day of the “big reveal,” not around what it’ll look like three months later when real life has moved back in.

The most functional bathroom storage is built into the layout, not added onto it.

That means thinking about storage placement before the walls close up, not after. A few principles that make the biggest difference:

  • Shower niches over freestanding caddies, every time. A built-in niche keeps the shower walls clean, holds what you actually use, and doesn’t rust, fall, or scratch the tile. Standard placement is 48 to 60 inches off the floor on the wall opposite the showerhead. Plan the niche location before the tile is ordered, because the niche dimensions need to align with your tile layout.
  • Drawer-heavy vanities outperform door-heavy vanities. Doors look clean. Drawers get used. Deep base drawers for hair tools, divided shallow drawers for everyday items, and a single door cabinet for under-sink plumbing access is the combination that actually stays organized. If your vanity is entirely cabinet doors, expect the interior to become a pile within a few months.
  • The space above the toilet is real estate. It’s often ignored or used for a single decorative shelf. In a bathroom with limited square footage, a recessed medicine cabinet or a shallow built-in above the toilet can hold a surprising amount of what currently lives on the counter.
  • Linen storage needs to live in the bathroom or immediately outside it. Storing towels three rooms away from the bathroom is a comfort problem. If your layout has any wall space near the shower exit, even a 12-inch-deep built-in column can handle towels, toiletries, and the items that currently live in a pile on the floor.

Our custom cabinets team in Spring works through bathroom storage planning as part of the design process, because storage that’s designed alongside the layout always fits better than storage bolted on afterward.

How to Read Your Bathroom Layout Before You Commit to a Plan

bathroom design plan
Source: Caitlin Jones Design

Before you finalize any layout decision, do this: stand in your bathroom and walk through a full morning routine, out loud, narrating every step.

“I walk in. I turn on the light. I go to the sink. I open the medicine cabinet. I reach for my…” Go through the whole thing. Then do it again imagining your partner is already at the sink. Where do you go? What do you reach around? What do you have to wait for?

This exercise sounds silly, but it surfaces problems that no floor plan sketch will show you. It’s also how professional designers approach a space before any design decisions are made, because a bathroom that works on paper and a bathroom that works in real life are sometimes very different rooms.

A few specific things to check during this walk-through:

  • Does the door clear every fixture when fully open? Not partially open. Fully open.
  • Can you reach the toilet paper from the toilet without leaning? Standard placement is 8 to 12 inches from the front of the toilet bowl to the holder, at about 26 inches off the floor. Most builder installations miss at least one of these measurements.
  • Where does wet stuff drip? Step out of the shower in your mind. Where do your feet land? Is there a rug or a mat there? Does the path to the towel take you across dry floor or wet floor?
  • What happens in the dark? If you get up at 3 a.m. and navigate this bathroom without turning on the overhead light, are you walking into anything?

Families in Katy and Cypress who’ve gone through this process with our team often say that the walk-through conversation before the design presentation is where they made half their best decisions. The floor plan is a tool. Your lived experience in the room is the real data.

If you haven’t already run the numbers on what your layout changes will cost, our bathroom remodel cost calculator gives you a solid Texas-specific starting point. It’s free, takes about 60 seconds, and breaks down pricing by scope and location so you’re not guessing.

Frequently Asked Questions

What’s the biggest layout mistake homeowners make when remodeling a bathroom?

The most common mistake is keeping the original builder layout without questioning it. Most Texas builder bathrooms were designed to meet code minimums, not to support two adults using the space simultaneously. When you open up the walls for a remodel, you have a real opportunity to rethink fixture placement, door swing, and traffic flow. The homeowners who take that opportunity almost always end up with a significantly more functional space. The ones who skip it often find themselves remodeling the same bathroom again five years later.

How do you know if you have enough space for a double vanity?

The functional minimum for a comfortable double vanity is 60 inches of total width, which gives each person roughly 24 inches of counter space after accounting for the two sinks. If your vanity wall is shorter than that, a single sink with excellent drawer storage and a wide mirror is often a better choice than squeezing in two sinks that don’t have enough room to breathe. In many Greater Houston homes with older builder bathrooms, a 48-inch single vanity with thoughtful built-in storage outperforms a cramped double.

Should you move plumbing during a bathroom remodel?

It depends on what you’re gaining. Moving plumbing to get better fixture placement is often worth it, especially if the current layout creates ongoing daily friction. Moving plumbing just for aesthetics is harder to justify. The cost of relocating a drain or supply line varies significantly by how far it’s moving and what’s behind the wall, but a realistic range for plumbing relocation in a Texas bathroom remodel is $500 to $2,500 depending on scope. Get the cost before you commit to the new placement, and weigh it against how much that placement actually improves the way the bathroom functions.

Does shower size matter more than shower placement?

Placement usually matters more. A well-placed 36-by-36-inch shower that’s close to the towel bar, oriented correctly for traffic flow, and has a built-in niche will be used and enjoyed daily. A large walk-in shower that’s positioned in the wrong corner, opens into the traffic path, and requires a cold floor walk to reach the towels is a source of low-level frustration every single morning. Size is a luxury. Placement is a basic functional decision. If budget requires a tradeoff, prioritize placement.

The Part That Makes the Whole Thing Worth It

When a bathroom layout is done right, you stop thinking about it. That’s the goal. Not a bathroom that gets compliments, though you’ll get those too. A bathroom that your household uses every day without friction, without workarounds, without that small daily frustration of a space that almost works.

That’s what good planning buys you, not just a prettier room, but a room that makes your mornings a little easier and your evenings a little quieter.

If you’re planning a bathroom remodel across Montgomery County and Greater Houston and you’d like to talk through your layout before anything gets ripped out, we’d love to take a look. Start with a conversation at designonadimeinteriors.com/getstarted and let’s figure out what your bathroom could actually be.

When Your Bathroom Feels Cold, Dingy, or Draining, Here’s What’s Really Going On

When your bathroom feels cold, dingy, or draining, it’s probably not because it’s dirty, babe. It’s ‘cause something in the space is quietly working against you.

You walk in, everything looks fine on paper, but the room still feels off. A little dull and a little heavier than it should, like no matter what you do, it’ll never quite feel fresh.

That’s not your imagination, and it’s not how well you clean it, either.

There are a handful of subtle things that shape how your bathroom looks (and feels) day to day. Once you spot them, the whole bathroom starts to make a lot more sense, and finally starts working with you instead of against you.

So, stick around, and I’ll tell you all about it.

Why Warm White Lighting Makes Everything Look Dingy

Why Warm White Lighting Makes Everything Look Dingy

You know what’s wild? 

That warm white light you installed to make your bathroom more cozy is actually the sneaky culprit making everything look grimy and sad. Yup, you read that right, honey.

When Warm Light Starts Working Against You

Don’t get me wrong, darling, warm lighting has its place. It’s lovely in a bedroom or living room where you want to relax and wind down.

In a bathroom, though, it can quietly dull everything around you.

That soft yellow glow tends to mute whites and soften contrast. 

Your tile loses its crispness. Your countertops look a little muddy. Even freshly cleaned surfaces could take on a slightly tired tone that reads as less than clean.

It’s not that anything is actually dirty. It’s that the light is shifting how your eye reads the space.

If your bulbs sit in that lower Kelvin range, you’re likely seeing a warmer cast than you realize. And once that happens, no amount of scrubbing is going to bring back that bright, fresh look you’re after.

The Shadow Problem You Didn’t Notice

Lighting direction matters just as much as color.

That overhead fixture you picked because it felt practical? It’s working against you, baby. Light that shines straight down creates shadows under your eyes, along the counter edges, and around the fixtures. Those shadows exaggerate every line, every texture, every tiny bit of buildup. 

And you know what happens then? 

A space, no matter how clean, starts reading as dull and slightly grimy, ‘cause your brain reads that visual noise as a mess.

Add in reflective and textured materials, and those shadows have even more to play with. Suddenly, every little imperfection feels front and center.

That’s why bathrooms with only overhead lighting rarely feel truly clean, no matter how often they’re wiped down.

Why Cooler Light Feels Instantly Cleaner

When you shift into a more neutral or slightly cooler light, everything sharpens up in the best way possible.

I’m talkin’ whites that actually look like whites again, finishes that get their clarity back, and edges that feel crisp. The whole room starts to feel more put-together.

And no, you don’t need anything extreme. In fact, super cool, blue-toned lights can feel harsh if you go too far.

But landing in that balanced range, where colors read true, and shadows are softened? 

Honey, that makes a noticeable difference. 

Once your light is doing its job, your bathroom stops fighting you. It finally reflects the effort you’re already putting into keeping it clean.

When the lighting is off, everything else loses clarity. But get the light right, and the whole bathroom starts to tell the truth again. Design on a Dime can help you rethink lighting from the ground up so it supports the space instead of fighting it. 

The Surfaces That Keep You Scrubbing and the Ones That Don’t

moder tile bathroom ideas

You know what’s sneaky? 

Some bathrooms practically scream, “Look at this smudge!” Others tend to hide dirt like a champ, lookin’ clean with half the effort.

A lot of it comes down to the surfaces you’re living with every day. Certain materials highlight every speck, while others soften (and by “soften,” I mean hide) the look of normal wear and tear.

Once you see the difference, it gets a whole lot easier to understand why your bathroom never quite feels finished, no matter how often you clean it.

Porous Tiles Hold Onto More Than You Think

Okay, honey, time to grab yourself a magnifying glass because what’s happening in your bathroom tiles is straight-up creepy.

Those porous tiles you thought were clean? They’re probably harboring bacteria deep inside, where your regular scrubbing can’t reach.

They can look all solid and smooth, but many types are actually full of tiny pores.

Those little openings trap moisture, soap residue, and bacteria. Even when the surface looks clean, what’s underneath could start to affect the overall appearance. You might see dullness, uneven color, or a slightly “stale” look that never quite goes away.

All I’m sayin’ is:

If your bathroom always feels like it needs a deep clean, porous materials are often part of the reason.

Shiny Finishes Show Every Little Thing

Glossy fixtures are beautiful, no doubt about it. But girl, they come with a trade-off:

They’re basically smudge magnets.

Polished chrome, glass shower panels, and high-gloss tiles reflect light in a way that highlights everything. I’m talking water spots, fingerprints, toothpaste splatter, and even a quick wipe that left a streak behind. It’s all visible.

Again, that doesn’t mean these finishes are wrong. It just means they ask for more upkeep.

If you’re after something a bit more “forgiving,” softer finishes, like brushed nickel and matte surfaces, tend to hide daily use much better while still looking polished.

Grout Can Hide Dirt While Still Looking “Fine”

Grout has a way of fooling you.

Darker grout, in particular, can mask the everyday buildup so the surface looks clean at a glance. But over time, that buildup is still there, settling into the material and affecting the overall feel of the space.

Lighter grout shows dirt faster, which can be frustrating; I get that, darling. But at least it gives you a more honest read on when it needs attention.

And another thing:

Traditional grout is porous. It acts like a sponge, holding onto water and stains, unless it’s properly sealed and maintained, of course.

When the materials make everyday upkeep harder than it needs to be, it’s usually a sign the space wasn’t designed with real life in mind. Design on a Dime can help you pick finishes that look stunning and hold up over time. Your bathroom will stay cleaner without all the extra work.

Why Counter Clutter Makes the Whole Bathroom Feel Off

Why Counter Clutter Makes the Whole Bathroom Feel Off

You can have spotless surfaces and still walk in thinking, “Why does this feel messy?

Most of the time, it’s what’s sitting on your counters.

Every bottle, tube, and tray adds to the visual load. Your eyes don’t get a place to rest, so the whole room starts to feel busy, even if everything is technically clean.

Try the Doorway Glance Test

Standing in your bathroom doorway is gonna tell you everything you need to know about why it feels cold and chaotic. 

No need to step in, hun. Just pause right there and notice where your eyes go first.

That first glance can tell you everything. Your eyes land on the problems instantly, and that’s exactly where you need to start fixing things.

So, for example, if your attention lands on a cluster of products, a crowded sink, or items scattered across the counter, that’s the problem area. Your brain is picking up on all that visual noise before it ever registers how clean the space is.

What you see first is what shapes your impression of the entire bathroom.

Keep Those Counters Under Control

Counters look their best when they’re lightly styled, not fully loaded.

For most bathrooms, that means keeping only the essentials out. Hand soap, maybe a small tray, and one or two items you actually use every day.

Everything else? 

Honey, it can live in drawers and cabinets.

Trust me, when those surfaces clear up, the space instantly feels more open. 

Light moves better, materials show up the way they’re supposed to, and your whole bathroom feels easier to maintain.

Give Everything a Proper Place

Let me tell you something: 

Clutter usually builds up because there’s nowhere else for things to go.
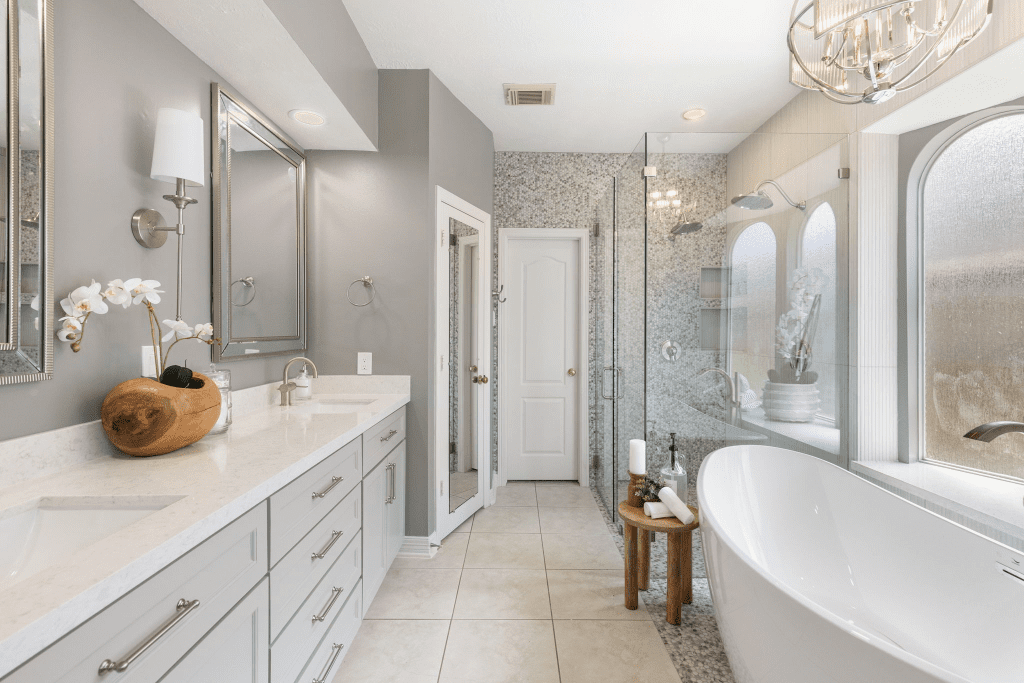
If your storage isn’t working, your counters end up doing all the heavy lifting. And we don’t want that, now, do we?

Simple fixes can make a big difference here. 

Think drawer organizers that keep daily items contained, under-sink storage, and wall-mounted shelves or cabinets that can take pressure off the vanity without crowding up the floors.

Once everything has a home, it’s much easier to keep surfaces clear without thinking about it.

5 Simple Fixes That Will Make Your Bathroom Look Cleaner by Tonight

Simple Fixes That Will Make Your Bathroom Look Cleaner

You’ve spotted what makes your bathroom feel cold, and now, it’s time to tackle the chaos that’s making it look all dirty and dingy even when it’s not.

The good news is, you don’t need a full remodel to see a difference.

A few small changes, done in all the right places, can actually shift how your bathroom looks (and feels) in a single afternoon. These are the kind of quick wins that give you that instant “Okay, that’s better” moment.

  1. Reset the Counter in Five Minutes

Take everything off your counter. Yes, all of it. Wipe it down, then only bring back what you actually use every day. A soap dispenser, maybe a tray, and one or two essentials. That quick reset creates breathing room, and your bathroom instantly feels more put-together.

  1. Wipe What Reflects the Most Light

You don’t need to deep-clean the whole bathroom. Focus on the spots that catch your eye first. I’m talking mirrors, faucets, and countertops. Give them a quick polish with a microfiber cloth, because they’re the sneaky little troublemakers that make everything look grimy.

  1. Bring in One Thing That Softens the Space

If the space feels a little cold, balance it out with something simple. Fresh towels, a clean bath mat, or a small natural texture, like wood or woven material, can shift the mood. You’re not redecorating, honey. You’re just taking the edge off all those hard surfaces.

  1. Refresh the Biggest Visual Surface in the Room

Let’s not ignore the biggest surface in your bathroom. That shower curtain or glass door takes up a lot of visual space, and if it’s looking tired, cloudy, or a little worn out, it brings the whole room down with it. Toss the curtain in the wash or just swap it out. It’s a small change that makes the bathroom feel brighter almost instantly.

  1. Clean or Replace Vent Covers

Now, honey, look up for a second. Dusty or yellowed vent covers quietly make the entire bathroom feel… well, neglected. A quick clean or an inexpensive replacement can freshen up the room more than you’d expect.

These small changes work ‘cause they target what you actually see and feel, hun, not just what you clean. And once those pieces fall into place, your bathroom starts lookin’ fresh again.

When Quick Fixes Aren’t Cutting It Anymore

white modern bathroom ideas

There comes a point where no amount of scrubbing or styling is going to change how your bathroom feels.

You swap the towels, clear the counters, and even upgrade the lights, and yet, something’s not quite right. That, honey, is usually your sign that the issue goes deeper than surface level can handle.

A remodel isn’t about starting over for the sake of it. It’s about fixing what’s no longer working so the space can finally feel right again. Check out the Sarah Project, and you’ll see exactly what I mean by that.

Here’s when you need more than a cosmetic fix:

  • When Problems Keep Coming Back

If you are cleaning the same spots over and over, pay attention to that. Mold that returns, grout that won’t stay clean, or that faint musty smell that never quite leaves are signs that something is going on behind the scenes. Poor ventilation, trapped moisture, or hidden leaks might still be feeding the problem, no matter how often you clean. At that point, it’s not about effort. It’s about the structure of the space and, more importantly, your health.

  • When Surfaces Are Worn Beyond Repair 

There’s a difference between normal “wear and tear” and materials that simply reached their limit. Cracked tiles, chipped finishes, and stained grout that won’t lift; these are all things that hold onto dirt and bacteria in a way you can’t fully clean. You can try your best, but your bathroom still looks tired. That’s not a reflection of your upkeep. It’s the materials asking to be replaced.

  • When the Layout Isn’t Working for You 

Sometimes, the problem isn’t what you see first. It’s how that room functions. Not enough storage, awkward spacing around the vanity, and poor lighting placement; all of it adds friction to your daily routine. Over time, that friction makes your space feel more draining than it should. A solid layout, though? It makes everything easier. 

  • When You’re Spending Too Much Time Maintaining It

If keeping your bathroom looking decent feels like a constant, never-ending task, that’s something worth looking into, baby. High-maintenance materials, outdated fixtures, and poor lighting all make simple upkeep feel like a chore. You clean, and a day later, it looks like you didn’t. A remodel gives you the chance to pick materials and finishes that actually support your lifestyle instead of working against it.

  • When It Just Doesn’t Feel Good Anymore

This one matters more than people realize. If your bathroom feels cold, dull, or just not like a place you enjoy being in, that’s a valid reason to make a change. I mean, you use this space every single day. It should feel comfortable, functional, and yes, even a little bit uplifting.

When the quick fixes stop making a difference, it’s usually because the space is ready for something more thoughtful and long-lasting. Design on a Dime’s team focuses on creating bathrooms that solve the root of the problem, not just the surface symptoms.

Frequently Asked Questions

What’s the easiest way to make a small bathroom feel less cramped?

One way to make a small bathroom feel less cramped is to focus on clearing visual space. Keep counters minimal, use lighter tones with a bit of contrast, and make sure the lighting reaches all corners. Even small changes can make your bathroom feel more open.

What type of mirror works best for improving how the space feels?

A larger mirror or one that reflects more light can make a huge difference. If possible, choose a mirror that allows for side lighting instead of relying only on an overhead light source.

How can I keep my bathroom smelling fresh throughout the day?

When it comes to keeping things smelling fresh, focus on the airflow first. Run your exhaust fan regularly and keep moisture under control. After that, options such as diffusers or lightly scented cleaners can help maintain a fresh feel.

How long should a well-designed bathroom last before needing an update?

A well-planned and solid bathroom could easily last 10 to 15 years or more. If the materials and layout still work well, small updates can stretch that timeline even further.

Should I hire a designer for a bathroom remodel on a budget?

Yes, you should hire a designer for your bathroom remodel because professionals deliver faster timelines, guarantee code compliance, and provide warranties that protect your investment while avoiding costly DIY mistakes. Plus, they handle everything, making the remodel a whole lot less stressful for you.

Ready for a Bathroom That Finally Feels Good to Walk Into?

If something’s been feeling a little off, hun, now you know it’s not just in your head. And no, your bathroom doesn’t need a complete demolition. 

So, just begin with what’s draining you the most. Perhaps it’s that harsh lighting or those grimy grout lines screaming for attention. Pick one fix from this list and tackle it this weekend. Because honestly? Life’s too short to dread your own bathroom. 

You deserve a space that energizes you, not one that makes you wanna crawl back into bed.

And if you’re at that point where the room needs more than a few surface updates, that’s okay, too. Design on a Dime is here to help you turn that frustrating bathroom into one that’s functional and easy to maintain. When you’re ready to take that next step, just get in touch with our team.

You’ve got this, baby! 

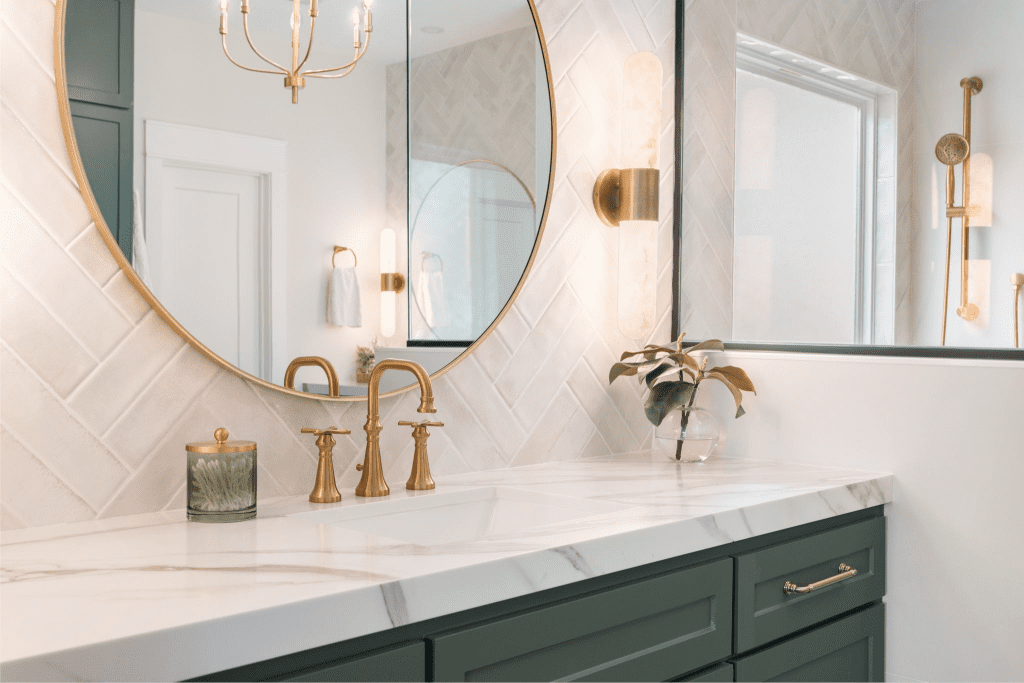
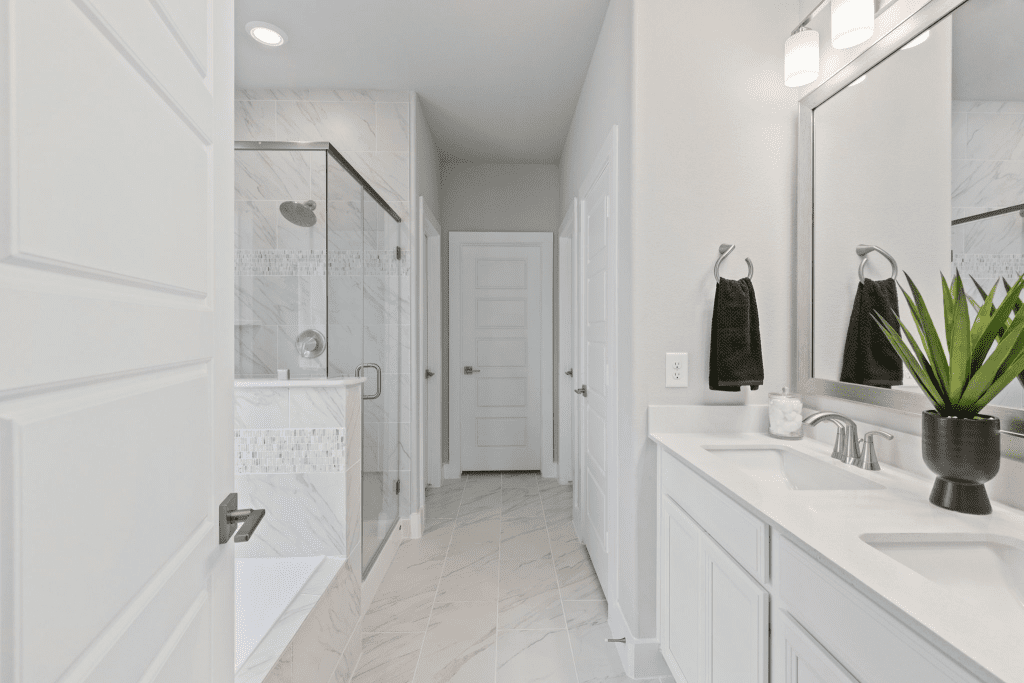
Choosing the Right Bathroom Vanity for Your Conroe Remodel

Choosing the right bathroom vanity is probably one of the most important decisions you will make in a Conroe remodel. 

And no, it’s not “just a cabinet with a sink,” honey. It sets the tone for how your whole bathroom feels and functions. 

The right choice could turn morning routines into something smooth and effortless, while the wrong one… well, it’ll leave you fighting for counter space and storage every day. 

Whether your style leans classic or contemporary, the vanity is your anchor piece, the star of the show that ties it all together. Stick around, because I’ll walk you through what really matters before you fall head over heels for that pretty showroom piece.

Assessing Your Bathroom Space and Layout

bathroom vanity

Before you start falling in love with a vanity style online, let’s talk about what really matters: 

How it fits your bathroom in real life, darlin’. 

A vanity is not just furniture; it’s part of the daily flow of your space, and if the layout isn’t right, you’ll feel it every single morning. And we don’t want that, do we? 

First, grab your tape measure. You’ll want at least 30 inches of clearance in front of the vanity so you can move comfortably, and about 15 inches on either side if possible. 

These are not just numbers on a page; they’re the difference between a bathroom that feels open and one that leaves you bumping elbows. That said, floating vanities or built-in niches can be smart ways to free up precious square footage, too, all without giving up style.

Next, think about movement. 

Doors that swing the wrong way and windows that get blocked by a cabinet can turn into daily frustrations. Planning your vanity placement with traffic flow in mind will make the whole bathroom more functional and welcoming.

And don’t forget the plumbing. Moving pipes is possible, but it adds cost and complexity to the remodel. If you can work with the existing lines, your budget will thank you. Of course, if a new configuration is what it takes to get your dream layout, that’s when professional planning really pays off.

Finally, consider vanity height. 

Standard options hover around 32 inches, while “comfort height” vanities run closer to 36 inches, perfect for most adults. If little ones will be using the space, too, you might want something lower or a sturdy step stool. 

Choosing the right height makes your daily routine smoother and keeps the whole family happy.

Vanity Size, Configuration, and Sink Choices

Picking the right vanity isn’t just about what looks pretty in a showroom. It’s about how that piece is going to work with your bathroom and your household every single day. Get the size, layout, and sink right, and you’ve got a space that feels like it was made for you.

Single or Double: Which Sink Setup Fits Best?

bathroom vanity size

Okay, this is where lifestyle really comes into play. 

If you’re working with a small bathroom or you’re the only one using it, a single sink is often the simplest, most budget-friendly option. You will have more counter space to spread out and less plumbing to worry about. 

Win-win, right?

But if two people are brushing their teeth at the same time every single morning, or if your teenagers treat your bathroom like prime real estate, a double vanity could be a lifesaver. With widths starting around 60 inches, double setups give each person their own zone, more storage, and far fewer morning squabbles.

We recently handled a project like this in Conroe. So, be sure to check our Arbor Project out; it is a perfect example of how an upgrade from a single sink to a double vanity can transform both daily routines and the look of a space.

Think about your routines, your space, and how much you like to share, and the answer usually becomes clear pretty quickly.

Depth and Width: Making the Most of Your Space

modern bathroom cabintes

Standard vanity depths run about 21 inches, but if you’ve got a tighter bathroom, you can slim down to 18 inches without losing too much function. 

As for width, it varies widely; single vanities range from about 24 to 48 inches, while double models start around 60 and can stretch much wider in a spacious primary bath. Smaller Texas bathrooms might call for a floating vanity; you’ll get the illusion of more space and enough storage.

As always, the key is balance. 

You want a vanity big enough to hold what you need, but not so bulky that it cramps the room. 

Sink Styles: Undermount, Vessel, Integrated, and More

vanity style

Once you’ve nailed down size, it’s time to think about sink style. This is where design personality really shines:

  • Undermount sinks sit below the countertop, giving you a clean, seamless look that’s easy to wipe down. They’re practical and elegant all at once.
  • Vessel sinks perch right on top of the counter, turning your sink into a statement piece. They work especially well in powder rooms where drama and style take center stage.
  • Integrated sinks are built right into the countertop for a smooth, one-piece surface. They’re a dream to clean and have a modern, polished feel.
  • Drop-in sinks are the old faithful of the group. They’re budget-friendly, easy to install, and available in a wide range of shapes and finishes.

Each one has its own sweet spot. Undermounts are great for everyday use, vessels bring style, integrated tops cut down on cleaning, and drop-ins keep costs down. 

Think about how you use your bathroom and how much maintenance you’re willing to handle, then choose the sink that makes your mornings a little brighter.

Materials That Last: Durability and Moisture Resistance

In the bathroom, the vanity takes more daily hits than just about any other piece of furniture. We’re talking toothpaste splatters, steamy showers, and the occasional splash war from the kids; these will all put your vanity materials to the test. 

Picking the right one means your bathroom stays beautiful longer, because a “soggy regret” is not a thing. 

Cabinet Choices: Solid Wood, Plywood, MDF, and More

bathroom cabinets

When you’re planning your remodel, cabinet material is not just a background detail. It’s the backbone of how your bathroom vanity will hold up over time. 

Let’s take a closer look at the most common options, sugar, and what they bring to the table:

  • Solid wood is the classic. It looks rich, feels sturdy, and it can be refinished if life leaves a few scratches. With regular sealing, it can last decades. The trade-off is that it needs more care in a humid Texas bathroom, or it may warp over time.
  • Plywood is the workhorse. It’s made from layered wood sheets, so it’s more resistant to swelling than particle board. Plus, it holds screws well, making it a solid mid-range choice overall.
  • MDF and particle board come in on the affordable end. They can look sleek when laminated or painted, but if water sneaks past that outer layer, they’re quick to swell and break down.
  • Thermofoil and laminate finishes are the go-to for budget cabinets. They give them a polished look and added protection from stains and spills. They clean up pretty easily, too, but once chipped or peeling, they’re hard to repair.

Countertop Materials: Stone, Solid Surface, and Beyond

Countertop Materials

Your countertop faces its own battle with water, heat, and makeup mishaps, and you know it. So, here’s a quick overview of what usually stands up best:

  • Quartz is durable, non-porous, and comes in endless colors. Plus, it resists stains and scratches, making it a top pick for busy bathrooms.
  • Granite and marble bring natural beauty, but they do need sealing to prevent stains and etching. Marble, in particular, will show water spots if left unsealed.
  • Solid surface materials (like Corian) are seamless and easy to repair if scratched, and they offer that smooth, integrated sink option.
  • Laminate keeps costs low and cleans pretty easily, but it’s prone to chipping and doesn’t love high humidity as much as stone or quartz.

Texas humidity can be tough on bathroom finishes. Design on a Dime can help you choose a vanity that’ll hold strong through years of those steamy summers.

Don’t Forget Storage and Everyday Usability

Now let’s talk about storage, sugar, because no one wants to start their morning rummaging for toothpaste behind a mountain of hair products. 

A good vanity doesn’t just look pretty. It works hard to keep your bathroom calm and clutter-free.

Think about the way you use your space. Drawers are perfect for keeping small items like makeup, razors, and cotton swabs within easy reach, while cabinets shine when it comes to stashing towels or those bulky cleaning supplies. 

A mix of shallow and deep drawers often gives the best of both worlds. Just keep in mind that plumbing plays referee here: 

Full-sized drawers might need to be adjusted with clever U-shaped cutouts so that everything fits without drama.

And oh, the smart features available today! Pull-out trays that glide out with your favorite skincare lineup, in-drawer outlets to charge your toothbrush or hair tools, even hidden compartments that keep clutter out of sight but always at the ready. 

I could go on and on, but the point is, these upgrades take a vanity from basic to brilliant.

Counter space deserves love, too. Leave yourself plenty of room for the everyday rituals, whether that’s laying out makeup brushes, shaving gear, or just a simple candle to keep things zen. 

A vanity that balances storage below with workspace on top makes your bathroom not just functional but downright enjoyable to use.

Here’s a handy cheat sheet to compare your options:

Storage TypeSpace OptimizationSmart Tech Features
Multi-doorMaximum capacityIntegrated outlets
Wall-mountedFloor space saverLED lighting
Compact/SmallUrban-friendlyMotion-sensor lights
Medium-sizedBalanced efficiencyBluetooth speakers
MultifunctionalHidden storageUSB charging stations

The right storage lets your vanity keep up with real life instead of becoming another spot that stresses you out. If you’re ready for a bathroom that finally fits your routine, Design on a Dime Interiors can help bring it all together.

Bringing Style and Finishing Touches to Your Vanity

bathroom wallpaper ideas

Storage is wonderful, but style is where the magic happens. The right vanity design pulls your bathroom together like the final piece of a puzzle, setting the tone every time you walk in.

In Conroe and throughout Texas, really, you’ll see a wide mix of styles; modern homes often lean toward sleek floating vanities with clean lines, while traditional houses love rich woods with timeless paneling. 

Transitional designs strike a balance, giving you the elegance of tradition with a fresh, updated feel. Rustic vanities, with their knotty woods and iron hardware, are favored in houses with a cozy, farmhouse-inspired look.

Now, let’s talk color trends. This year’s all about warm and inviting. Think soft grays, creamy taupes, and the ever-popular greige. Natural wood tones are making a comeback, too; oak and walnut bring character and warmth that pair beautifully with Texas sunlight. 

Take our Ben Project, for example. Here, our team brought in custom vanities in two shades; a navy blue one for the boy’s vanity and a deep forest green one for the girl’s side of the bathroom.

Hardware choices can take your vanity in different directions: sleek matte black pulls for drama, brushed nickel for a timeless touch, or warm brass for a hint of glam.

And let’s not forget the finishing touches. Your mirror and lighting should feel like part of the same story as your vanity. 

A bold, framed mirror could double as a statement piece, while backlit or wall-mounted lighting adds both function and a touch of luxury. Think about task lighting for everyday routines like shaving or makeup, and softer accent lighting to keep the space relaxed and spa-like.

Whether your heart beats for modern simplicity or rustic charm, the finishing details, from colors, textures, and hardware to lighting, are what turn a bathroom vanity into a statement piece that reflects your home’s personality.

Ready to pick your vibe? Let Design on a Dime help you turn those design dreams into a bathroom that feels tailor-made for your home.

Installation, Care, and Keeping Your Vanity Looking Fresh

Installation, Care, and Keeping Your Vanity Looking Fresh

That shiny new vanity is only as good as its installation. And sure, DIY might look tempting on a Saturday afternoon, but, honey, trust me: 

One crooked level or a loose pipe can snowball into water damage that costs way more than the savings. 

Professional installers bring the know-how to get your vanity leveled, anchored, and plumbed just right. Plus, most offer warranties that back up their work. 

Think of it as buying peace of mind. 

Your vanity will look flawless, work properly, and, most importantly, you won’t end up Googling “why is my sink leaking?” at midnight.

Once it’s in, the real secret to longevity is regular care

If you’re a “wipe it down and move on” kind of gal, materials like porcelain, quartz, and sealed laminate are your best friends; quick to clean and hard to stain. Natural stone vanities bring beauty in spades, but need resealing to protect against moisture marks. 

As for wood, it looks rich and timeless, but it does ask for proper ventilation and an occasional check-in to keep it from swelling and warping.

Texas humidity is no small thing, darling, especially in places like Conroe, where summers can steam up a bathroom in seconds. Running an exhaust fan, wiping up puddles, and keeping air moving will do wonders for protecting your vanity. 

A little prevention saves you from mildew headaches down the line.

Combine a solid warranty with consistent care, and you will have a bathroom centerpiece that stays as beautiful in year ten as it was on day one.

Budgeting Tips and Perks of Shopping Local in Conroe

small bathroom vanity

Let’s talk dollars and sense, because a bathroom vanity is more than just a pretty face. It’s an investment. 

On average, vanities range in price from a few hundred dollars for those stock pieces to several thousand dollars for custom cabinetry. Now, here in Montgomery County, you’ll often find that prices stay in line with national averages, but shopping local has a big perk: fewer hidden costs

So, skip those cross-country shipping fees and long wait times if you can. You will likely get better service from folks who know Conroe homes inside and out, anyway.

Local showrooms and suppliers give you the chance to see and feel the difference before you buy. Take a stroll through Coburn’s for a wide variety of bath fixtures, for example. You’ll get to compare finishes and styles in person, which can be a game-changer compared to guessing from a screen.

Timing matters, too. 

Stock vanities can often be delivered in a week or two, but custom designs might take six to twelve weeks, depending on the materials and finishes. 

Oh, and darling, don’t forget to budget for extras, including countertop fabrication, plumbing adjustments, and measurement services; those little line items add up.

The good news? 

With local experts guiding you, you’ll have clarity on costs, confidence in your choices, and a timeline that doesn’t leave you brushing your teeth at the kitchen sink for months on end.

Shopping local? Darling, your dream bathroom just met its dream team. We make bathroom remodeling in Conroe simple, stylish, and stress-free.

Frequently Asked Questions

What vanity styles hold resale value best in Texas homes?

Neutral, transitional designs in wood or stone finishes tend to appeal to the broadest range of buyers; they are a great choice if you’re hoping to boost the resale value of your Texas home. Sure, bold colors are fun, but they may feel dated more quickly.

Are floating vanities sturdy enough for daily use?

Yes, they absolutely are. When they are installed properly into the wall studs, floating vanities are every bit as strong as floor-mounted models and offer the bonus of easier cleaning underneath.

Can I change just the countertop without replacing the whole vanity?

Yes, if your vanity base is in good shape, there’s no need to replace the whole thing. You can usually swap in a new countertop and sink for a fresh look at a lower cost.

Do custom vanities take much longer than stock models?

They might take longer than stock models. Custom builds usually require 6–12 weeks, while stock options can be ready in a few days to a couple of weeks. Planning ahead is key to helping you avoid delays.

Are matte finishes better than glossy in a high-use bathroom?

Yes, matte and textured finishes tend to hide fingerprints and water spots better than polished and glossy surfaces, making them a highly recommended choice for high-use bathrooms and those who want simple upkeep.

Your Dream Vanity Awaits

Your bathroom deserves more than a cabinet that “sort of” works. The right bathroom vanity can transform your space into a room that’s functional, inviting, and just plain enjoyable to use every day. 

Whether you’re dreaming of extra storage, a statement piece, or a sleek modern look that fits your Conroe home, the choices you make now set the stage for years of comfort and style.

Ready to bring your vision to life? 

At Design on a Dime, we guide homeowners from concept to completion, making sure every detail feels effortless and tailored to you. Reach out today and let’s craft a bathroom vanity that’s truly made for your routine.

Open Shower Concept: Sleek, Simple, and Full of Possibility

An open shower concept may be just the breath of fresh air your bathroom’s been begging for. No doors, no curtains; just clean lines, smooth finishes, and all the glorious sunlight bouncing around like it owns the place. 

It’s a little bit spa, a little bit savvy, and a whole lot of “Why didn’t I do this sooner?” 

Around here, we love a design that feels as good as it looks, and this one checks every box. And whether you’re reimagining a small space or craving something more modern and open, there’s a reason this trend is turning heads. 

Stick around, hun—we’re diving into why folks are loving it and what you need to know before making the switch.

Why Open Showers Just Look So Dang Good

open shower concept
Source: Serena Armstrong Interiors

Let’s be real, sugar—if you’re tired of your shower curtains clinging like they’ve got separation anxiety, the open shower concept might just win you over. It’s all about clean lines, uninterrupted sightlines, and letting that beautiful tile work really shine. 

Without bulky doors or curtains breaking things up, your eye flows naturally across the room, which makes the whole space feel calmer, more expansive, and just plain easier to breathe in.

We did something similar for our Arbor Project, where the bathroom design embraced openness in its own way. We’re talking light, seamless finishes, glass elements, and soft, light colors that helped the space feel luxurious without being loud. 

Now, that particular layout didn’t include a full open shower, but the design thinking is the same: 

Minimize barriers, highlight texture, and let the room’s natural beauty do the talking.

With open showers, materials take center stage

For example, matte and glossy tiles mingling like they’re old friends, brushed brass or matte black fixtures that pop against soft stone hues, and flooring that runs continuously right into the shower zone. It all works together to create that spa-like feel without feeling overdone. 

Plus, the improved sense of space that comes from having fewer visual barriers allows more natural light to flow freely, making even small bathrooms feel open and airy. 

And when you’ve got that sunlight pouring in? Honey, that’s not just a bathroom—it’s a whole mood.

Making the Most of Every Inch (and Ray of Light)

opren shower small bathroom
Source: Jessica Reynaud

Some bathrooms feel like a breath of fresh air. Others—same size—feel like you’re brushing your teeth in a shoebox. The difference? 

Smart design choices that let the space and light do their thing.

By removing doors, frames, and bulky enclosures, you instantly open up the sightlines. That gives even a small bathroom room to breathe. Natural light can flow freely, and your beautiful tile work? Fully on display. 

Frameless glass (or no glass at all) keeps the look clean. At the same time, built-ins like recessed shelves, wall-mounted faucets, and tucked-away storage help keep the visual clutter down. We use these tricks all the time—floating vanities, warm paint colors, well-placed mirrors—because they work.

Even something as simple as segmenting the space into wet and dry zones (a walk-in shower over here, a cozy towel nook over there) makes the room feel calmer and more functional, without closing it off.

Best Layouts for Small Bathrooms with Open Showers

If you’re working with a small footprint, don’t stress—an open shower can be your best friend. Here are a few layout tips that work wonders:

  • Corner Showers with No Door: Tuck that shower into a corner with a simple splash panel or half wall to keep things open without soaking your whole floor.
  • Linear Floor Plans: Line everything up—vanity, toilet, shower—in one row so traffic flows naturally and nothing feels cramped.
  • Wet Room Style: Let your entire space serve as the shower zone (with good drainage, of course); this is especially handy in narrow or awkward bathrooms.
  • Use Clear Glass Selectively: One fixed glass panel can do the job without enclosing the shower completely; think “barely there” barrier.

And if you’re dealing with low ceilings or tiny windows, keep things light—soft whites, pale woods, and sandy tones will reflect instead of absorb. Even a tiny room can feel fresh and full of energy with the right choices.

Keeping It Safe and Comfortable for Everyone

white tiles shower
Source: Victoria de la Camara

Let’s face it—bathrooms aren’t always the friendliest places when it comes to safety. 

Slippery floors, tight corners, doors that swing the wrong way… that’s enough to make even the most agile among us tread carefully. But here’s the good news: 

An open shower concept doesn’t just look good—it can make the bathroom a whole lot safer and easier to use for everyone.

There’s no step up or awkward curb to trip over. So, open showers are a dream for anyone using walkers, wheelchairs, or simply dealing with everyday mobility challenges. And those wide, doorless entries? They mean no more navigating swinging glass panels or cramped corners just to rinse off. 

Add in textured, slip-resistant flooring and good lighting, and suddenly you’ve got a bathroom that works for every age and stage of life—without sacrificing an ounce of style.

When we’re doing full-service bathroom remodels here at Design on a Dime, we look at accessibility and safety as part of the initial design plan, not something we can bolt on later. Thoughtfully placed grab bars, easy-reach storage, and subtle visual contrasts improve the function of a space while still looking beautiful and intentional.

Design Tips for Barrier-Free Showers

  • No-Threshold Entry: Ditch the curb; keep the floor level for safer movement and a cleaner look
  • Grab Bars That Don’t Scream “Hospital”: Matte black, brushed gold, or even wood-look finishes blend right in
  • Lighting That Works Hard: Use layered lighting (namely, overhead, task, and accent) to minimize shadows and increase visibility
  • Smart Layouts: Leave enough turning radius for mobility aids without sacrificing design flow

Accessibility doesn’t mean boring. It means thoughtful. 

With a little know-how—and the right design team, of course—you can have a bathroom that’s safe, smart, and still worthy of your Pinterest board.

What Makes an Open Shower Work (Not Just Look Good)

soft pink open shower tiles
Source: Kelli Lamb

Now, we’ve talked about how open showers can be beautiful—but beauty alone won’t keep your bathroom from turning into a splash zone. If you want that spa-like vibe to last longer than one rinse and repeat, let’s make sure your setup works just as well as it looks. 

Because, honey, the function is where the magic happens.

Drainage

When your shower doesn’t have a door or curb, water is going to go wherever it pleases, unless your floor is sloped just right. That’s where drainage design comes in.

  • Linear drains—sleek strips along the wall—are a favorite for open showers. They are modern and make it easier to maintain a flat, barrier-free floor, making them ideal for style and accessibility.
  • Center drains are more traditional and totally fine, but they’ll require a four-way slope in your floor, which can complicate tile layout a bit.

Whatever you choose, the goal is the same: water goes down, not across the bathroom floor and into your hallway.

Splash Control

While open showers minimize visual clutter, you still need to gently guide that water where it belongs.

  • Glass panels, especially fixed ones, are a great way to block splashes without closing the space off.
  • Half walls or tiled partitions can do the job, as well, while adding a little visual interest or privacy; great for shared spaces or guest baths.

The trick is to keep water contained without breaking up the layout. It’s all about balance—and with a good designer, you’ll nail it.

Waterproofing and Ventilation

Open showers mean more of your bathroom is exposed to steam and spray, so moisture management is key.

  • Waterproof membranes beneath the tile are non-negotiable. Walls, floors, or any adjoining areas should be sealed up tight.
  • Ventilation needs to be on point, too. A high-quality exhaust fan (properly sized for the bathroom’s square footage) keeps humidity from hanging around, fogging mirrors, or even worse, inviting mold to the party.

And don’t forget splash-prone surfaces near the actual shower: a good waterproof sealant around vanities, windows, and even light switches is just smart thinking.

Heating Options

An open shower might feel light and airy, but sometimes that air gets a little too crisp—especially in winter. The fix? Warm things up underfoot.

  • Heated floors are a game-changer. They dry out water faster, reduce slipping risks, and make early mornings much more pleasant.
  • Heated towel racks or steam shower add-ons are worth looking into if you’re feeling particularly fancy (and your budget agrees).

Warm, dry, and dreamy? Yes, please.

Smart Features

Don’t forget those thoughtful little touches that elevate the everyday:

  • Adjustable handheld showerheads give you flexibility for rinsing, cleaning, or bathing the pup
  • Wall-mounted controls placed outside the splash zone let you warm things up before you step in

It’s all about building a space that feels easy, intuitive, and a little indulgent every time you step in.

Not sure where to start with the layout, plumbing, and finishes? We’ll help you design an open shower that works beautifully for your space and your lifestyle.

Maintenance and Cleaning: No Elbow Grease Needed

open shower design

Cleaning—everyone’s favorite form of self-care, am I right? Okay, maybe not, but hear me out: 

With an open shower concept, it doesn’t have to feel like a whole production. A part of what makes these showers so popular (besides the whole “looking gorgeous” thing, of course) is how much easier they are to keep sparkling.

With no doors, fewer corners, and minimal hardware, there’s simply less to scrub. And when you pair that with the right materials? Now you’re cooking with gas.

Let’s talk tile. For low-maintenance living, go with large-format porcelain. It’s non-porous, stain-resistant, and way easier to wipe down than those tiny mosaic patterns with a mile of grout. 

And speaking of grout, choose epoxy grout if you can. It resists stains, doesn’t crumble as easily, and says “no thanks” to mildew way better than traditional sanded grout ever could.

Ventilation plays a big part, too. After a shower, remember to crack a window or flip on the fan to help all the moisture clear out faster. It’s one of those simple habits that keeps mildew from ever getting a foothold.

As for the actual cleaning? Here’s how we keep it easy and breezy:

  • Daily rinse-downs: A quick spray with water keeps soap and shampoo from building up
  • Weekly wipe-downs: A vinegar-and-water mix (with a little Dawn, if you’re feeling sassy) knocks out scum and shine-killers
  • Microfiber cloths: Always swipe glass panels downward to avoid streaks, then buff dry
  • Scrub Daddy or soft brush drill attachments: Perfect for textured tile; scrubs without scratches
  • Don’t forget your storage: Clean under baskets and shower caddies; mildew loves to lurk in the forgotten corners

Bottom line? You really don’t need to turn into Cinderella to keep your bathroom looking fresh. A few smart choices up front—and a little love once a week—and you’re golden.

Open Shower Design Ideas for Every Style

One of the best parts about choosing an open shower concept? You won’t be boxed into a single “look.” 

Once the heavy doors and bulky frames are out of the picture, you’ll have freedom—joyful, design-happy freedom. Whether your style leans crisp and calming or bold and colorful, open showers are like a blank canvas for your bathroom dreams.

Here are a few ways folks are making the most of that creative flexibility:

Minimalist Spa-Style

Minimalist Spa-Style shower
Source: Gamble + Design

Think warm neutrals, clean lines, and materials that whisper instead of shouting. 

A frameless glass panel, a rainfall showerhead, and perhaps a little teak stool in the corner—yes, please. Add large-format porcelain tiles with soft veining to keep things sleek and low-maintenance. You can also extend those floor tiles right into the shower zone for a seamless, soothing feel. 

This style is all about less fuss, more exhale.

Rustic Charm With Natural Stone

rustic open shower design
Source: ArtFasad

If modern’s not your thing, don’t worry. Open showers can also work beautifully with more rustic, grounded aesthetics. Think rough-cut stone walls, wood-look tiles, and bronze fixtures—these can create a cozy and nature-inspired retreat that feels like a tucked-away mountain spa.

Bonus points for warm lighting and handmade-look finishes that add texture without stealing the show.

Bold Tile Moments

bold tiles in bathroom
Source: Storie Collective

Ready to make a statement? Open showers are perfect for showing off a pop of color or pattern. Try a geometric tile on the shower wall, a fun mosaic floor, or even just a vivid accent stripe to bring energy into the space.

And since there is no door blocking the view, your design choices get to shine. So, go ahead and let your personality show up in the tile.

Coastal or Boho Feels

Coastal open shower design
Source: Victoria de la Camara

Soft blues, sandy beiges, breezy whites—it’s like a beach house in your bathroom. Throw in textured tiles, natural wood accents, and maybe a little rattan or linen nearby to keep things light and easy. You can also mix in a shell-inspired tile or pebble flooring for extra beachy charm.

Oh, and don’t you worry:

Even a simple half wall or arched glass panel will provide enough splash protection while keeping that airy vibe intact.

Mix, Match, and Make It Yours

shower tiles ideas
Source: Erica Johnston Design

The beauty of open showers is how customizable they are. You can:

  • Blend matte and glossy finishes for subtle depth
  • Use tile bands or floor patterns to define the “shower zone”
  • Add a bench, floating shelves, or even dual showerheads if you’re feeling fancy
  • Go curbless or low-threshold, depending on layout and mobility needs

Whatever you choose, the layout adapts to you, not the other way around.

Need help pulling your ideas together?

We’ve designed everything from cozy spa nooks to high-impact family bathrooms—and we’d love to help bring your open shower vision to life.

Frequently Asked Questions

Are open showers cold without a door to trap steam?

They can be, especially in cooler climates or larger bathrooms. Heated floors, towel warmers, or overhead heating are more than enough to keep things cozy, though!

Do open showers work well in homes with kids or multiple users?

Yes, open showers can still work in homes with kids or several users, but you may want to add a half wall or frosted glass for privacy, especially in shared spaces or jack-and-jill bathrooms.

Will an open shower hurt or help my home’s resale value?

It depends on your market. In modern or urban homes, open showers can definitely be a big draw. In more traditional markets, buyers might still prefer enclosed options. 

How much does it typically cost to add an open shower?

Costs of adding an open shower can vary widely based on layout, materials, and plumbing. That said, you can expect a starting range of $5,000to $15,000 for a custom setup.

Can I convert my existing tub-shower combo into an open shower?

Usually, yes—with the right layout and drainage. It might require a full remodel, though, especially to slope the floor and waterproof the area properly.

Let’s Make Your Bathroom Your Favorite Room in the House

If you’ve been dreaming of a bathroom that feels more open, more calming, and a whole lot more you, the open shower concept might just be your sign. It’s not about chasing trends; it’s about creating a space that works beautifully for your life, every single day.

Whether you are starting from scratch or looking to refresh what you’ve already got, our team at Design on a Dime is here to help bring those ideas to life—practically, beautifully, and with plenty of heart.

Ready to chat about your remodel? Let’s set up a consultation.

Because bathrooms shouldn’t just work—they should wow.

Fresh & Fabulous Bathroom Floor Tile Ideas That Never Go Out of Style

Bathroom floor tile ideas may sound like just another home project, but honey, let me tell you—they can change the whole feel of your space faster than sweet tea disappears on a summer day. You can go from bland to brilliant without a complete overhaul. 

Whether your bathroom needs a complete refresh or just a little love underfoot, the right tile can bring it to life with personality, charm, and a whole lot of style. I’ve seen floors go from drab to downright dreamy, all with a few smart choices. 

So, if your bathroom’s been lookin’ a little tired lately, keep on reading. We’re about to walk through some ideas that’ll have you feelin’ inspired—and maybe even a little giddy.

Vinyl Tiles: Budget-Friendly, Beautiful, and Easy to Install

Vinyl Tiles for Bathroom
Source: DWK Interiors

If you’ve ever dreamed of dressing up your bathroom floors without maxing out your budget—or patience, for that matter—vinyl tiles might just be your new favorite fix.

These peel-and-stick beauties come in everything from sleek marble looks to cozy wood grain and bold patterns that know how to make a statement. They’re waterproof, wallet-friendly, and ready to turn up the charm without turning up the stress. 

Bonus? Many styles are low in VOCs, so your indoor air stays as fresh as your design.

Vinyl tiles are particularly forgiving for DIY enthusiasts:

Installation is as easy as follow-the-arrows, press it down, and boom—you’re in business. Just let the tiles acclimate to your space first (a little patience goes a long way here), then grab your tile cutter or jigsaw for those tricky edges.

Maintenance? It’s a cinch, too. No fancy cleaners needed—just a gentle wipe-down with diluted vinegar, and those floors will shine like they just got pampered.

For a fuss-free, fabulous floor that plays nice with both your budget and your style? Vinyl is the real MVP.

Need help selecting and installing your new bathroom floor? Design on a Dime’s expert flooring services are tailored to your style and budget!

Classic Ceramic Tile: Timeless, Tough, and Easy to Love

Ceramic Floor Bathroom Tiles

Let’s spill a little truth about ceramic floor tiles—they are a dependable classic that never goes out of style. Whether you are dreaming up sleek greys, bold blacks, or something with a little flair, ceramic tiles offer a timeless foundation that’s ready to handle whatever your bathroom throws at it. 

Plus, they’re one of the most budget-friendly options out there—perfect for big transformations and small updates alike.

What makes them such a smart pick? 

Well, for starters, they’re easy to clean. A quick wipe-down with warm water and a pH-neutral cleaner, and you’re good to go; no scrubbing marathons required. Just steer clear of harsh chemicals, and you’ll keep that gorgeous finish shining bright.

Ceramic and porcelain tiles (a close cousin) are fired at high heat, which makes them naturally dense and less porous. In other words, they stand strong against splashes, steam, and bath-time chaos. Go for a tile with the right abrasion resistance rating, and it’ll hold up like a champ in high-traffic areas.

As for style? You’ve got options for days

Hexagons, herringbone, and checkerboard mosaics—these are all classic patterns that always look fresh. Stick with timeless colors like white, black, grey, or sandy neutrals, or add a bold twist with jewel tones like navy or emerald. And if you want spa vibes, earthy beige or limestone-inspired tiles keep things warm and grounded.

Whatever your vibe, there’s a ceramic tile ready to bring it to life.

Porcelain Tile: Sleek, Strong, and Made for Real Life

Porcelain Tile

If your bathroom feels more like Grand Central Station some days, porcelain tiles are here to keep things calm, cool, and collected. This flooring favorite is not just pretty—it is practically bulletproof, standing up to steamy showers, muddy footprints, and the occasional shampoo bottle nosedive without batting an eye.

Porcelain is dense, durable, and waterproof—which makes it a no-brainer for high-traffic, high-moisture spaces. 

Whether you’ve got kids doing cannonballs into the tub or pets treating your bathroom like their personal spa, porcelain’s non-porous surface laughs in the face of all that chaos. It’s resistant to scratches, stains, and thermal shock, so those wild temperature swings don’t stand a chance.

And it doesn’t just perform—it stuns. Today’s porcelain tiles come in every style under the sun

Want that luxe marble look without the maintenance? Done. Obsessed with warm wood grains but allergic to refinishing? There’s a plank for that. 

From weathered clay to classic subway lines, glazed porcelain collections like ACCESS II™, ACTION™, AGIO™, AMALA™, and ANGELES™ serve up style in spades. 

Porcelain’s wide variety of colors, finishes, and patterns means there’s something for everyone, from rustic retreats to clean and contemporary oases. 

Large-format designs give your bathroom a modern, airy feel with fewer grout lines, while anti-slip finishes help keep busy spaces safe. And with dark and multi-tone options that hide dirt and footprints, you’ll spend less time scrubbing and more time soaking.

In short? Porcelain brings the looks, the strength, and the peace of mind. It’s bathroom beauty that works as hard as you do.

Want to see how these tile ideas come to life? Our bathroom remodeling service is all about bringing your vision to reality. Ready when you are!

Natural Stone: Earthy Elegance with a Touch of Drama

Marble tile for bathroom ideas
Source: Carian Design

Let’s be real—you want a bathroom that feels like a high-end retreat, not a sterile dentist’s waiting room. Natural stone tiles bring that grounded, luxurious energy with textures and tones that make you want to kick off your shoes and stay awhile.

Picture this: 

The cool touch of slate underfoot, the soft gleam of marble catching the morning light, or the sun-warmed tones of travertine wrapping your space in a quiet kind of luxury. 

Each stone brings its own personality: 

  • Granite adds strength and grit with style 
  • Marble turns your floors into literal works of art, reflecting sophistication
  • Limestone whispers of breezy coastal charm 
  • Slate knows how to set the mood for spa night, every night
  • Travertine delivers earthy warmth, begging you to go barefoot

Natural stone works beyond the bathroom, too, tying into patios, showers, or even accent walls, for a look that feels curated and connected. You can pair it with moisture-resistant paint and some textured natural fabrics, and you’ve got a space that’s built to last and designed to soothe.

It’s not just flooring—it’s a full-on vibe.

Mosaic Tiles: Big Personality in the Tiniest Pieces

Mosaic Tiles interior design Texas

Source: Carmit Oron

Ever looked at your bathroom floor and thought, this could use a little more sparkle—but without turning into a slip ‘n slide? 

That’s where mosaic tiles come in, bringing both beauty and built-in traction.

These little gems pack quite a punch—tiny hexagons, playful starbursts, soft arabesques, even pebbled textures that feel like a foot massage and look like art. And all those grout lines between the tiles? Hello, natural grip!

Whether you’re craving cozy charm with vintage-inspired stars, a bold pop with op-art hexagons, or want a handcrafted, authentic moment with medallions like Bohemian Grove or Cymbidium Flowers, mosaic tiles bring serious detail and soul to your space.

Love a nod to tradition? Curved scallops and arabesque borders hit that sweet spot between timeless and fresh. And with matte or textured finishes, these beauties give you style and safety—no slips and definitely no snooze-worthy floors.

From choosing the perfect tile to professional installation, Design on a Dime has your bathroom makeover covered. 

Wood-Look Porcelain: Warm Looks, Cool Confidence

Wood-Look Porcelain Tiles

If mosaic tiles are the life of the party, wood-look porcelain planks are that quiet friend who always shows up with calm vibes and great taste.

Think soft, weathered grays or that golden oak glow—inviting, right? These tiles serve all the warmth and charm of natural wood, but without the worry. 

No warping, no tiptoeing after a shower, and no holding your breath every time someone tracks in with wet feet.

Modern tech gives these planks high-definition grain and texture that feel like the real deal, and they’re built tough—resistant to water, scratches, humidity, and just about anything else your bathroom throws at them. Honestly, they’re absolute workhorses!

All that cozy wood charm, none of the high-maintenance fuss—porcelain planks bring easygoing beauty to your bathroom retreat.

For the Arbor Project, our team updated the bathroom floor with stunning wood-look porcelain tiles for that perfect balance of warmth and durability. 

Here’s why we love (and recommend) ’em:

  • 100% waterproof and humidity-proof (hello, steamy showers!)
  • Pet zoomies and muddy kids are no problem—these planks don’t scare easily
  • Compatible with underfloor heating, so your toes stay toasty
  • Chic, real-wood look fits rustic ranch, modern minimalist, or cozy cabin spaces

In short? All the comfort of wood, none of the drama. Just pure, easy beauty from the ground up.

Stay Grounded: Stylish Tiles With Textured and Non-Slip Surfaces

textured and non-slip tiles

Let’s be honest—nobody wants their bathroom floor doubling as an ice rink. And between all those steamy showers, wet feet, and the morning rush, traction isn’t optional—it’s essential.

Trust me, your toes (and tailbone) will thank you.

That’s where textured and non-slip tiles come to the rescue, offering a layer of safety without sacrificing your style. The secret? Look for a slip-resistance rating (also known as the COF—Coefficient of Friction) of 0.60 or higher in wet areas. 

I like to call that the anti-faceplant factor

Matte finishes and micro-textured surfaces are the quiet protectors, offering subtle grip that blends right in. Porcelain and honed natural stone bring both polish and practicality, while raised or embossed patterns provide just enough texture to keep little feet and aging joints steady.

And for those thinking long-term, choosing low-toxin, chemically neutral tiles helps keep your indoor air just as healthy as your footing.

Bottom line? Safe doesn’t mean boring. 

Your floors can look good, feel good, and help keep everyone on their feet—quite literally. 

Transform your bathroom floors with confidence—our Dream Team can deliver stunning results without breaking the bank.

Eco-Friendly and Budget-Savvy Bathroom Tile Choices

Eco-Friendly and Budget-Savvy Bathroom Tile Choices
Source: Cle Design

Want a floor that looks amazing, feels good underfoot, and is kind to both Mother Earth and your pockets? 

Oh, honey, sustainable’s never looked so stylish—or smart.

There’s a treasure trove of beautiful, earth-conscious tile options out there. 

Ceramic tiles made with recycled content—like Daltile’s collection—turn yesterday’s scraps into today’s showstoppers. And glass tiles? Those shimmering beauties come from post-consumer materials, making your bathroom shine with purpose.

Terrazzo is back in a big way, mixing chips of marble, quartz, and glass set in cement or resin into durable and artsy floors that won’t break the bank—but are packed with personality. And let’s not overlook classic linoleum; crafted from renewable linseed oil, it’s biodegradable, resilient, and easy to care for.

If you’re looking to stretch that budget, smaller-format tiles reduce waste during installation, while certified recycled options often save you money over time thanks to their durability and low upkeep. Plus, these eco-friendly choices mean fewer toxins and allergens, making your bathroom healthier for everyone under your roof.

Sustainability doesn’t mean sacrifice. 

It means making a choice that’s beautiful, thoughtful, and built to last, just like your dream space.

Frequently Asked Questions 

How do I know which tile material is best for my bathroom’s humidity levels?

When it comes to bathrooms and other high-humidity spaces, look for tiles with high water resistance like porcelain or vinyl, and consider sealing grout to keep moisture out.

Can I install bathroom floor tiles over existing flooring?

Yes, you can install bathroom floor tiles over existing flooring, but the surface must be clean, level, and in good condition to ensure proper adhesion and durability.

What’s the best way to prevent grout from discoloring over time?

The best way to prevent grout discoloration is to apply a grout sealer regularly and clean spills promptly to protect against any stains and mildew.

Are textured tiles harder to clean than smooth ones?

They may require a bit more effort to clean, but at the same time, they offer better slip resistance, making them safer for wet areas. 

How long should I expect different tile materials to last in a bathroom?

With proper care, porcelain and ceramic tiles can last decades, while vinyl might need replacement after 10–20 years, depending on the level of wear and tear.

Your Bathroom Floor, Reimagined

Your bathroom floor is more than a surface—it’s the foundation for comfort, style, and, if you think about it, lasting memories. Whether you’re drawn to timeless elegance, modern flair, or intricate charm of mosaics, there’s a perfect tile waiting to bring your vision to life. 

Don’t settle for dull—choose a design that reflects your style and boosts functionality.

Ready to turn those ideas into reality without the stress? Design on a Dime can guide you from inspiration to installation with expert advice and hands-on support. 

Get in touch with our team today and let’s create a bathroom floor you’ll love stepping onto every day.

10+ Fresh Walk In Shower Ideas to Elevate Your Everyday Routine

Good walk-in shower ideas aren’t just about style—they’re about creating a space that feels like a breath of fresh air every time you step inside. Done right, they can turn your bathroom into a sleek, oh-so-relaxing retreat. 

Whether you’re planning a full-on bathroom renovation or just daydreaming about your perfect retreat, the right inspiration can turn even the simplest shower into something special. Think clean lines, easy access, and a sprinkle of personality that makes you smile every morning. 

Around here, we believe your bathroom should work hard and look good doing it. If you’re ready to bring a little beauty, comfort, and function into your daily routine, keep on scrolling. We’ve prepared plenty of ideas to get you started!

Spa-Inspired Shower Features for Ultimate Relaxation

Spa-Inspired Shower Features for Ultimate Relaxation
Source: Ling Interiors

Let’s be honest—after a day of juggling errands, work, and maybe a toddler meltdown or a dog who thinks the bath is lava, don’t you deserve a moment that’s just for you?

Of course you do, sugar! 

With the right walk-in shower setup, you can turn your daily rinse into a mini escape. 

Just picture a rain showerhead delivering a gentle cascade while a handheld sprayer tackles the tension in your shoulders. A curved shower arm keeps water where it belongs, protecting nearby surfaces, and adds a little modern drama to your setup.

Want a hint of hot tub luxury without the upkeep? Built-in bench seating and steam-friendly features can bring all that warm, soaking comfort right into your shower.

[image]

Zero-entry floors offer a smooth, trip-free step inside; easy on the feet, easy on the eyes. And how about those directional body jets? They’re like little personal masseuses, tuned to hit all the right spots.

Finish it off with sleek wall-mounted controls, and honey, you’ve got a spa day waiting for you every day.

Ready to bring your dream shower to life? Let our team handle the details—from layout to fixtures—with a full-service bathroom remodel.

Materials and Textures That Bring Your Walk-In Shower to Life

Materials and Textures That Bring Your Walk-In Shower to Life
Source: Mister and Mrs. Sharp

Your walk-in shower should do more than just “work”—it should feel like a daily indulgence. The secret? Thoughtful material choices and texture pairings that add richness, style, and a little wow factor every time you step inside.

Luxury showers often play with unexpected combos—think natural stone or marble warmed up with gold accents, or the contrast of wood floors with matte black or bronze fixtures. Big-format tiles get rid of grout lines (and make cleanup a breeze), while frameless glass doors keep the space feeling more open, light, and effortlessly modern.

Porcelain tile remains a superstar choice—tough, water-resistant, and beyond versatile in both color and finish. Whether you prefer warm neutrals or deep moody tones, porcelain delivers style without the fuss

You can pair it with sleek granite or stone surfaces that resist stains and scrubbing, and you’ll be blending beauty with practicality.

Don’t underestimate the power of texture, either. 

Gold fixtures paired with mosaic tiles  bathroom design
Source: Maeve Design Collective

Smooth glass panels with black metal hardware add that final jewelry-like touch, while wood elements add warmth and architectural interest. This mix-and-match approach turns your shower into a space that’s both functional and fabulous.

If you want a quick cheat sheet for high-end impact, try these winning combos:

  • Natural stone and glass for timeless spa vibes
  • Gold fixtures paired with mosaic tiles for dazzling contrast
  • Bronze hardware and wood for cozy sophistication

With the right materials and textures, you’re not just renovating a bathroom—you’re creating a retreat you’ll never want to leave.

One of our favorite examples is the Arbor Project. We paired warm wood cabinetry with crisp black-framed glass and raised ceramic tiles to strike that perfect balance between modern edge and spa-like calm. It’s a great reminder that contrast—when done right—can feel both elevated and effortless.

Eye-Catching Color Combos That Make Your Shower Pop

Eye-Catching Color Combos That Make Your Shower Pop
Source: Jessica Reynaud

Who says your shower has to play it safe? In 2025, bold color is having its moment—and bathrooms are better for it.

Picture stepping into a wash of sapphire blue tiles that shimmer like deep ocean water, or surrounding yourself with emerald green walls that channel rainforest retreat energy. 

These rich colors aren’t just trendy, sugar—they’re transformative, turning everyday showers into vivid, mood-boosting rituals.

Want to really turn heads? Go bold with a splash of ruby red or a luxe wine-and-burgundy pairing. These deep tones create instant drama, especially when they’re combined with warm brass or gold fixtures that bring a touch of grown-up glam.

blush pink tile
Source: Lisa Staton

You can even play with contrast for a little retro flair—think navy and mustard yellow, or charcoal and blush pink for a soft-yet-striking twist. 

And if you’re not ready to commit wall-to-wall, don’t worry. You can try using color in small doses—accent niches, ombre tiling, or a single statement wall behind a glass enclosure; these can deliver that wow factor without overwhelming the space.

With the right mix of hue and texture, your walk-in shower can become the most exciting part of the house, and the best part is—no paintbrush required.

Mixed Tile Shapes That Add Personality

Mixed Tile Shapes That Add Personality

How about letting your shower show off a little? Mixing tile shapes is one of the easiest ways to take your walk-in from plain to personality-packed.

Think outside the rectangle—pair hexagonal floor tiles with sleek vertical wall planks, or break up a wall of subway tile with diamond mosaics that draw the eye and keep things interesting. 

Even small touches—mixing matte and glossy finishes, for example—can create a dynamic contrast that feels intentional and elevated.

This look isn’t just playful—it’s smart design. 

You see, layering different shapes, patterns, and finishes can bring texture, movement, and depth to your space. And when it’s done right? It looks downright custom.

A few stylish combos to try:

  • Chunky horizontal tiles with skinny vertical strips for a modern, rhythmic effect.
  • Mosaic-tiled niches against large-format matte tiles to spotlight your favorite products.
  • Contrasting grout colors to help shape shifts stand out, especially in accent areas or borders.

Want even more life in your layout? Elements of biophilic design with a touch of greenery—be it through a living wall, a plant shelf, or leafy tile motifs—bring a natural softness that complements all that geometry.

It’s all about balance. With the right mix, you’ll get something bold, polished, and totally one of a kind.

Not sure how to balance bold style with functionality? Design on a Dime specializes in bathroom remodels that are both practical and striking!

Luxe Metallic Accents That Shine in All the Right Places

Luxe Metallic Accents Tiles for Bathroom
Source: Mandarin Stone

Want a walk-in shower that feels a little extra—in the best way? Add a touch of metallic and watch your bathroom go from everyday to effortlessly elegant.

Metallic-look porcelain tiles are a favorite for a reason: they’re rust-proof, moisture-resistant, and built to last, all while serving serious style. High-gloss ceramic tiles can bounce light around your shower like an actual mirror, instantly making the space feel bigger, brighter, and more luxurious.

You could lean into the industrial vibe with brushed steel or oil-rubbed bronze finishes—or channel that old-Hollywood glam with warm gold or champagne tones that catch light like fine jewelry. And if you’re all about drama, geometric metal inlays paired with glass mosaics add a modern edge that turns heads.

For something a bit more understated, muted gray or charcoal metallic tiles offer a sleek, smoky finish that plays well with both modern and classic palettes.

Designers often use metallic accents to highlight niches, borders, and statement walls—little touches that pull double duty on style and function. On that note, you can also try combining metallic finishes with deep blues, emerald greens, or crisp whites for a combo that feels high-end without trying too hard.

Because who says spa-worthy can’t sparkle?

Functional Walk-In Shower Layouts That Make Sense

Functional Walk-In Shower Layouts That Just Make Sense

Whether you’ve got a cozy half-bath or a roomy primary suite, the right layout makes all the difference in how your walk-in shower feels and functions. Because let’s be honest—nobody wants their morning rinse to feel like bumper cars in a car wash.

A well-planned layout keeps things looking sleek, working smoothly, and yes, even helps avoid those early morning traffic jams. Unified flooring that runs from your shower through the rest of the bathroom doesn’t just look polished—it also creates the illusion of more space, even in smaller layouts.

Here are a few layout ideas that pull double duty:

  • Corner showers tuck perfectly into tight spots, making them ideal for smaller bathrooms without sacrificing style.
  • Alcove or galley-style showers run between two walls or next to a vanity, making smart use of longer, narrow spaces.
  • Wet room designs ditch the barriers completely, blending the shower with the rest of the space for a clean, open feel.

It’s all about creating flow that feels natural—and looks good while doing it.

Ready for an upgrade? Let’s make your shower downright irresistible.

Big vision, small space? Our Dream Team is known for creative layouts that can turn tight bathrooms into standout spaces. Let’s rework your shower.

Sustainable Walk-In Shower Ideas That Don’t Skimp on Style

Sustainable Walk-In Shower Ideas That Don’t Skimp on Style

If you’ve ever thought “eco-friendly” meant plain, boring, and beige—think again. Your walk-in shower can be kind to the planet and look like it belongs in a boutique hotel.

Start with the surfaces. Lime plaster and natural wax finishes offer a sleek, spa-like look without the harsh chemicals—no VOCs, no fuss. These breathable materials also resist mold and mildew, so you’re not just going green, you’re staying clean.

Ain’t that a win-win?

Instead of plastic panels or standard tiles, consider reclaimed wood or sustainably sourced birch plywood for shelving and accents. They’re durable, warm, and tell PVC to hit the road.

Want to skip scrubbing? Grout-free plaster repels moisture and doesn’t beg for bleach.

And behind the scenes? Look for low-emission materials and responsibly sourced products. Because saving water and energy never goes out of style.

Your shower dreams can sparkle without trashing Mother Earth—now that’s what I call smart, stylish living!

Walk-In Shower Lighting Ideas That Bring the Glow

Walk-In Shower Lighting Ideas
Source: Ripples Bathrooms

Let there be light—and not the boring, builder-grade kind. The right lighting can take your walk-in shower from “meh” to magazine-worthy in the flick of a switch.

Forget gloomy corners and harsh overheads. Your shower deserves lighting that flatters, functions, and adds a little flair.

Try a few of these standout ideas:

  • Start with recessed downlights—angled just right, they cast soft, elegant light across the tile (and bonus: they’re splash-safe and steam-ready).
  • If you want a little mood lighting, waterproof LED strips tucked into niches or along the base offer a soft ambient glow, perfect for late-night unwinding. Some even feature color options, so you can match the vibe—calm blue one day, warm gold the next.
  • A pendant light—yes, even in the shower—is a stylish and unexpected twist that adds personality while still being totally practical.

The secret? Look for fixtures rated for damp or wet environments so your lighting stays safe and stunning.

Who said showers can’t sparkle?

Smart Storage Ideas for a Clutter-Free Walk-In Shower

Smart Storage Ideas for a Clutter-Free Walk-In Shower

Let’s be honest here—nothing ruins a sleek walk-in shower faster than a pile of shampoo bottles teetering like Jenga blocks. If your razor’s gone MIA again or the conditioner’s doing laps around the drain, it’s time for a little storage glow-up.

Now, hear me out: 

Recessed niches are a game-changer. They’re built right into the wall, look clean and custom, and keep all your favorites right where you need them—without sticking out like a sore thumb.

Got an awkward corner? Slide in a few corner shelves to turn that dead space into chic, practical storage.

Adjustable caddies are a renter’s dream—plus, they’re easy to move and clean, and ideal if your product lineup changes as often as your playlists.

And if you’d like something tailor-made, modular systems let you snap together shelves or bins to match your routine—because your shower should fit you, not the other way around.

Need a cheat sheet? Here’s a quick roundup:

Storage SolutionBest Feature
Recessed NichesBuilt-in, seamless, maximizes space
Corner ShelvesFits unused corners, super stylish
Adjustable CaddiesMoveable, perfect for renters
Modular SystemsCustomizable, mix and match options

Need help designing a shower that fits your style and space? Book a bathroom remodel consultation and let’s create something beautiful—and functional—together.

Premium Fixtures That Elevate Your Shower Experience

Premium Fixtures That Elevate Your Shower Experience

If you want your walk-in shower to feel like a daily retreat, the fixtures are where the magic really happens. It’s not just about function—it’s about style, comfort, and a little touch of luxury that makes every rinse feel special.

Step under a rain showerhead finished in matte black or shimmering gold, and suddenly, your bathroom is not just a place to get clean—it’s your personal spa. Multi-spray showerheads take coverage to the next level, wrapping you in water just right, while digital controls put your perfect temperature at your fingertips. 

No more guessing games or chilly surprises.

You get the idea.

Oh, and don’t overlook the impact of a thoughtfully designed floor-level tray. These create an open and seamless look that complements your premium fixtures and keeps your space feeling fresh and modern.

Feeling a little fancy? Touchless taps add both convenience and a polished finish for that “I have my life together” level of convenience. And when the hardware is built on solid brass, you’re investing in beauty and durability that’ll outlast even your busiest plant collection.

Add thermostatic mixers to the mix—because nobody wants their shower interrupted by a cold snap—and you’ve got a high-end setup that’s elegant without ever feeling flashy.

Once you’ve experienced this level of comfort and style, you might just never want to step out.

Want premium fixtures without the renovation stress? The Design on a Dime team manages every step of the remodel so you can enjoy the finished result. Let’s get to work!

Customization Ideas To Make Your Walk-In Shower Truly Yours

Customization Ideas To Make Your Walk-In Shower Truly Yours

Darlin’, your walk-in shower should be as unique as you are—not just four walls and a nozzle, but a space that feels made-to-order, down to the last detail.

Start by thinking beyond the basics. 

Want to turn your shower into a soothing escape? You already know that multi-directional body sprays and rain showerheads with adjustable pressure are the way to go. And for a touch of luxury? Consider a steam shower upgrade or a heated floor system so you never have to brave cold tiles again.
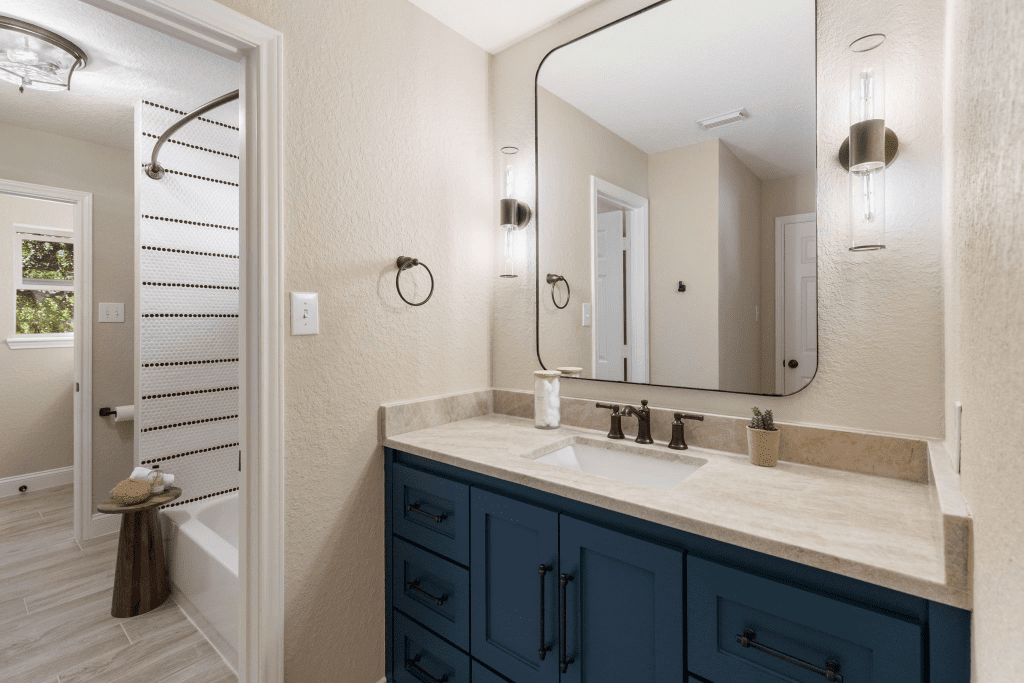
Space constraints? No problem. Custom curved or angled glass doors will save room without sacrificing style, while a built-in fold-down bench offers the perfect spot for rest, shaving, or soaking up the calm.

For those who love tech, smart shower systems let you preset your perfect water temperature and flow, even start your shower from your phone—imagine stepping into warmth the moment you walk in. 

Cleaning headaches? Opt for seamless, grout-free wall panels—slick, easy to wipe down, and resistant to mold. 

The point is: 

Your shower should reflect your lifestyle, your taste, and your love for a little everyday luxury. 

And with all these smart customizations, you’re not just stepping into a shower—you’re stepping into your personal sanctuary.

Frequently Asked Questions

Can I convert a tub into a walk-in shower without a full remodel?

Yes, tub-to-shower conversions are common and often require less construction than a full-blown remodel, especially with prefab shower kits and low-threshold pans.

What’s the average cost of a custom walk-in shower?

Prices vary widely based on materials, size, and features—but most homeowners spend between $6,000 and $15,000 for a custom walk-in shower installation.

How do I keep a walk-in shower from leaking?

Proper waterproofing, sloped floors, and quality seals around doors and joints are key to preventing leaks. A professional installer will ensure everything drains correctly.

Are there walk-in shower options for small bathrooms?

Yes—corner showers, sliding glass panels, and minimalist layouts can work beautifully in compact spaces without sacrificing style or function.

What’s the best way to clean a walk-in shower with minimal effort?

Use a squeegee after each use, choose large-format tiles or grout-free panels, and install a handshower for easy rinsing during cleanup.

Let’s Design Your Shower to Fit Your Life

The best walk-in showers don’t simply look good—they work beautifully with your lifestyle. Whether you’re craving a spa-like escape, a stylish upgrade, or just something easier to clean and maintain, smart design makes all the difference.

At Design on a Dime, we specialize in creating spaces that reflect you—your needs, your tastes, and your daily rhythms. 

If you’re ready to stop daydreaming and start planning, get in touch with our team. We can help you bring your shower vision to life, one detail at a time.

Ultimate Shower Remodel Guide: Design, Cost and Expert Tips

Ready to create a shower space that is as practical as it is indulgent and you need a shower remodel guide to walk you through the process? Say no more! 

Sleek tiles, elegaant fixtures, and a showerhead that mimics a gentle rain—whether you’re going for something simple and modern or a luxurious, spa-like retreat, we’ve got you covered. 

The right design, budget, and upgrades can make all the difference between a dream shower and a pricey headache. But before you start tearing things apart, you’ll need a solid plan.

Interested in learning how to create your dream shower oasis? Okay, then. Grab a cup of coffee (or a sweet tea, if that’s your thing), and let’s go over everything you need to know to make your shower remodel a smooth, stylish success!

Cost Estimation: How Much Does a Shower Remodel Cost in Texas?

shower remodel cost Texas

Alright, let’s talk about the big elephant in the room: the cost of remodeling your shower. It’s not exactly pocket change!

On average, a full remodel sets you back $7,000 to $8,000. Sure, if you’re just jazzing up the fixtures, you might spend $1,000 to $2,000. But if you’re dreaming of a high-end, custom look, you could be splurging over $15,000. 

If you’re considering a full-blown tub-to-shower conversion, expect to pay anywhere from $1,500 to $8,000. In this case, size matters, too—those 30×60″ units can range from $750 to $5,300.

Expect to spend $7,000–$8,000 for a full remodel, or over $15,000 for a custom look.

A big factor? Labor and materials—both of which can vary depending on where you are. If you’re in a big city like Dallas or Houston, expect prices to be a bit higher.

Fancy tiles and high-end fixtures might tempt you, but they can also make your budget do a disappearing act. Acrylic is cheaper ($500–$2,500) than custom stone ($40–$65 per sq. ft.) and ceramic tiles. You can go with paint instead of tiles to cut down on material costs. A gallon of high-quality paint costs around $30 to $70, making it a truly budget-friendly option.

And let’s not forget about labor costs; they can eat up 40–60% of your budget, with plumbers in Texas typically charging $45 to $200 an hour. 

Keep an eye on unexpected expenses, too—because, let’s face it, surprises are fun at parties, not in your budget! And don’t forget permits—they can range from $175 to $2,000, depending on where you live.

Hiring professionals that specialize in bathroom remodeling can save you time and stress, even if it means spending a bit more.

Key Layout and Design Decisions 

bathroom remodel cost

Alright, let’s get this shower party started with some layout magic!

There’s a lot that goes into a shower remodel—from optimizing the bathroom’s flow and picking materials that laugh in the face of moisture to maintaining proper ventilation. And it all starts with the layout. 

It’s crucial to consider the location and size of the shower to ensure it fits within your bathroom’s existing layout. With a bit of strategic thinking (and some luck), you’ll have a shower space that’s not just functional but also a total showstopper. 

You’ll find a ton of inspiration for your bathroom remodel here!

Optimize the Bathroom Layout

The goal here is to create a bathroom that feels like a soothing sanctuary rather than a cramped puzzle. That means you’ll have to make some savvy design decisions to optimize the layout and transform the space into a blend of style and function.

Here’s what you can do:

  • Swap the tub for a shower to save precious space and enhance flow.
  • Go vertical and make use of available wall space with tall cabinets or linen columns.
  • Consider corner installations; they’re perfect for sinks and showers and allow you to use every inch.
  • Choose sliding doors; they’re sleek and minimize obstructions.
  • Separate wet and dry zones to keep things organized and functional.

When mapping out your bathroom layout, make sure there’s plenty of room to move around and use the available fixtures. Nobody wants to shimmy past the sink just to hop in the shower! With these tips, you’ll have a bathroom that’s not just stylish but also spacious enough for you to bust a little two-step whenever the mood hits.

Select Durable Materials

Now that you’ve got your bathroom layout sorted, let’s make sure it stands the test of time with some smart material choices. 

And honey, you’ll have quite a few options here: 

  • High-performance materials like laminate panels are waterproof, scratch-resistant, and mimic stone so well you’ll do a double-take. 
  • Solid surfaces or cultured stone are non-porous champs, easy to clean, and keep cracks at bay. 
  • Fiberglass panels are your new best friend if you’re on a budget—they’re affordable and waterproof, perfect for a DIY project. 
  • Natural stone offers unique patterns from irregular tile formation, adding a one-of-a-kind touch to your design. 
  • Granite tiles bring heat resistance and style in spades, adding a touch of luxury. 
  • Porcelain tiles are your go-to for wet areas—they’re less porous and more durable than ceramic, and hold up well in Texas humidity. 

With these materials, your shower will be both fab and functional!

Plan for Effective Ventilation

While you’re busy dreaming up the perfect shower space, let’s not forget about the key element of ventilation—because nobody wants to turn their bathroom into a hot, steamy swamp!

Here’s how to tackle this:

  • Position the fan as close to the shower or tub as possible to capture moisture efficiently, ideally keeping it within 6 feet of the exterior vent.
  • Vent directly outside—no attics or crawl spaces (unless you’re into surprise mold… which you’re not!).
  • Choose a fan with the right CFM rating for your bathroom size, and go for an ENERGY STAR-rated model to keep things efficient and save energy.
  • Timer switches and humidity sensors are your best friends for turning the fan on when needed.
  • Keep the duct runs straight, short, and insulated if you live somewhere chilly. 

A well-ventilated bathroom isn’t just a matter of comfort—it’s crucial to prevent moisture buildup and protect indoor air quality, ensuring a healthier home environment and keeping your shower looking brand-new for years to come.

Choosing the Right Shower Type

shower remodel cost in Texas

Now that we’ve tackled the not-so-tiny matters of cost and layout, let’s talk about choosing the right type of shower.

Each option has its own charm—all you’ve got to do is find what tickles your fancy:

  • Electric showers: Ideal for homes with gravity-fed or combination boiler systems. These use cold water only, heating it only when required, which makes them both efficient and straightforward.
  • Mixer showers: Love a good mix? These require separate hot and cold water supplies and work best with traditional or unvented systems. Just be sure your water pressure is around 1-3 bar, or you might need a pump.
  • Power showers: Your water pressure is on the lower side? No problem—these include built-in pumps to give your water flow a boost.
  • Digital showers: For those who love a touch of modern tech, these showers offer precise temperature control and sleek features for that futuristic vibe.
  • Eco showers: Water-saving wonders that don’t skimp on performance—great for the eco-conscious.
  • Rain showers: Going for a spa retreat type of vibe? These showers are designed to mimic a gentle downpour for a truly luxurious experience. 

And while we’re at it: 

Choosing the right type of shower doors—be it sleek glass or a classic frame—that fits your dimensions and complements the design aesthetic, is key to tying your whole look together.

Feeling overwhelmed with options? That’s where we come in. Our team takes your ideas and turns them into reality without the guesswork—or the expensive mistakes.

Demolition and Preparation Steps

bathroom design remodel

Alright, folks, let’s roll up those sleeves and dive into the chaos that is the demolition phase!

If you’re going down the DIY route, you’ll need to gather a few tools—including hammers, pry bars, and possibly even a reciprocating saw. Most importantly, think about safety. Suit up with goggles and gloves and keep additional safety gear on hand to minimize the risk of injuries.

Before you get down to work, be sure to clear out the bathroom clutter—you don’t want soap dispensers flying around, do you?

Oh, and don’t forget to shut off utilities; we’re avoiding geysers and electrical zaps here. 

Cover the floor, protect your surroundings, put that DIY armor on—and get to work. Tackle the vanity, toilet, and shower fixtures, leaving no mirror or trim in your path unturned.

Shut off utilities to dodge unexpected waterworks and shocks; safety gear on, it’s go time!

Keeping things tidy during demolition can be tricky. The key is to plan for disposal of demolished items like toilets and sinks to avoid accumulation of debris—both in your home and on the curb.

A Quick Word on Waterproofing Techniques 

When we say “prepare for a shower remodel,” we mean “waterproofing.” Why? Because nobody wants a soggy bathroom. 

So, once you’re done with the demolition, you’ll need to plan for proper waterproofing to prevent leaks and moisture damage. 

Clean the area thoroughly, checking for any sneaky mold, and get ready to apply a waterproof membrane. 

Here are the most commonly used options: 

  • Liquid Membranes: Roll on layers with a paintbrush; they’re like a raincoat for your shower.
  • Sheet Membranes: Stick them on, ensuring there’s at least 2 inches of overlap.
  • Foam Kits: These kits typically include foam wallboards and shower bases, combining structural stability and waterproofing. 
  • Advanced Tricks: Use Kerdi bands around pipes and screw holes, and flood-test your shower pan for leaks.

Plumbing and Electrical Updates

bathroom design

You’re already giving your bathroom a facelift, so why not throw in some plumbing and electrical updates while you’re at it? 

For one, it keeps your shower space safe and ensures that it can handle any changes in layout and fixtures. And two, it’ll significantly increase the resale value of your home; modern systems are appealing to potential buyers. It’s win-win all around.

Here are some upgrades you might want to add to your to-do list: 

  • Low-flow fixtures will save both water and your wallet, lowering your bills. Texas summers get hot, and water conservation matters.
  • Tankless heaters mean endless hot showers—minus the bulky tanks.
  • Wider pipes improve water pressure, making you feel like you’re under a waterfall.
  • Secondary drainage will prevent water buildup and accommodate new fixtures.
  • Single lever handles allow for easier water control and add a sleek and modern look.

Look, we love a good DIY project, but some remodel tasks are better left to the experts—and any sort of plumbing or electrical updates are one of them. Just reach out to us and we’ll let you know if it’s time to call in the pros.

Fixture Installation Process

cost of bathroom remodeling

Once your plumbing and electrical updates are in place, it’s time to install your shower fixtures. 

Here are the key steps that will ensure everything functions smoothly while preventing leaks and water damage: 

  • Prep first by shutting off the water supply and blocking the shower drain with a cloth to prevent small parts from falling in.
  • Secure the shower column by attaching it to the valve’s upper outlet; you want a sturdy foundation.
  • Install the shower arm at the preferred height, wrap it with Teflon tape, and seal those holes with silicone to keep water from sneaking in.
  • Decide between a screw-on or slide-on tub spout and install it accordingly to ensure a secure fit.
  • Seal everything by applying silicone sealant around all fixture access holes to stop any pesky leaks.

Voilà, your shower’s looking sharp—and, most importantly, leak-free!

If you’d rather skip the measuring, cutting, and drilling, our team can handle all the details and give you a finished look that’s both stylish and sturdy.

Tiling and Finishing Details

shower design

Ready to transform your shower from drab to fab?

Let’s chat about picking the perfect tiles—whether you’re going for the chic gloss of marble or the sturdy charm of porcelain, your choices are endless. 

When selecting tiles, consider the slip resistance and durability of the material to ensure safety and longevity in your shower space. We’ll also cover the nitty-gritty of grout and caulk, and why waterproofing isn’t just a good idea—it’s your shower’s best friend. 

Here’s a pro tip:

Consider installing a single piece shower pan; it simplifies maintenance and minimizes the risk of leaks compared to a traditional tile floor.

Tile Selection Considerations

You’re about to step into your shower, but instead of feeling like a spa retreat, it’s more like a slip ‘n slide waiting to happen. Doesn’t sound fun, now, does it?

Safety is key here—and slip-resistant tiles are a must. Each year, around 234,000 people over 15 suffer bathroom injuries—mostly from falls. That’s all you need to know about the importance of slip-resistant flooring. 

So, let’s make smart choices:

  • Large format tiles reduce grout lines, creating a smooth, elegant look in small spaces.
  • Mosaic tiles will feature many grout lines—and lots of grout lines means better grip for your toes.
  • Textured surfaces, like honed stone or ceramics, result in better footing.
  • Proper tile sizing keeps things balanced; opt for small tiles for floors, and big ones for walls.
  • Ceramic and porcelain handle moisture like champs; they are the leading waterproof options.

Of course, you shouldn’t forget about design harmony—be sure to match the tile styles with your bathroom’s vibe. The Design on a Dime team can help you with that, so don’t hesitate to schedule a consultation

Grout and Caulk Applications

Alright, time to talk about grout and caulk—your bathroom’s unsung heroes. 

Grout fills those pesky gaps between tiles, keeping them snug and in place. It’s a mix of cement, sand, and water, or sometimes epoxy for extra strength. Dark grout can add drama, while lighter shades make spaces feel airy. 

Caulk is like grout’s flexible cousin. When properly applied, it seals moving parts—think shower corners and tub edges—preventing moisture infiltration and maintaining water-tight seals, which ensures the longevity of your bathroom surfaces. Silicone caulk is a bathroom favorite, thanks to its mold-resistant and waterproof nature. 

Here’s a quick table to break it down:

FeatureGroutCaulk
UseTile jointsDynamic joints
Best forStatic areasAreas with movement
Material Cement-sand-water or epoxySilicone or acrylic
Application toolRubber floatCaulking gun

Adding the Final Touches

bathroom decor

Now that the heavy lifting is done, it’s time for the fun part—those little details and finishing touches that take your shower from basic to breathtaking. 

For instance, upgrading to a rainfall shower head could make you feel like you’re in a tropical paradise, while sleek towel warmers add a spa-like, luxury touch. And how about embedding LED lights into your shower niche for a dash of style? 

It’s all about mixing practicality with flair.

Want to make your bathroom feel bigger and brighter? Smart fixtures like backlit LED mirrors offer the perfect glow for getting ready.

Even the smallest details can make a big impact. Statement hardware—think unique knobs or handles—can add a touch of class without breaking the bank. 

And don’t forget a little greenery! Add a succulent or two, and suddenly your shower isn’t just a place to rinse off—it’s a personal retreat.

Ready to Transform Your Shower?

There’s nothing quite like stepping into a freshly remodeled shower—a private retreat where every detail reflects your unique style. But while it’s tempting to focus solely on beautiful tiles and sleek, new fixtures, you should be mindful of the potential challenges that come with any remodelling process—and your budget, too. 
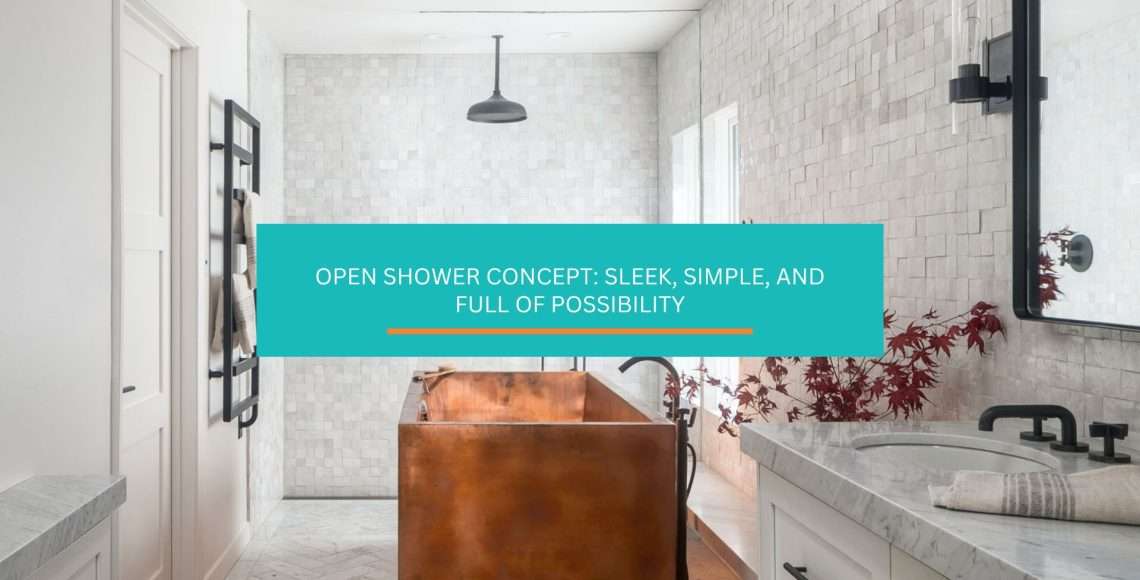
Don’t worry, though—your dream shower space is within reach! 

Whether you’re looking for guidance or a little extra inspiration, you can schedule a consultation with the Design on a Dime team. 
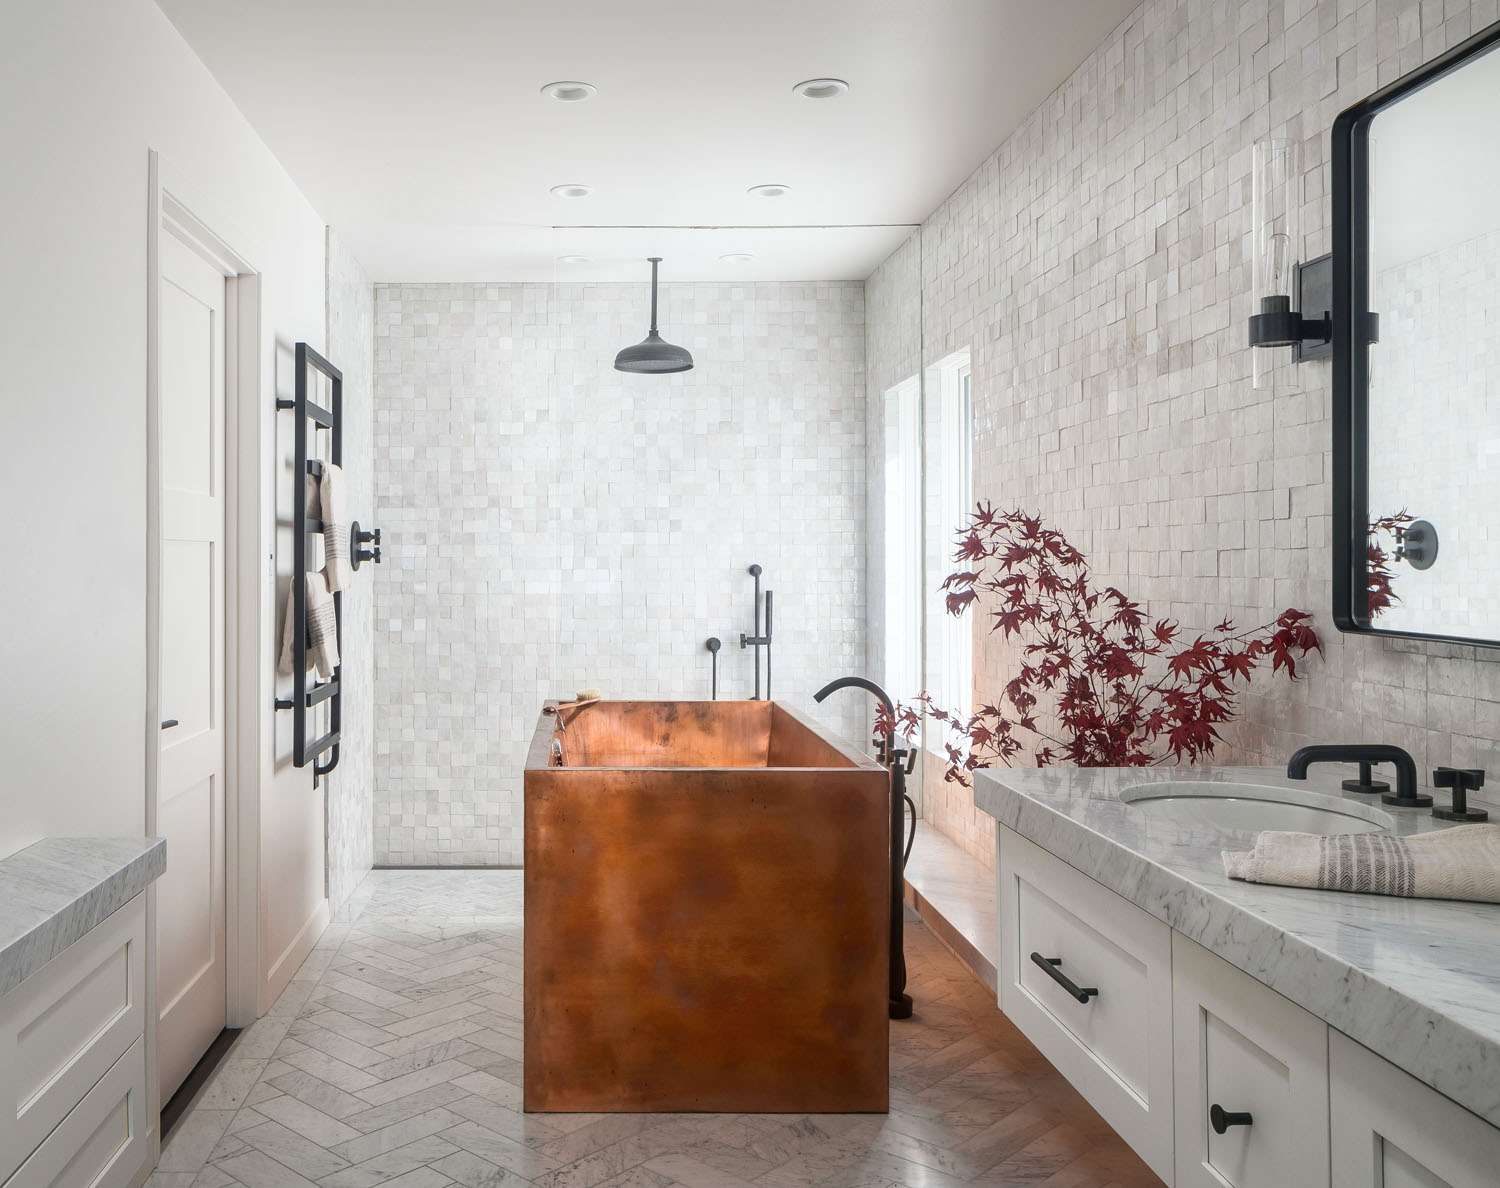
Let’s chat about your ideas and make them a reality. Contact us today!

Contact us to schedule your consultation!