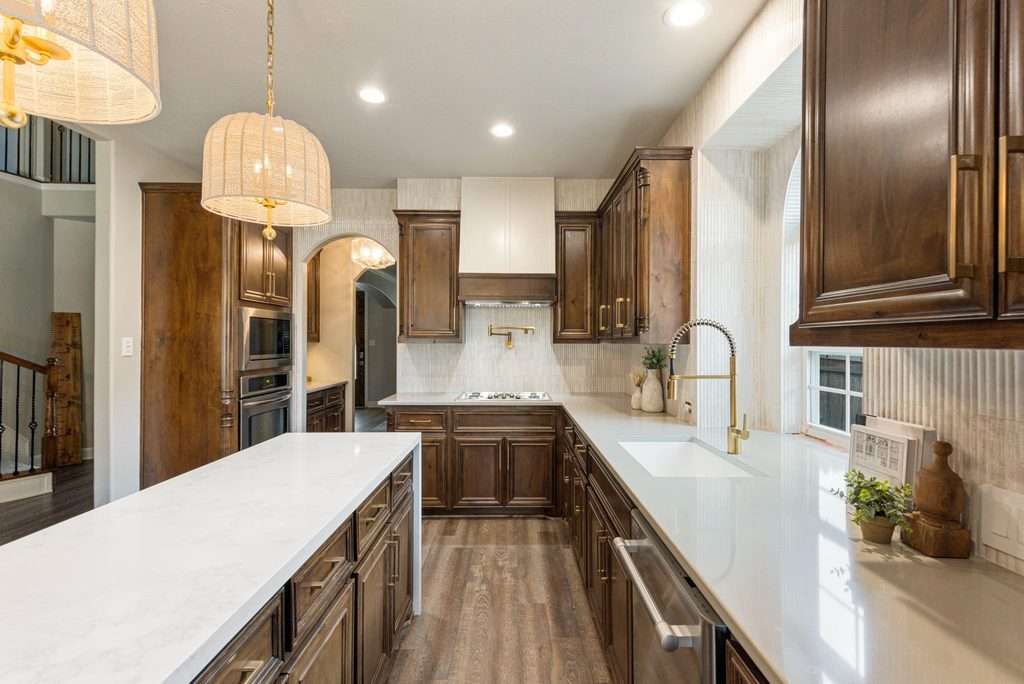
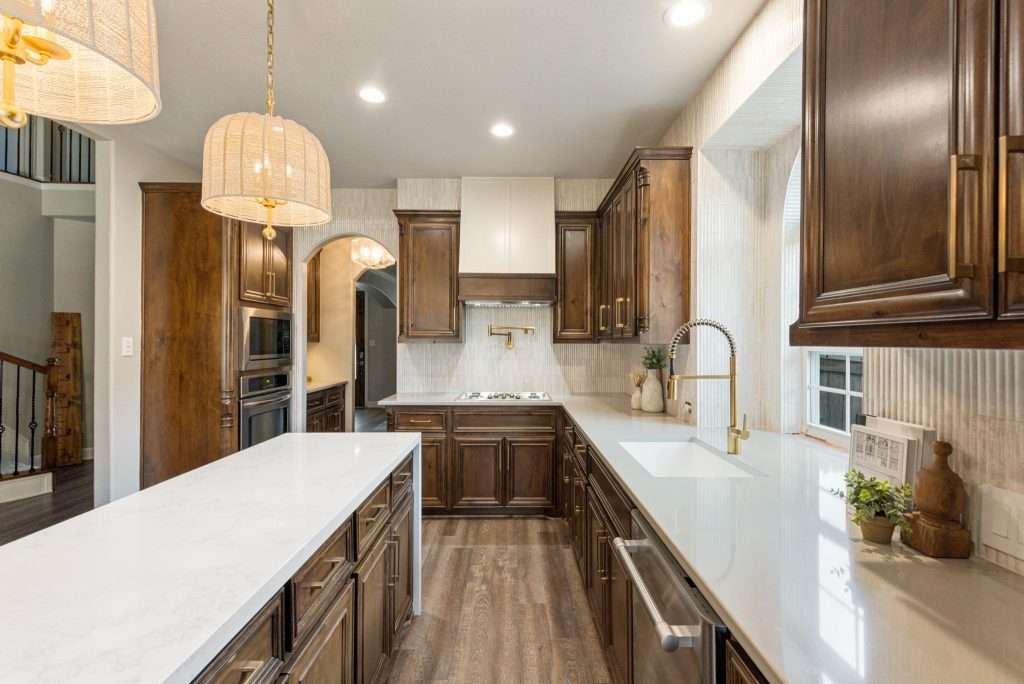
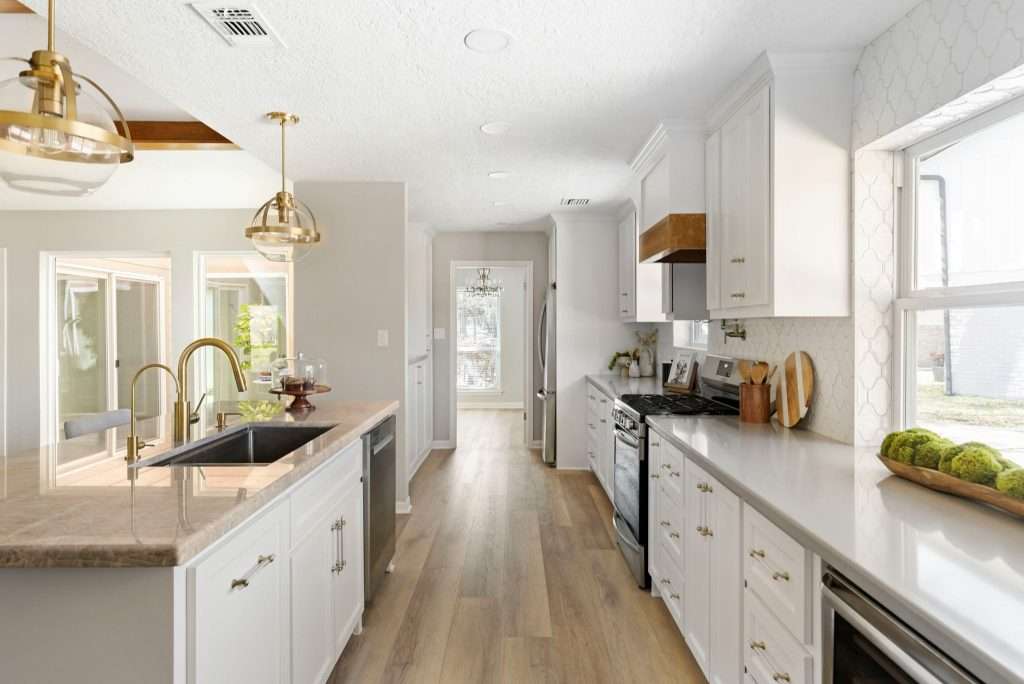
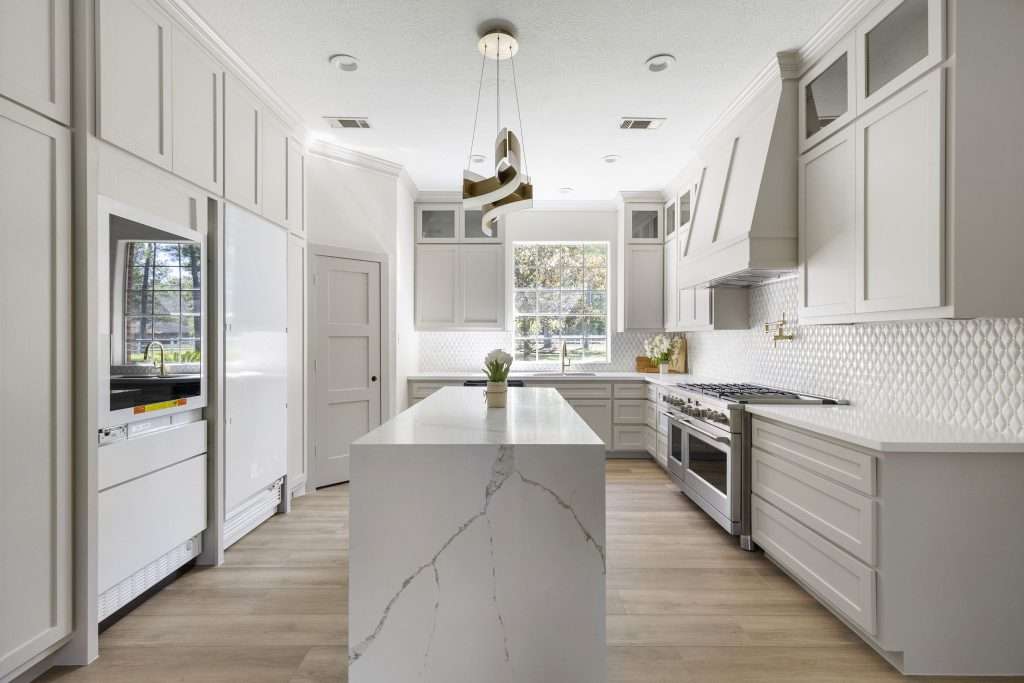
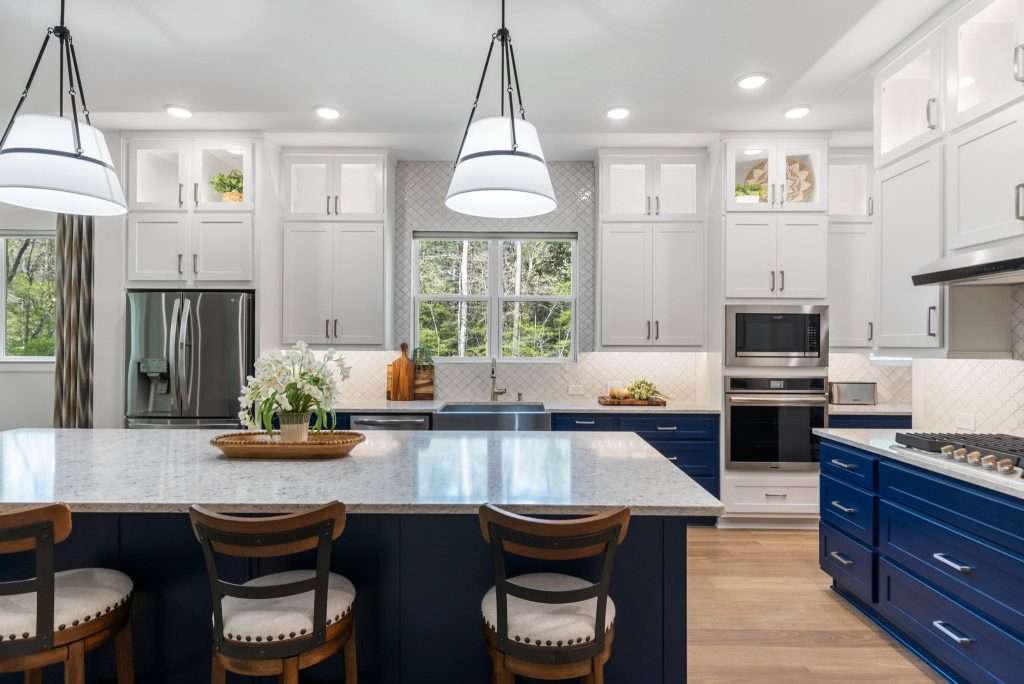
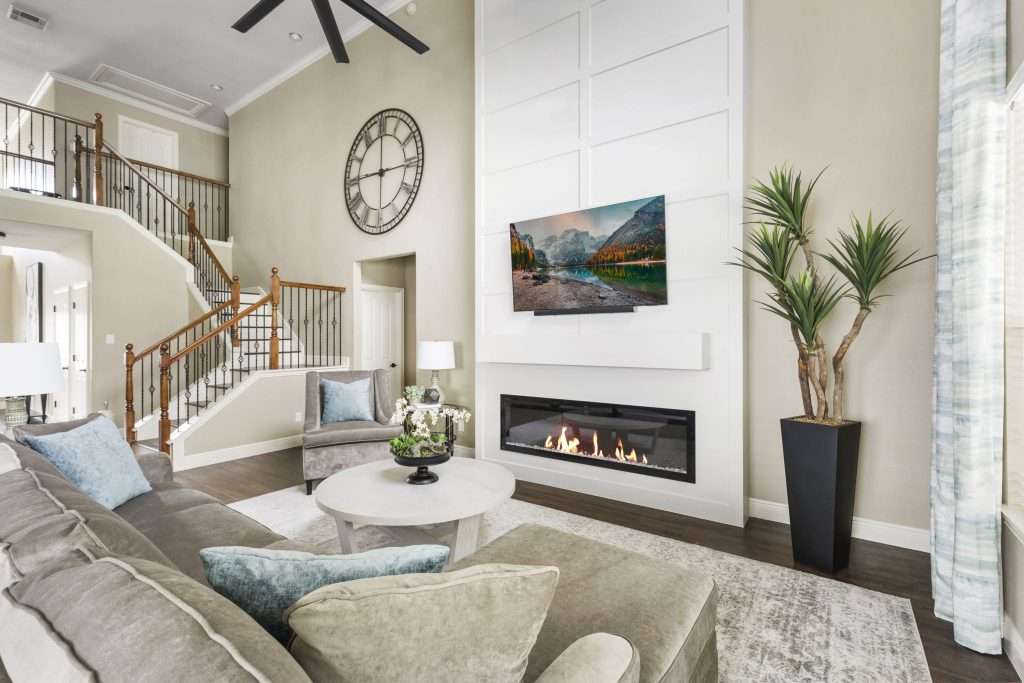
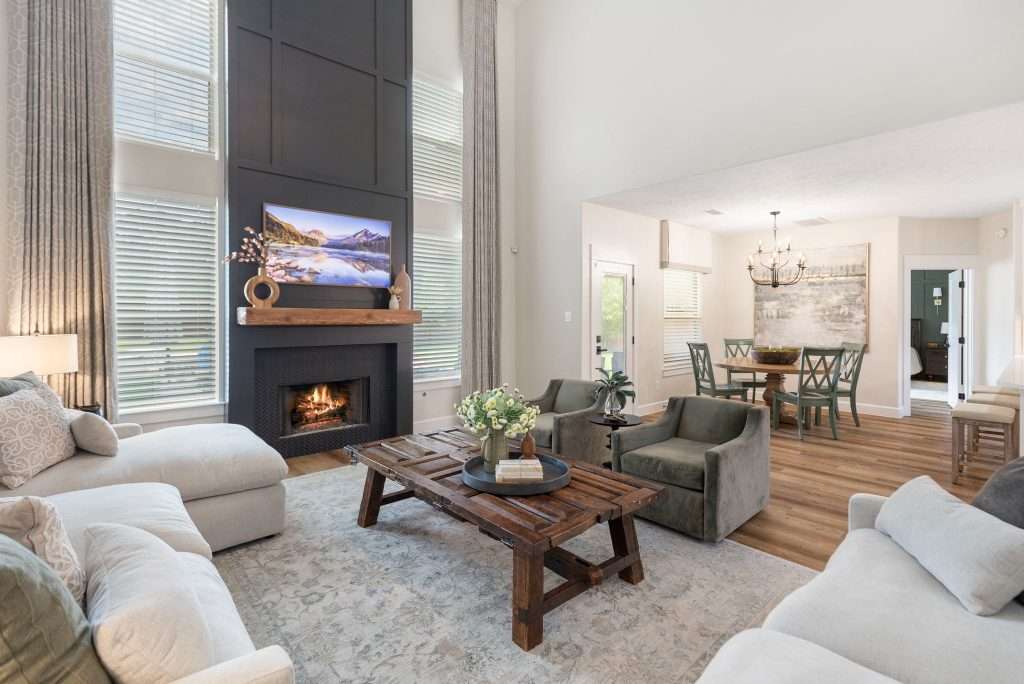
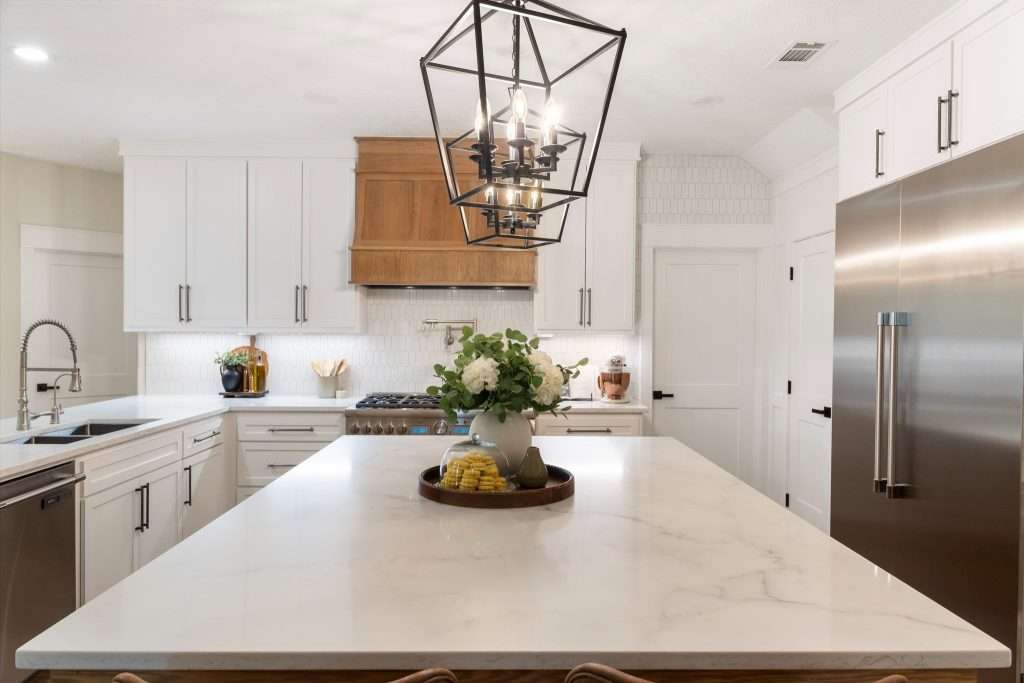
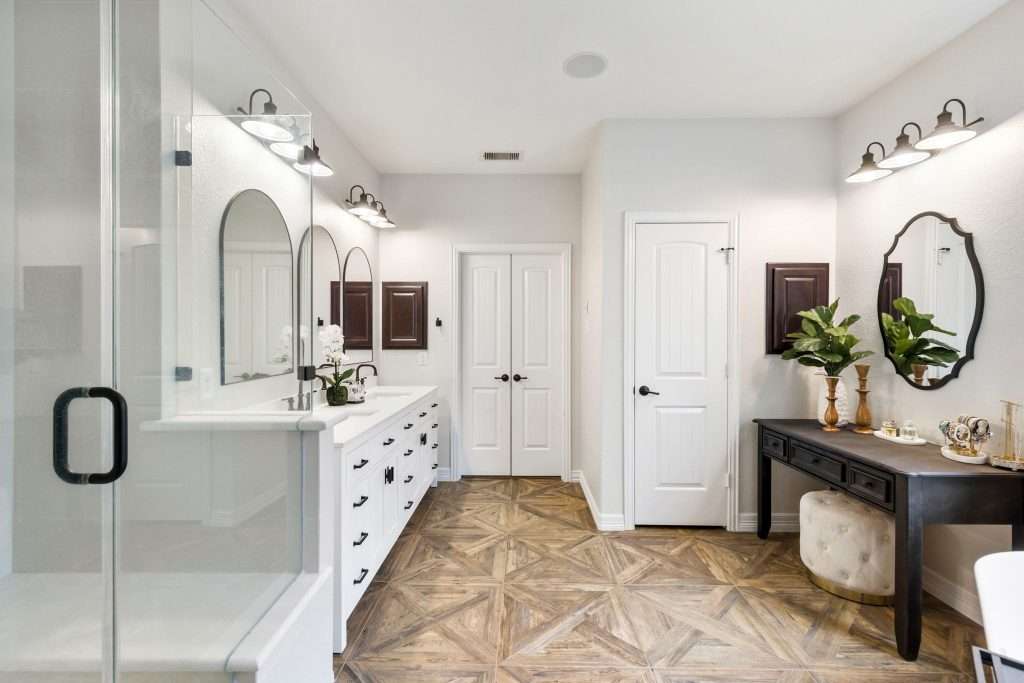
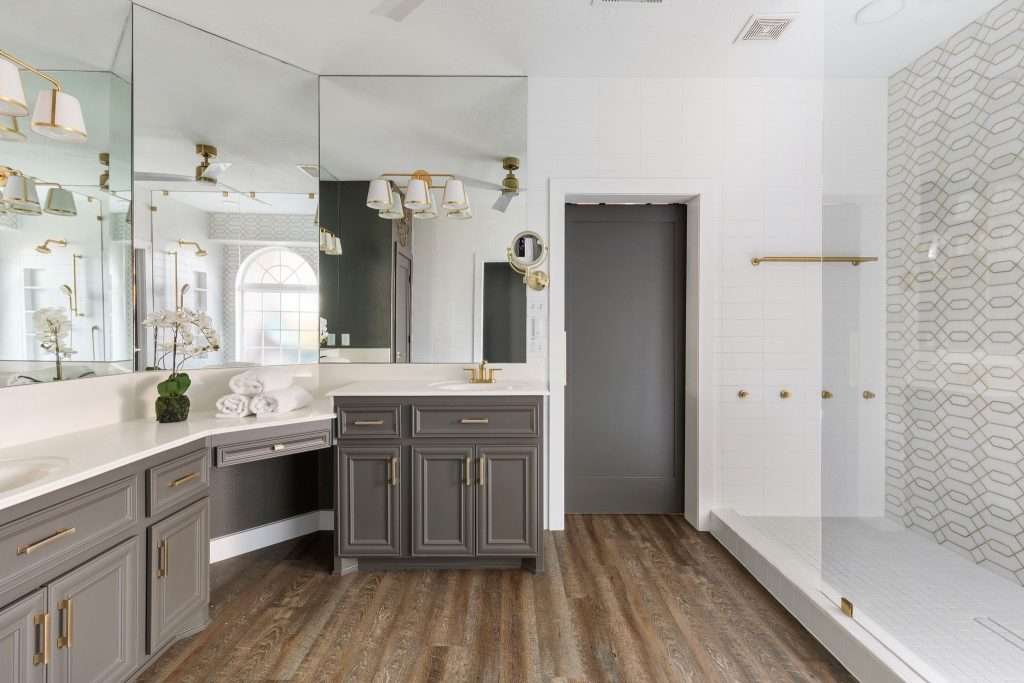
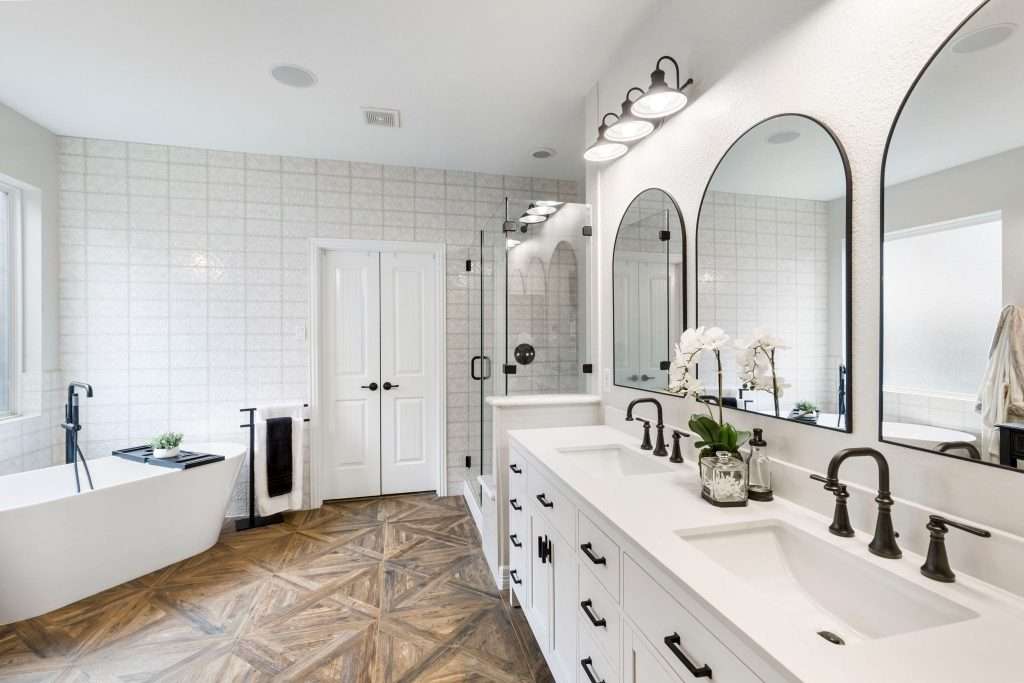
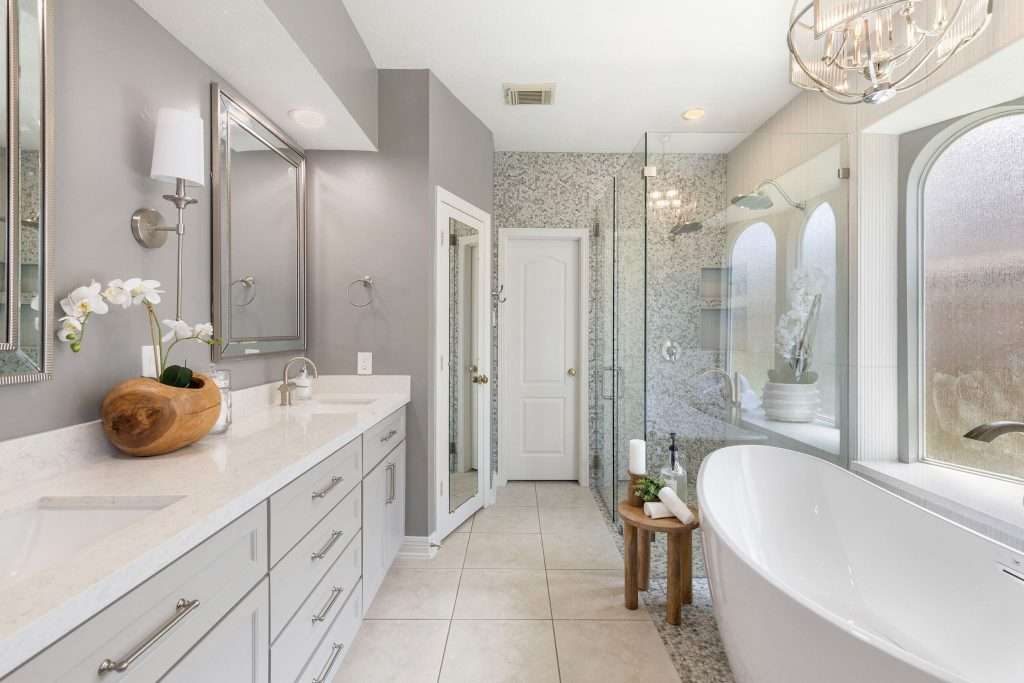
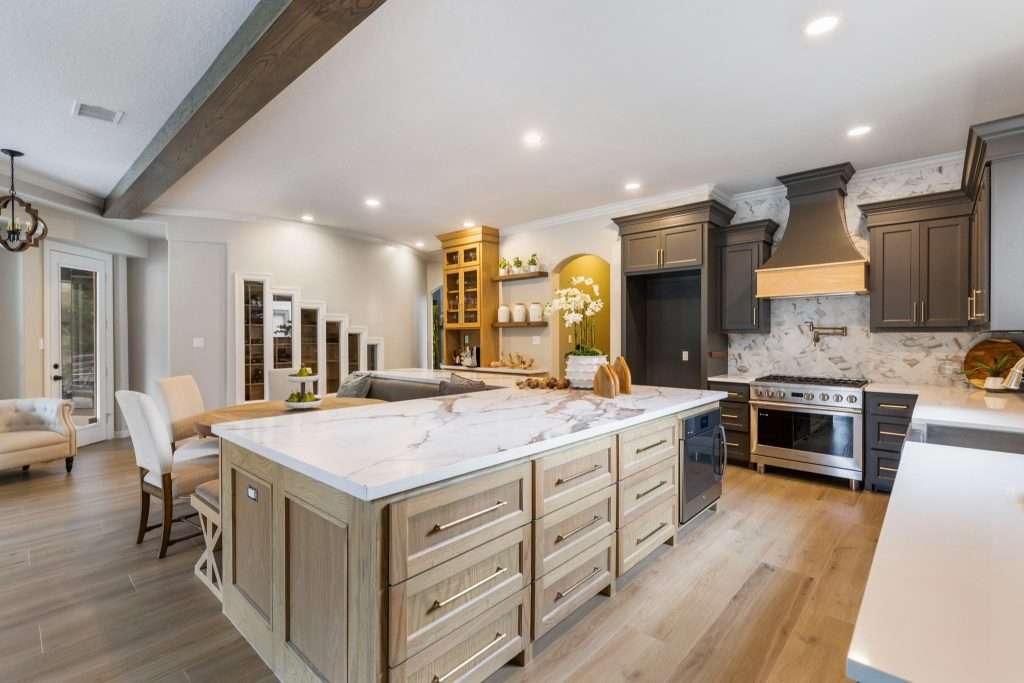
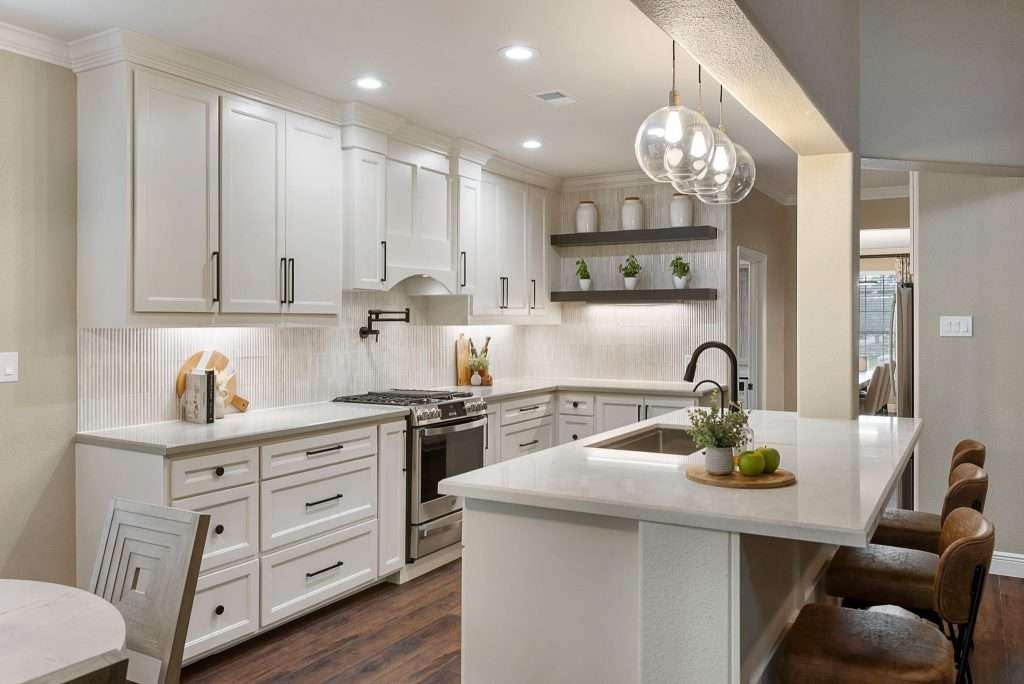
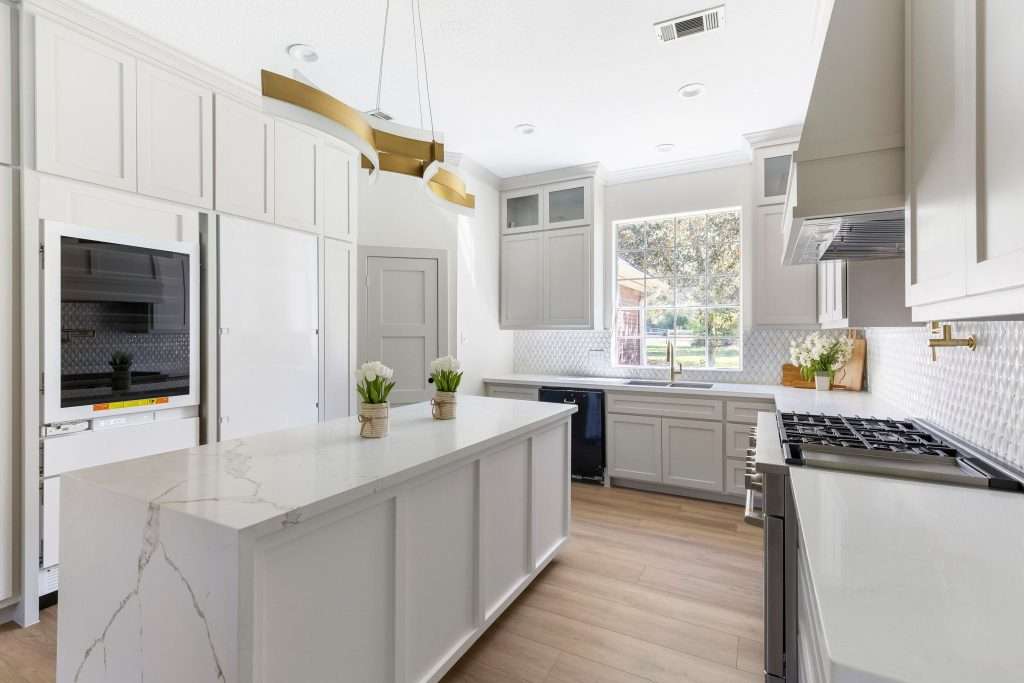
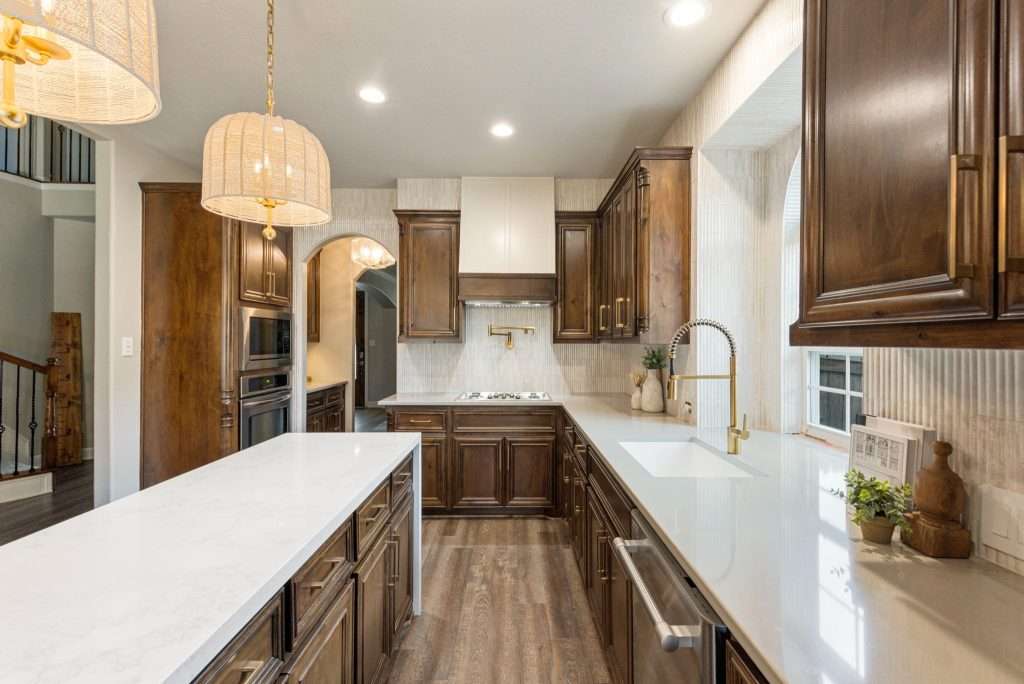
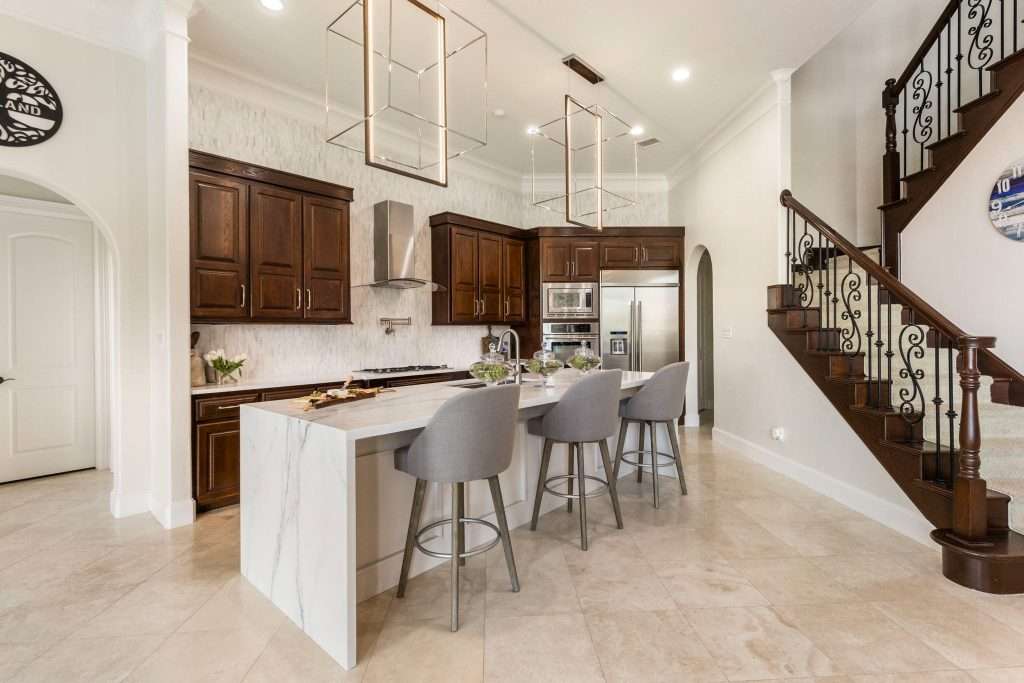
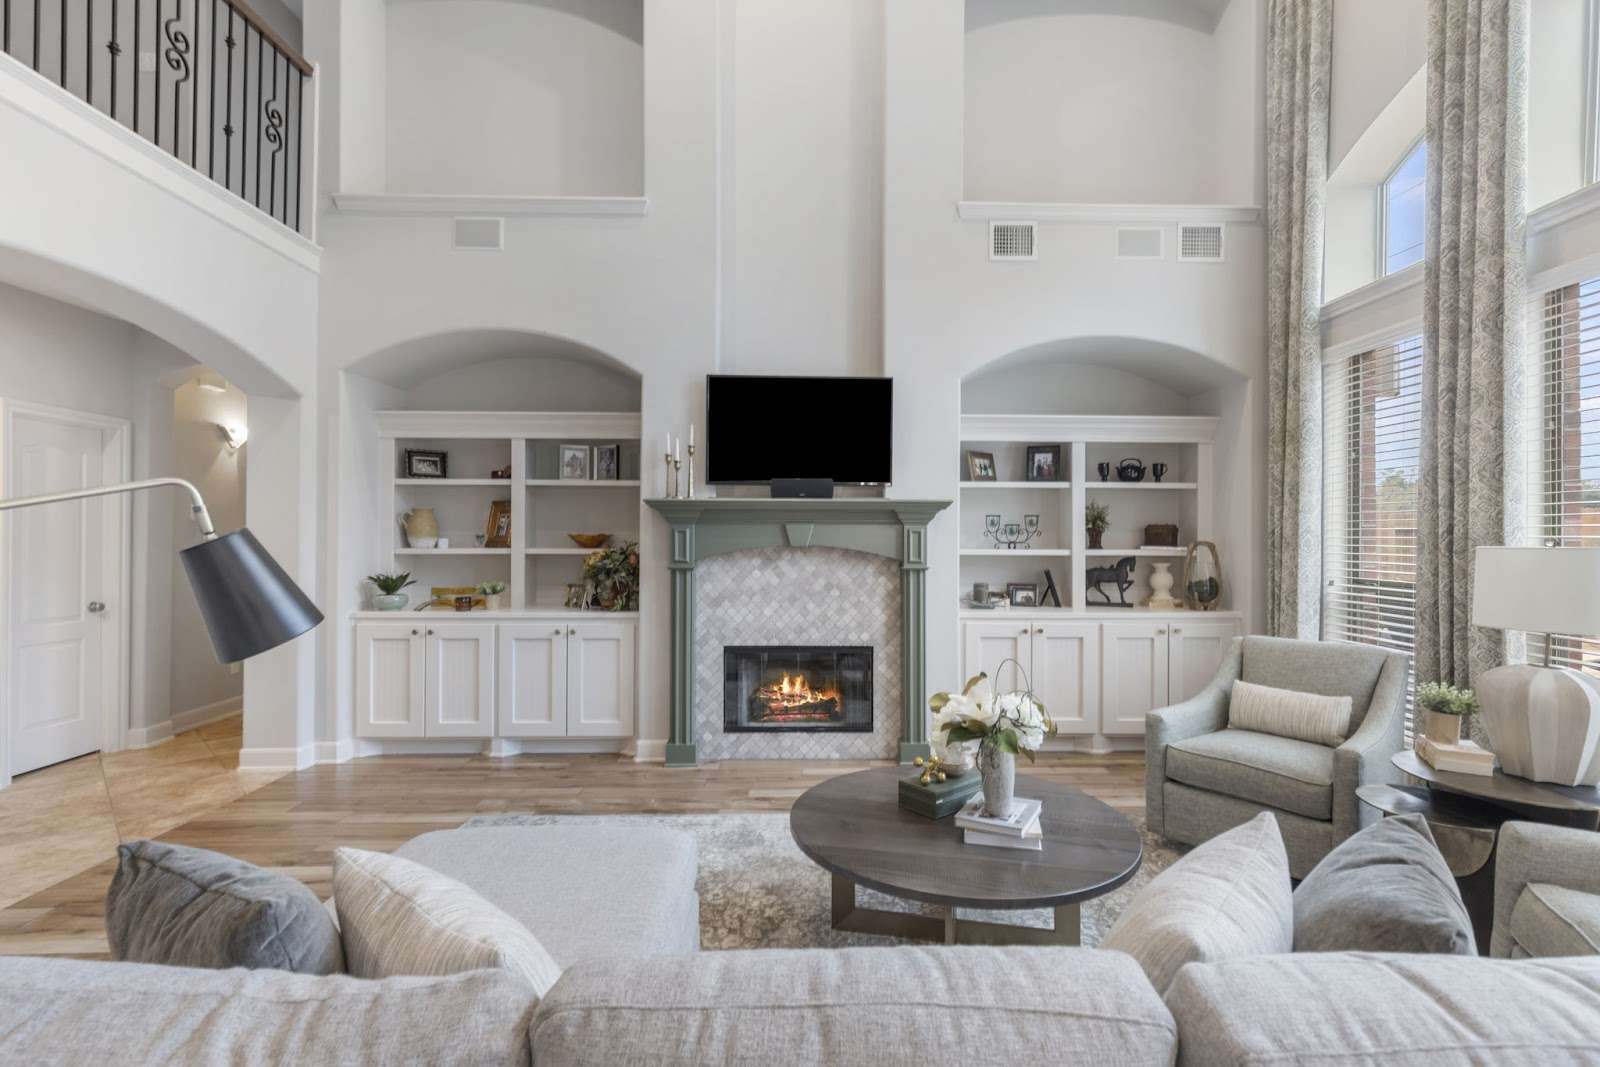
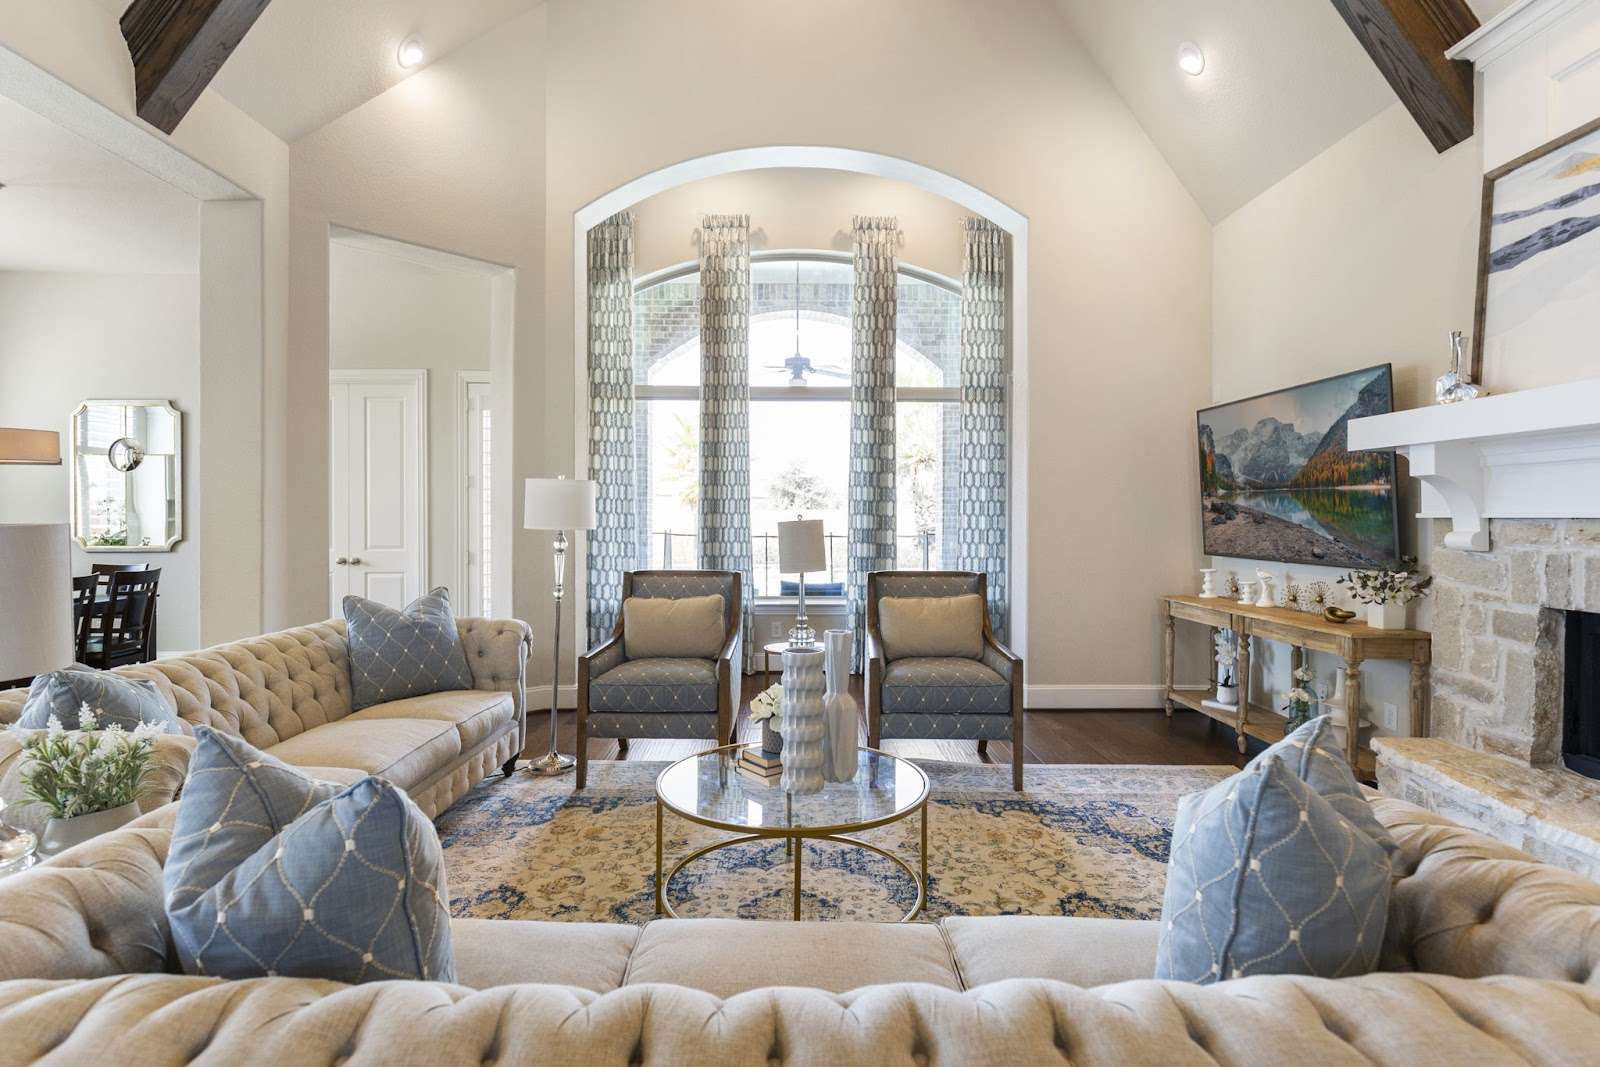
An empty nest kitchen remodel almost always starts with the same instinct. The house got quiet, so the kitchen should get smaller. That was the obvious call on a Magnolia project, and we turned it down.
Both clients are officers. They had hired us years earlier for interior design, then came back once the budget allowed. Empty-nesters by then. The kitchen they had could not host the life they were planning: adult children, their spouses, and grandchildren who had not been born yet.
So we sized it for people who did not exist.
That is the part most folks skip, honey. Close to 500 projects across Montgomery County later, the kitchens that age best are almost never the ones built for whoever sleeps in the house this year.
Why the Empty Nest Is the Wrong Time to Shrink Your Kitchen
An empty nest is usually the moment a house becomes the gathering house, not the moment it stops being one. The kids move out. Within a few years the holidays, the birthdays and the Sunday dinners quietly relocate to your address. You are the one with the room and the stove and nobody sleeping on a futon.
Your square footage did not change. Your job did.
The numbers back this up harder than most people realize. Pew Research Center found that 18% of Americans now live in a multigenerational household, up from 7% in 1971. That is not a fringe pattern anymore. It is one in five houses on your street.
Our Amara Court project is the cleanest example I can point to. That couple had just moved closer to their grandkids, trading the grandeur of their previous Austin house for a smaller place here.
Smaller house. And what did they ask us for? A kitchen and a bath that supported everyday living and aging in place, in a calm, open environment where they could host family.
They downsized the house and upsized the hosting. Those two decisions are not in conflict, and treating them as if they are is where a lot of remodels go sideways.
What Your Kitchen Has to Hold Once the Kids Bring People Home
The headcount is not the real change. The shape of the crowd is. A kitchen that fed four seated people now has to hold nine standing ones. They are holding drinks, and they refuse to leave the room you are cooking in.
That is a circulation problem, not a cabinet problem, darling.
Buyers already know it. In the National Association of Home Builders’ 2024 What Home Buyers Really Want study, table space for eating in the kitchen ranked at 80% among essential or desirable features. A central island came in at 74%. People are not asking for a bigger kitchen. They are asking for somewhere to stand in it.
Where the crowd actually collects
Watch your own kitchen during a holiday. Everybody ends up on one side of the island, between the refrigerator and the sink, in the exact lane you need to walk.
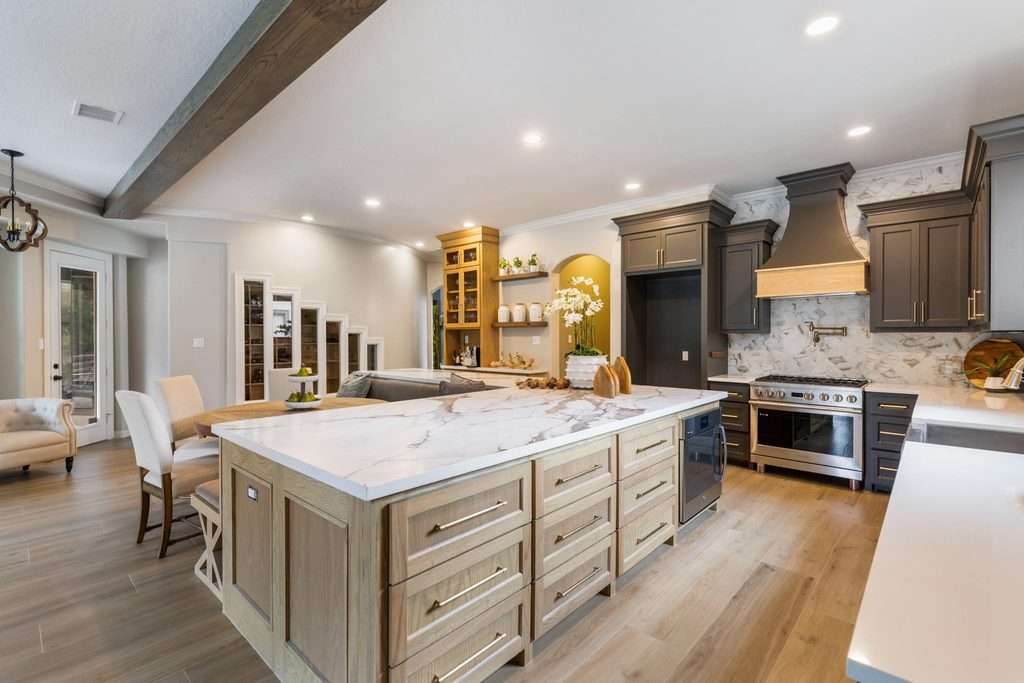
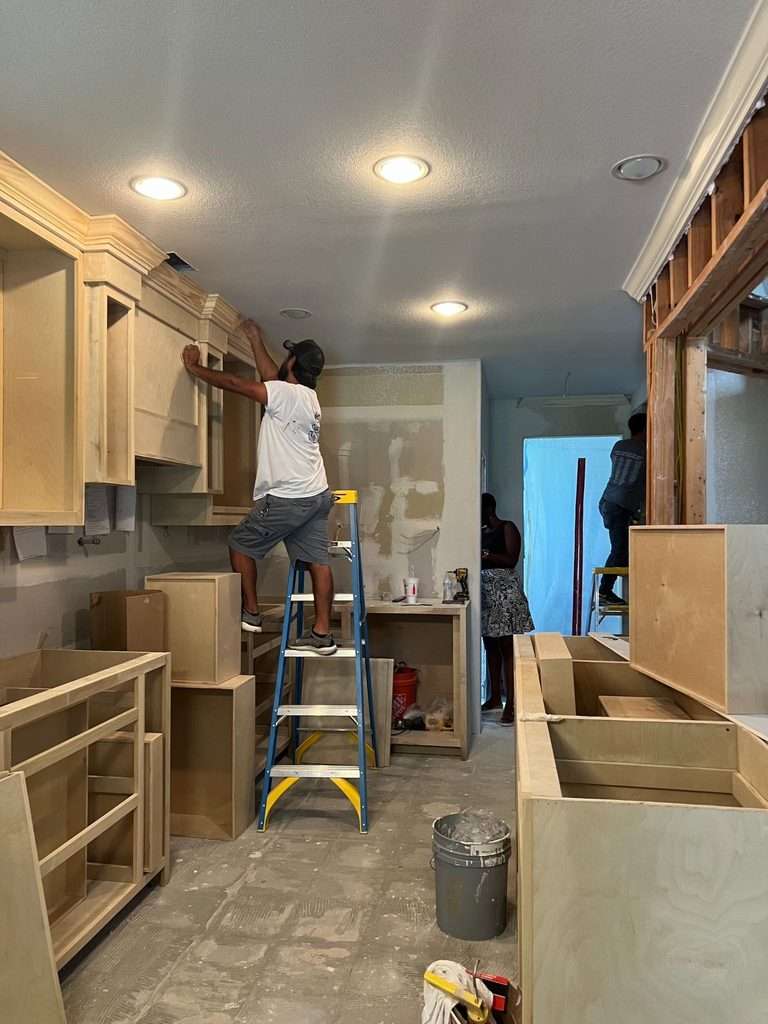
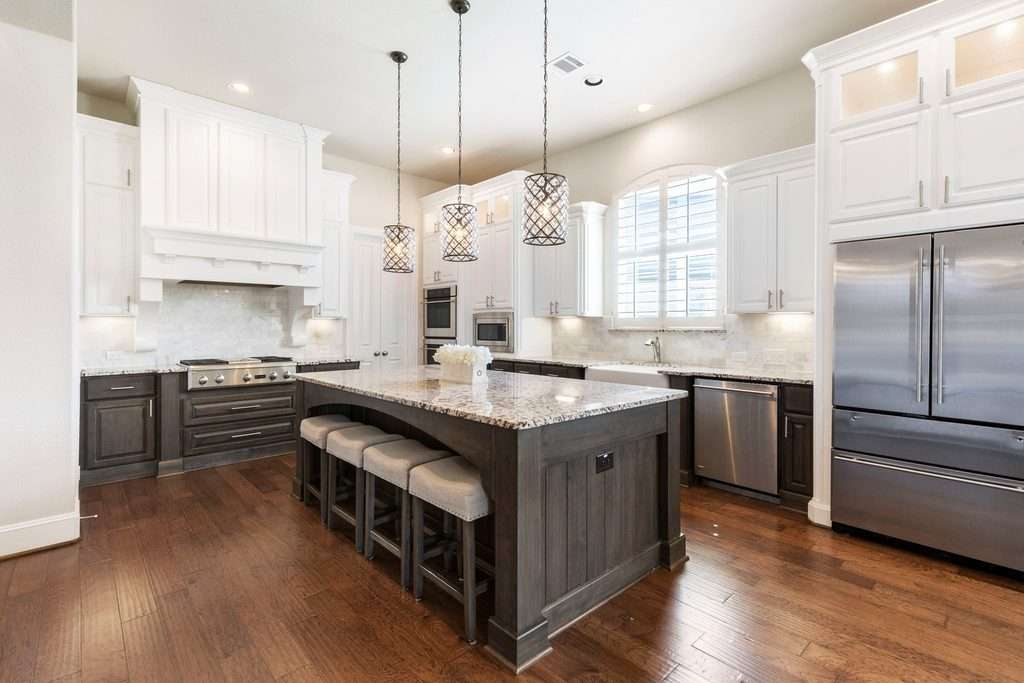
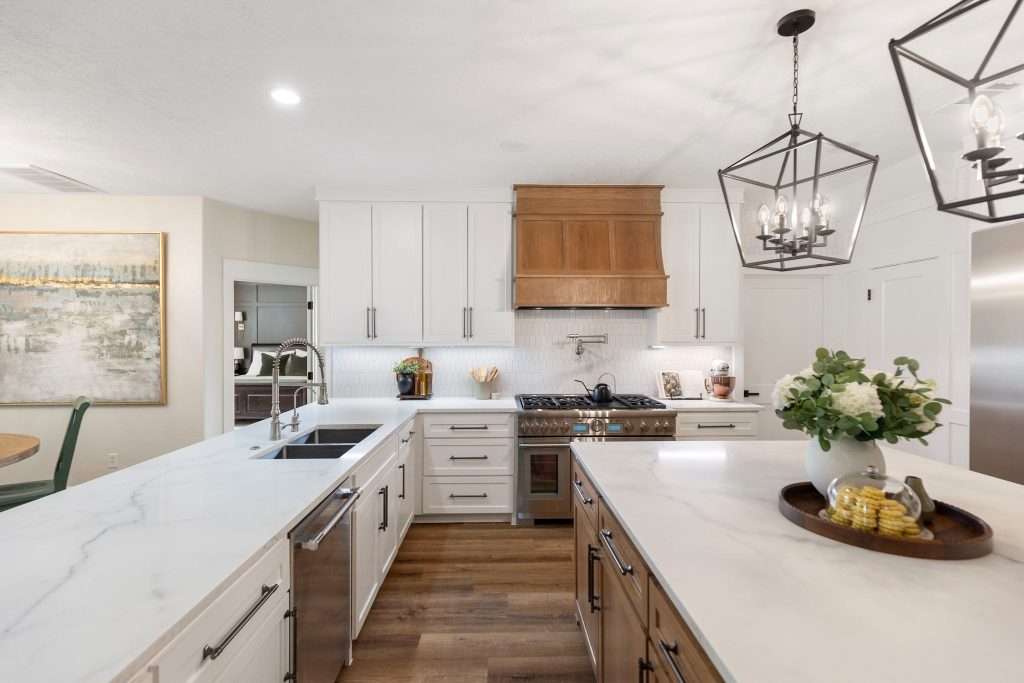
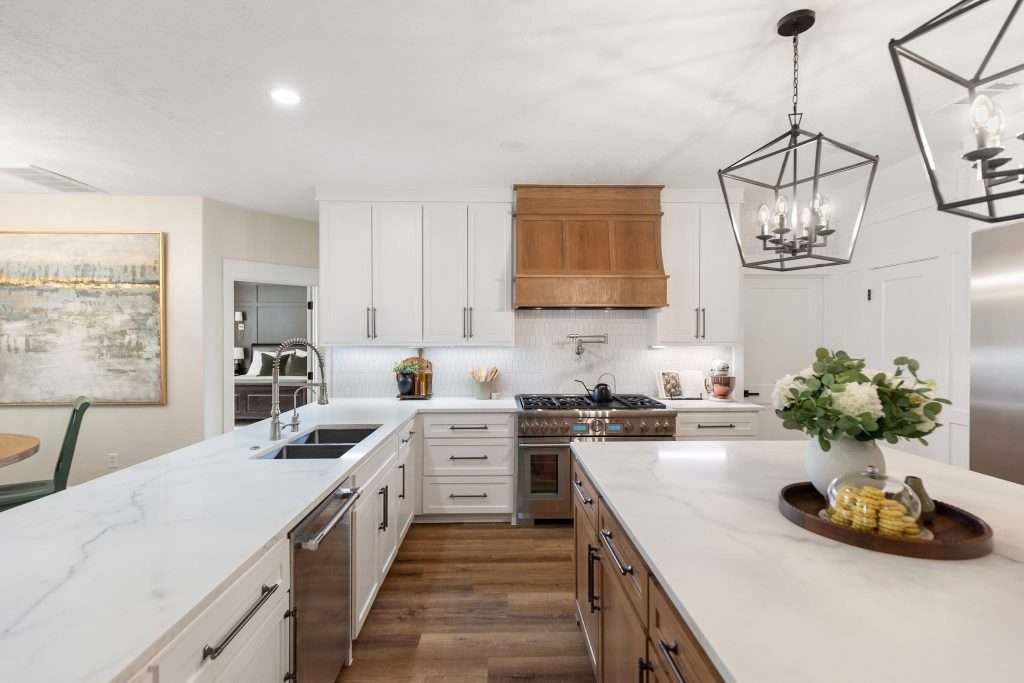
Our Magnolia kitchen transformation started from that same complaint. The client described a closed-off space and asked for an island where guests could gather. Getting there meant removing walls and running a 25-foot steel beam to carry the second floor.
Seats are not the same as room
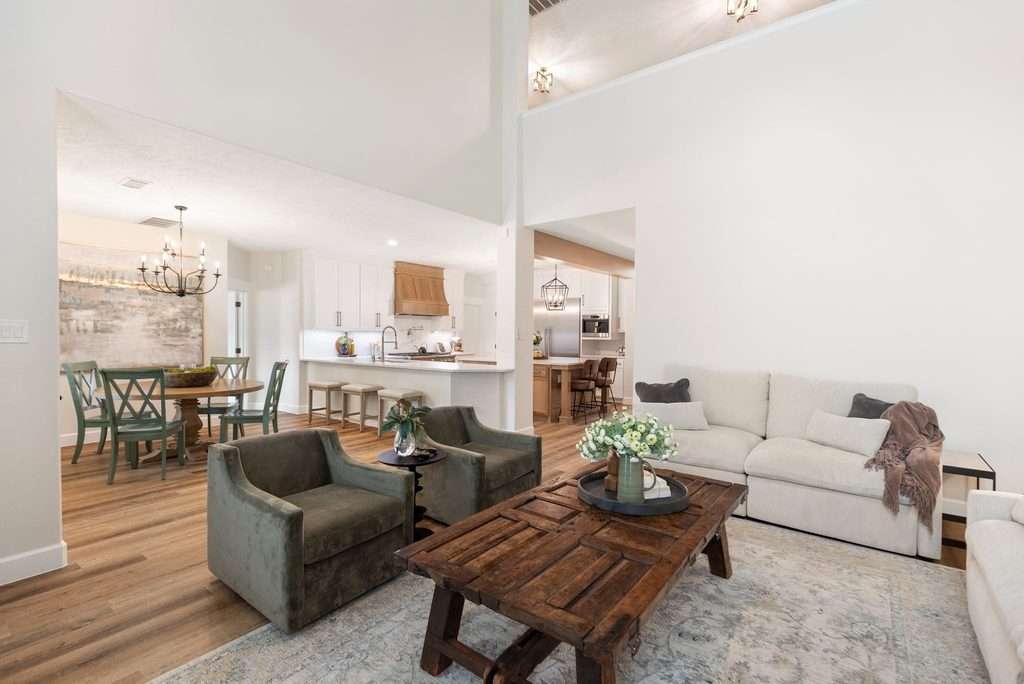
Adding two chairs is easy. Adding two feet of standing room behind those chairs is the part that takes a plan. Our Lake Conroe home reimagined project belonged to a retired couple who loved entertaining their grown children and close friends. The whole design question there was flow from the kitchen into the living space, not seat count.
The Question We Ask Instead of How Many People Do You Cook For
We ask what your biggest day of the year looks like five years from now. Not the average Tuesday. The Tuesday is easy, sugar. The average day is the one your current kitchen already handles fine, which is exactly why it is a terrible thing to design around.
Five years is the right horizon because it clears the gap between an engagement and a toddler.
The house stops matching the life before it stops working
Our Huntsville project clients came to us after 17 years of family life, holiday biker galas and two growing boys. Nothing was broken. Their open-concept home simply no longer reflected the way they live, or entertain, today. That is the more common version of this problem, and it is much harder to notice than a leak.
The same thing drove our Brabner Way project in Conroe. Those clients arrived knowing exactly one thing: the home no longer matched how they lived. Walls came down to open the kitchen back into the heart of the house.
Put a number on it before you fall in love with a layout
Once you know the headcount you are designing for, the budget conversation gets much less frightening. Run your numbers through our Texas kitchen remodel cost calculator before you start pulling inspiration photos. Knowing the range early is what lets you spend it on the right wall instead of the prettiest one.
That planning stage is most of the value. Our designers handle kitchen remodels across Willis and the surrounding lake communities, and the first working session is almost always about the biggest day, not the average one.
Grandkids Change the Materials Before They Change the Layout
Small children arrive in your house long before they change your floor plan, and they land on your surfaces first. That is why we make the material call early rather than treating it as decoration at the end.
Here is the one we do on every project, regardless of family stage.
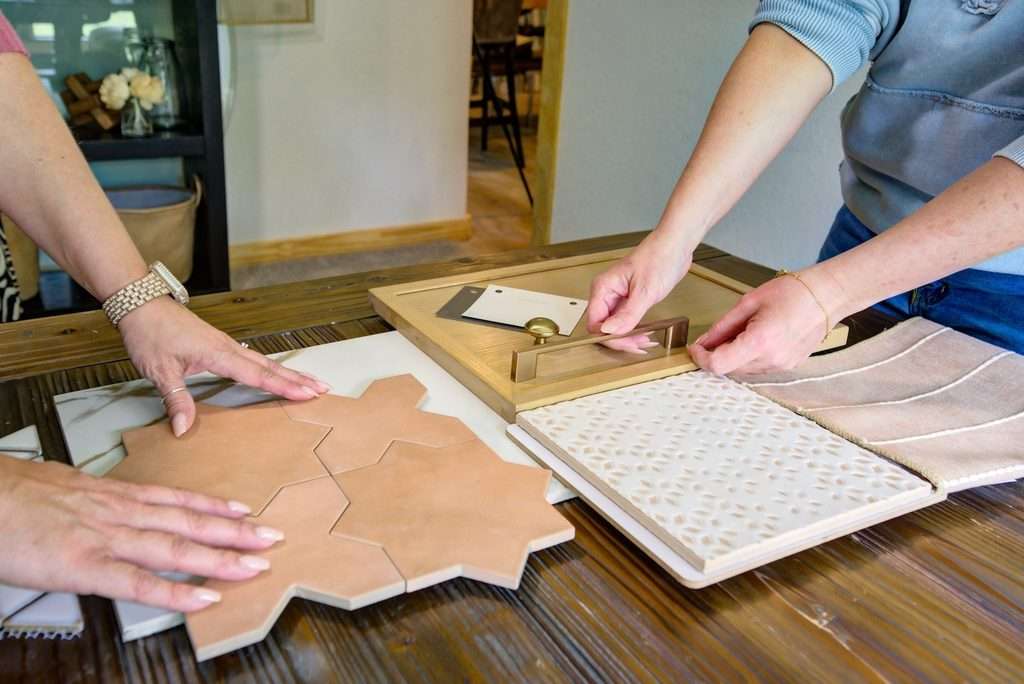
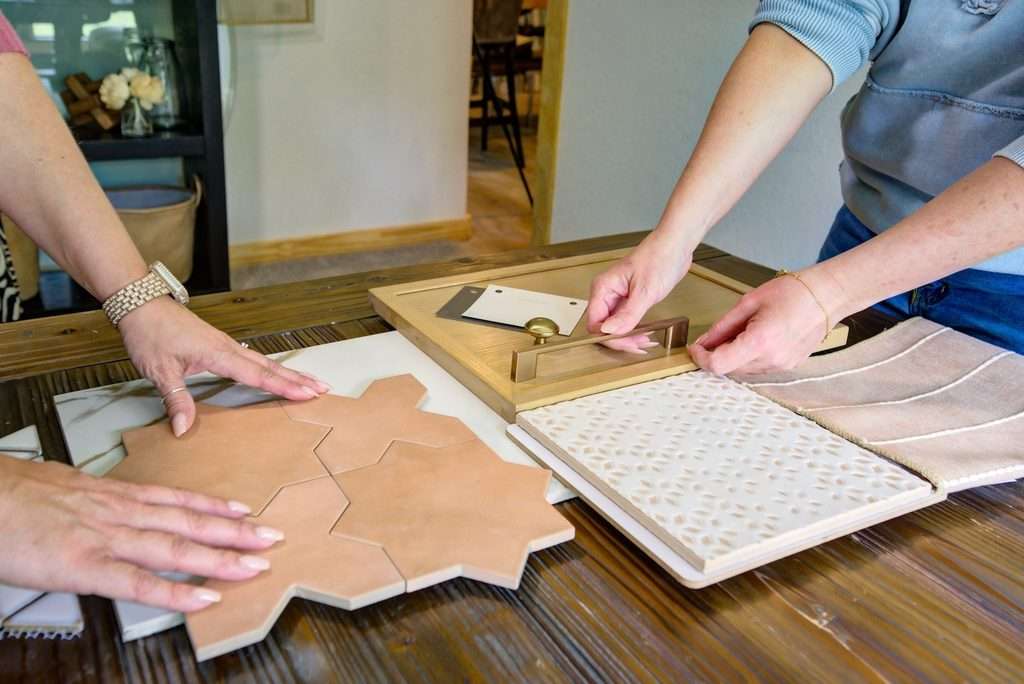
We put the white sample fabric on the table during the presentation visit and we pour red wine on it. The wine beads. It sits there on top of the weave like a marble. The client reaches down, dabs it once, and it is gone. That is performance fabric, where the protection is woven in at the manufacturing stage instead of sprayed on afterward.
It is why we put white furniture into homes with toddlers, retrievers and wine clubs without flinching, honey. If you want the longer version, we wrote about why the protection has to be in the weave.
What the Houston climate decides for you
The floor is the other early call, and around here the climate makes most of it. Houston floods, so luxury vinyl tile has become the norm because it tolerates water and can be replaced in sections. Tile stays common because it keeps a room cooler in August.
The organic flooring that works beautifully in California does not survive what our summers do to it. The same tile we install here would crack in a New York winter.
Local design is a materials problem before it is a style problem.
Those Huntsville clients gave us a three-line brief when we walked through: wow their guests, withstand spills, and feel timeless for years. Notice that durability sat in the middle of the sentence, not at the end. When we specify flooring for Magnolia homes, that middle line is the one doing the quiet work.
The Choices That Are Impossible to Add Later
Three things are close to free during construction and painful afterward: blocking inside the walls, electrical in the island, and a contingency in the budget. Miss any of them and you are opening finished walls to fix it.
Blocking is the one nobody sees
Blocking is just framing material set inside the wall where a grab bar or handrail might eventually mount. Years later, if somebody needs a rail in the shower, the support is already there. No drywall demo, no re-tile, no matching the grout you cannot match anymore. We walk through exactly how and where we set it on a Conroe remodel.
The Amara Court couple asked for aging in place without sacrificing style, and that sentence is doing a lot of work. They wanted the support built in and invisible. Most of the smartest choices that let a home grow with you are the ones you will never see.
Plan for the household you might be housing
Our Tory Ann project, another Magnolia kitchen, needed the laundry room to support the rhythms of a multigenerational household. That was not on the original wish list. It surfaced once we started mapping how many people actually move through that house in a week.
The 10% nobody wants to hear about
We require a 10% contingency on every remodel, and I will not soften that. A remodel is a living project. The drawings look perfect right up until we open the walls. Then we find lighting and plumbing sitting exactly where we planned to move them, and the math changes.
Week one is demo, which is loud and fast and exciting. Week two onward is rebuild, which is slow and dusty and tests everybody. Be patient, be prepared, give grace. We lay out what the weeks actually feel like if you want the honest version.
Storage is usually where the extra people get absorbed. Our custom cabinet work in Magnolia tends to solve more of the crowding than square footage does.
Why Montgomery County Families Keep Choosing to Stay Put
Most people over 50 are not going anywhere, which is the whole reason this planning matters. AARP’s 2024 Home and Community Preferences Survey found that 75% of adults 50 and older want to stay in their current home. Another 43% say that home would need modifications to be safe and accessible.
Wanting to stay and being able to stay are two different things, darling, and the gap between them is a design decision.
Read those two facts together. A young, fast-growing town full of new families means the grandparents’ kitchen becomes the default gathering place, because it is the one with history in it.
That is the pattern we keep seeing across the county. The homes that handle it well took a longer horizon than one remodel cycle. Our kitchen designers serving Montgomery start every plan with the ten-year version of the family, not today’s headcount.
Frequently Asked Questions
Should an empty nest kitchen be smaller than the one you had with kids at home?
Usually not. The number of people living in the house drops, but the number visiting it tends to rise. Visitors also gather in the kitchen rather than spreading out through the house. The better move is to keep or increase open floor area while reducing the number of separate zones you maintain.
What is the difference between designing for entertaining and designing for a family?
A family kitchen serves one or two cooks moving efficiently through a work triangle. An entertaining kitchen serves a crowd standing still. That means wider walkways and a longer island edge people can lean on. It also means a drink or coffee station set away from the cooking lane, so guests never cross it.
How far ahead should you plan a kitchen for grandchildren who are not born yet?
Five years is the practical horizon. It covers the arrival of small children without forcing you to guess at a life stage that may never happen. Focus on the decisions that are hard to reverse: layout, walkway widths, wall blocking and outlet placement. Leave the reversible choices like seating and accessories for later.
Do accessibility features make a kitchen look institutional?
Not when you specify them during design rather than adding them afterward. Blocking hidden inside a wall, a wider doorway, better task lighting and a lower section of counter all read as ordinary good design. The features that look clinical are almost always the ones retrofitted onto a finished room.
Does any of this differ in the Greater Houston market?
The layout principles hold anywhere, but the materials do not. Homes across Montgomery County and Greater Houston deal with flooding, humidity and a heat index that punishes the wrong surfaces. Water-tolerant flooring and heat-friendly tile carry more weight here than they would in a drier or colder climate.
Build the Kitchen for the Family You Are About to Have
Here is what I want you to take from all this, hun. The quiet house is temporary. It is a pause between two loud chapters, and the second one arrives with car seats.
Nobody regrets the extra walkway. Nobody regrets the blocking in the wall or the outlet in the island. The regrets are always the other direction, from folks who built for a Tuesday and then hosted a Thanksgiving.
You do not have to guess at any of this on your own. Design on a Dime Interiors has planned close to 500 projects across Montgomery County and Greater Houston. We can help you work out what your kitchen needs to hold five years from now, instead of five months from now.
So if your kitchen feels like it belongs to a version of your family that already moved on, reach out to our team. Let’s talk about what comes next.
Renovating a Kingwood home usually starts with the conversation nobody enjoys, which is the one about what sits behind your drywall. You bought in a village you love. The trees, the trails, the schools, all of it. Then one Saturday you stood in your kitchen and realized the layout hasn’t changed since the house went up, and neither has much of anything inside the walls.
Maybe a previous owner ran some wiring themselves. Maybe there’s original wallpaper still hiding under two coats of paint.
Here’s the part that surprises people, honey. Your neighbor four doors down is staring at the exact same thing. That isn’t bad news. In a neighborhood built the way yours was, predictable trouble is close to a gift.
What a House Built Before 1990 Is Actually Hiding
The honest answer is that we don’t know until the walls come off, and anyone who tells you otherwise is guessing. What we do know is the pattern, because houses from this era hide the same handful of things.
The Layout Was Never Meant for How You Live
Builders in the seventies and eighties drew kitchens as closed rooms. Cooking happened in one box, eating happened in another, and a wall separated them because that’s simply how it was done.
You feel that every time you host. The person cooking stands alone while everyone else crowds the doorway.
We worked on a house where the dining room sat behind a wall nobody had ever thought to question, eating square footage the kitchen badly needed. Moving that wall changed the entire house. You can see how far a closed kitchen can travel in our Magnolia kitchen transformation.
What Previous Owners Left in There
Original wallpaper. Original cabinets. And in one home, wiring a previous owner had run themselves that was not to code.
That last one matters more than the first two. Wallpaper is a nuisance. Wiring is a safety problem, and it only shows itself once demolition starts.
Older houses can also carry materials we handle differently now. The EPA’s guidance on lead paint in homes built before 1978 is worth reading before anyone starts sanding anything in a house from Kingwood’s first decade.
Nothing About This Is Unusual
None of this means you bought badly. It means you bought a house that reflects the year it went up. Every home from that era has a version of this list, and knowing the list is most of the battle.
Why Your Whole Street Has the Same Problem
Because a handful of builders put your whole street up at once, working from a handful of plans. Kingwood wasn’t assembled house by house over fifty years. It arrived in waves.
The community launched in 1970 as a joint venture between Friendswood Development Company and King Ranch, marketed then as “The Livable Forest.” Trailwood was the first village, with homes completed from 1971. Elm Grove went up mostly between 1978 and 1989, with Perry Homes building the original sections. The community-wide median build year lands around 1988.
The City of Houston annexed Kingwood on the last night of 1996, which is its own story. Most of the houses already stood there by then.
Why That’s Actually Useful
Sugar, this is the advantage nobody sells you on. In a neighborhood like Conroe, where homes went up across decades in every direction, your remodel is a genuine unknown. Here it isn’t.
Somebody on your street has already opened the same wall. The plumbing runs where theirs ran. The load-bearing wall sits where theirs sat. Ask around before you commit to anything, because the answers are sitting three houses away.
That’s a very different starting point from the one we deal with in Conroe’s newer subdivisions, where the housing stock changes every few streets.
When we plan a Kingwood kitchen remodel, the era tells us where to look first. That saves real money before anyone orders a single cabinet.
What the Flooding Changed About Ground Floors Around Here
Flooding changed the material conversation on ground floors permanently, and it changed it here more than almost anywhere else in the region. This corridor sits between two forks of the San Jacinto River, and it has the history to show for it.
Harvey’s damage mapping from the Harris County Flood Control District counted thousands of flooded homes across Kingwood, Humble and Atascocita on the West Fork alone, with more than a thousand additional Kingwood homes on the East Fork. Elm Grove flooded again in 2019. So did much of the area during Imelda that same year.
What We Specify Down Low, and Why
Houston is its own materials problem. Our heat index lands nowhere near what California or the East Coast deals with, and the National Weather Service normals for the Houston area put average summer highs in the mid nineties with more than a hundred days a year above ninety.
So our flooring math runs on luxury vinyl. It tolerates water, and you can replace it in sections when the worst happens instead of all at once. Tile shows up constantly too, partly because those floors stay cooler through August.
FEMA’s own flood damage-resistant materials guidance sorts materials into classes, and the ones it accepts below base flood elevation are the ones we already reach for around here. Tile. Stone. Solid vinyl set in the right adhesive.
Solid hardwood and carpet don’t make that list. Darling, that isn’t a style opinion, it’s what the water does.
Upstairs Is a Different Conversation
None of this applies to your second floor. Bedrooms upstairs can take the wood floor you actually want, and we spec them that way often.
The mistake is running one material through the whole house because it looked good in a showroom. Our guide to humidity-proof finishes for Texas homes covers the same logic for walls and cabinetry. If you’re weighing the options, our breakdown of laminate versus vinyl flooring gets into where each one genuinely earns its place.
Flooring choices in a flood-experienced corridor deserve more thought than a color swatch, which is exactly what our Kingwood flooring work is built around.
How to Renovate a Repeated Floor Plan Without Copying Your Neighbor
Copy the lesson, not the finish. That’s the whole answer, and it’s worth the paragraph it takes to explain.
When five houses share a plan, five homeowners tend to solve it the same way. They see a remodel they admire, they ask which cabinet color it was, and they order the same one. Six months later the street has four kitchens that could swap addresses without anyone noticing, baby.
What’s Worth Copying
The structural discoveries. Where the plumbing actually runs. Which wall came out easily and which one turned into a week. Whether opening the kitchen to the family room helped or just made the whole floor louder.
That knowledge is genuinely valuable and your neighbors will hand it to you for free.
What Isn’t
The finishes. Your neighbor picked that tile for your neighbor’s light. It falls differently than yours if the house faces another way. They sized that island around their family.
We think about how a family actually moves through a house before we think about what goes on the walls. A primary bathroom in a Humble home built in 1985 has a fixed footprint, and what you do inside that footprint is where the real decisions live.
Where Personality Actually Comes From
Storage, usually. Built-ins solve the specific corner you’ve worked around for eleven years, and nobody else’s built-in will look like yours because nobody else has your corner.
Our Kingwood cabinetry work tends to be where a house stops looking like the four around it.
Why Your Budget Has to Allow for What the Walls Teach You
We require a ten percent contingency on every remodel we take on, and older houses are exactly why. That isn’t padding. It’s what opening walls teaches you over enough projects.
A remodel is a living project. The drawings look perfect. Then the walls come off and lighting or plumbing turns up somewhere you planned to move something, and the math changes that afternoon.
The Rhythm Nobody Warns You About
Week one is demolition. It’s loud, it’s fast, and it feels like enormous progress.
Week two onward is rebuild. It’s slow, it’s careful, and the dust gets everywhere. Homeowners get antsy right about then, hun. Every single time.
Be patient. Be prepared. Give grace. That’s the advice we hand every first-time client, and it holds up.
Want a realistic starting range before you talk to anyone? Our Texas kitchen remodel cost calculator walks through what actually drives the number, from cabinetry through permits. It runs on current Houston-area pricing, not a national average that means nothing here.
One Question to Ask Whoever You Hire
Texas does not require a contractor to be licensed or registered. Any handyman with a truck and a phone can call himself one.
So the question isn’t “are you licensed.” It’s are you insured. A contractor who has paid real money to underwrite their work is held to a code standard the uninsured one simply isn’t. There are other renovation red flags worth knowing, but that one does the most work.
Close to five hundred completed projects across Montgomery County have taught us that the vetting happens before the first swing of a hammer, not after. That’s the thinking behind how we run interior design in Kingwood and across the Lake Houston area.
Questions We Get From Kingwood Homeowners
Does an older home really need more planning than a newer one?
Yes, and the reason is that a newer home has fewer unknowns behind the drywall. A house built in 1982 has had forty-plus years of owners, repairs and additions, some documented and some not. Planning turns those unknowns into decisions you make on purpose. Otherwise the demolition crew makes them for you on a Tuesday.
Should I remodel to match what my neighbors have done?
Match their structural lessons, not their selections. If three houses on your street removed the same wall and were glad they did, that tells you something real about the plan. What color they painted the cabinets tells you about their taste in that year. Your house faces a different direction and holds a different family, and both of those should show.
Is it worth remodeling a home in an area that has flooded?
For most homeowners in the Greater Houston market, yes, provided the material choices reflect where you live. Ground floors take water-tolerant flooring and moisture-resistant board where it counts. The EPA’s guidance on mold and moisture explains why that board choice matters in a climate this humid. Second floors can take whatever you love. The homes that struggle after a flood are usually the ones finished as though the risk didn’t exist.
How much should I set aside beyond the estimate?
Ten percent, at minimum, and we build that into every project as a requirement rather than a suggestion. Remodels are living projects. The moment walls open, you find things the drawings couldn’t show, and a contingency is what keeps a discovery from becoming a crisis or a half-finished room.
What actually makes a remodel feel personal in a repeated floor plan?
Storage and function, far more than finishes. Built-ins shaped around what you actually own. A layout arranged around how your family really moves. Lighting planned for the way your particular windows behave. You can’t copy those choices off a neighbor. They start from your life rather than from a showroom display.
What an Older House Gives You Back
A house built before 1990 hands you mature trees, real lot sizes, and a floor plan that has already told your neighbors most of its secrets. Newer construction can’t give you the first two at any price.
What it asks in return is that you take the walls seriously. Budget for what’s behind them, choose ground-floor materials that respect where this corridor sits, and let your own life drive the parts that make the house yours.
We work across Kingwood, Humble, Atascocita and Porter from our studio in the Lake Houston area, and across Montgomery County from Conroe. If your house has been asking you a question every Saturday morning, come talk to us about it.
You’ve been tolerating that bathroom for a while now, haven’t you? Maybe it’s the dated tile that seemed fine when you moved in but now catches your eye every single morning. Maybe the layout never quite worked and you’ve just been working around it.
Whatever finally pushed you over the edge, here you are, ready to do a primary bathroom remodel and genuinely unsure where to start.
And honey, that overwhelmed feeling you’re having right now? It makes complete sense. A primary bathroom involves more decisions, more trades, and more moving parts than almost any other room in the house. Before you call a single contractor or fall down a tile Pinterest rabbit hole, there are a few things worth getting clear on first.
Why the Primary Bathroom Is the Hardest Room to Get Right
Most rooms give you a little margin for error. You put furniture in the wrong spot, you move it. You pick the wrong paint color, you repaint. A primary bathroom remodel does not work that way. The decisions you make at the planning stage (layout, plumbing locations, door swings, ventilation) get locked in behind tile and drywall. Change your mind after the fact and you’re looking at tear-out costs that can double your original budget.
This is the room where two people share a morning routine, often at the same time, in a space that rarely exceeds 100 square feet. Every square inch either works or it doesn’t, and the difference between those two outcomes almost always comes down to how much thinking happened before demo day.
The other thing that makes primary baths tricky: they carry a lot of emotional weight. This is the first room you walk into every morning and the last one you’re in at night. It’s not just functional. It’s personal. That means the pressure to get it right is real, and the mistakes sting a little more than they would in, say, a laundry room.
Getting this room right starts with understanding which decisions have to be made in a specific order. Skip the sequence and you’ll end up with gorgeous fixtures that fight each other, a layout that creates bottlenecks, or a finish palette that reads beautifully in photos and feels cold every single morning in real life.
Layout First, Because Everything Else Follows
The single most expensive mistake homeowners make in a primary bathroom remodel is going straight to finishes. They pick tile. They fall in love with a vanity. They find a freestanding tub on sale. And then they call someone to make it all fit, only to discover the plumbing is in the wrong place, the door can’t open properly, and the tub they bought won’t leave enough clearance to get to the toilet.
Layout decisions have to come first, every time. Here’s why: plumbing moves money fast. According to the National Kitchen and Bath Association, keeping plumbing fixtures close to existing supply and drain lines is one of the most reliable ways to control remodeling costs.
The moment you start relocating a toilet or moving a shower drain more than a few feet, you’re into slab work. In our part of Texas, where homes are built on concrete slabs rather than basements, that’s a more involved process than homeowners expect.
Before anything else gets decided, you need a clear answer to three layout questions:
Is the door swing eating into usable space? A lot of builder-grade primary baths have doors that swing into the room and immediately block access to the vanity or toilet. Flipping to a pocket door or barn door is a relatively affordable fix that opens up the floor plan significantly.
Where are the two people in this room actually standing at the same time? The classic mistake is designing for one person. Map out where each person gets ready: who’s at the vanity, who’s in the shower, who needs the toilet. Make sure those zones don’t create a traffic jam during the 7:00 a.m. rush.
Does the shower placement make sense for the window and ventilation situation? In Greater Houston’s humidity, ventilation matters more than it does in drier climates. Where the shower sits relative to the exhaust fan and any natural light source affects both daily comfort and long-term moisture management.
Get these three questions answered before you look at a single tile sample. The rest of the decisions will make a lot more sense once you know what you’re actually working with spatially.
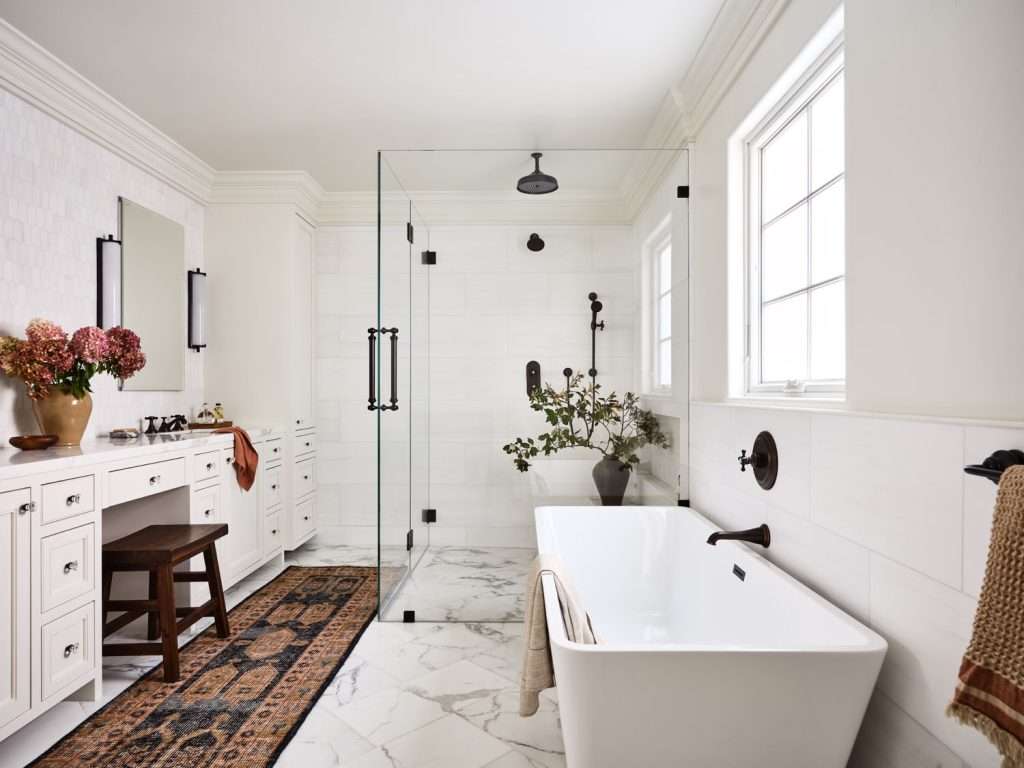
The Bathtub Question That Divides Every Household
Source: Victoria de la Camara
The decision that comes up in nearly every primary bathroom remodel conversation we have. Keep the tub or lose it?
The honest answer is: it depends, but probably not for the reasons you think.
The bathtub-to-shower conversion is one of the most popular remodeling requests we get, and it makes sense for a lot of households. If you genuinely haven’t used your tub in two years, you’re not suddenly going to start.
Removing it opens up floor space that can make a medium-sized primary bath feel dramatically more generous. A larger walk-in shower, better storage, a dedicated makeup area: the footprint you reclaim from a standard alcove tub goes a long way.
But here’s the part worth thinking through carefully: a home with no bathtub at all can affect resale appeal, particularly in the Greater Houston market where family buyers are a significant segment.
The National Association of Realtors consistently notes that master suites with no tub at all see more pushback from buyers than those that at least have a soaking tub or a dedicated wet room.
This doesn’t mean you have to keep the tub if you hate it. It means the decision deserves more than just “we never use it.”
A few questions worth sitting with:
Is there a secondary bathroom in the house that has a tub? If so, the argument for removing the primary tub gets much stronger.
Are you planning to sell within five years? If yes, the resale math tilts toward keeping at least a soaking tub option.
Would a smaller, freestanding soaking tub in the corner give you the design moment you’re after without eating the square footage of a full alcove tub setup?
This is genuinely a household conversation, not just a design choice. And honey, if two people in the house have opposite opinions on this one, it helps to work through the logic with someone who has seen how it plays out across a lot of finished projects.
The Design on a Dime team has navigated this exact conversation more times than we can count, and there’s usually a solution that satisfies both sides.
How to Set a Budget That Reflects What You Actually Want
Source: Maeve Design Collective
This is where most primary bathroom remodels go sideways before they even start. Homeowners come in with a number they’ve decided on, usually based on some combination of what they think it should cost and what they’re comfortable spending, and it doesn’t account for what they actually want.
The gap between “I want to spend $15,000” and “I want to move the plumbing, add heated floors, install a frameless glass shower, and use large-format tile” is significant.
Not because any of those things are unreasonable, but because pricing individual line items in your head almost always underestimates the full scope.
Here’s a more useful framing: price the project from the scope, not the other way around. Start by listing everything you actually want to change, then find out what that realistically costs in the Houston market.
If the number is higher than you expected, you can make informed trade-off decisions. If you set the budget first and try to squeeze the scope to fit, you’ll end up cutting things mid-project, which almost always costs more than planning for them from the start.
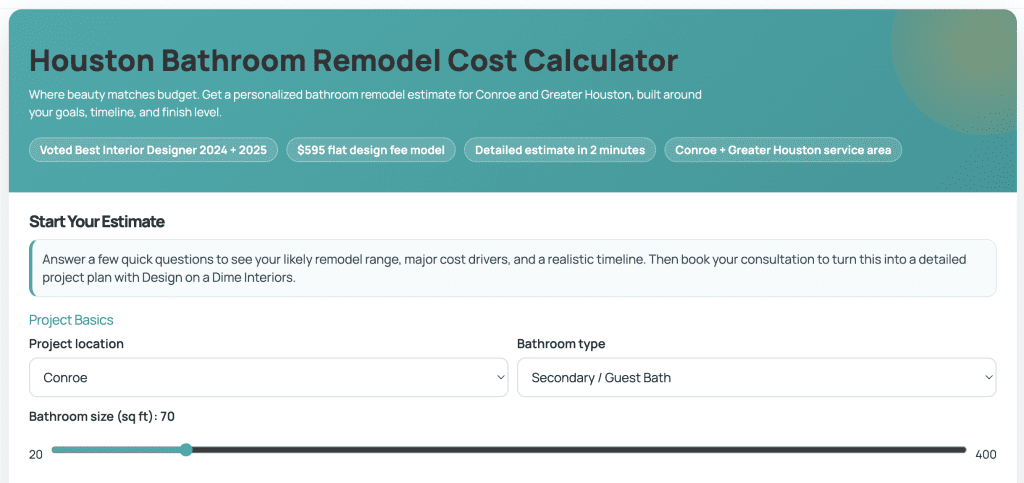
As a starting point, our Texas Bathroom Remodel Cost Calculator gives you a realistic range based on actual project data from Greater Houston homes. It’s not a substitute for a real estimate, but it’ll give you a grounded number to work from before any contractor walks through your door.
A few cost realities worth knowing going in:
Tile is labor-intensive. The material cost is often lower than people expect; the installation cost is where budgets get surprised. Large-format tile, herringbone patterns, and floor-to-ceiling shower tile all add labor hours. Budget accordingly.
Plumbing rough-in is not visible but it’s never cheap. Any fixture move (toilet, shower drain, tub) involves your plumber and potentially your concrete slab. Get this scoped explicitly before finalizing your layout decisions.
Ventilation and lighting are routinely underbudgeted. Both require electrical work and both matter enormously to daily comfort. They’re worth allocating real money to.
If the full scope genuinely exceeds what you can do right now, a good designer can help you sequence the project by doing the structural and plumbing work now and phasing finish upgrades over time.
Finish Selections That Actually Hold Up in a Texas Climate
Here’s something that doesn’t come up enough in bathroom design content: the Gulf Coast climate is not neutral. The heat, the humidity, the way natural light pours through windows at certain times of year. All of it affects how finishes look and perform in daily life.
Polished marble that looks stunning in a Seattle showroom can be a maintenance headache in a Houston-area home where the combination of hard water and humidity creates water spots and mineral buildup faster than you’d expect.
Highly reflective surfaces amplify the intense midday light that comes through south-facing windows in Texas homes. And matte tile, while beautiful in photos, shows footprints and soap residue more in a high-humidity shower environment than most people anticipate.
This doesn’t mean you can’t have any of those things. It means the selection process should account for your actual conditions, not just what photographs well.
A few finish principles that hold up consistently in Montgomery County and Greater Houston homes:
Honed or matte stone in larger formats tends to hide the daily wear of hard water better than polished finishes in high-humidity areas. It also reads warmer, which is useful in bathrooms that get a lot of natural light.
Brushed or matte metal fixtures show water spots significantly less than chrome or polished nickel. In a climate where every shower leaves mineral deposits on fixtures, this is not a small consideration.
Grout color is a long-term decision. Light grout looks clean in a showroom and shows everything within six months in an active household. Tinted grout or epoxy grout in a slightly darker tone extends the life of your bathroom’s clean appearance considerably.
For tile specifically, the Tile Council of North America publishes performance ratings that cover slip resistance, water absorption, and durability. None of that shows up in the lifestyle photos you’re pinning.
It’s worth knowing that porcelain with a PEI rating of 3 or higher is generally recommended for bathroom floors in residential applications.
If you’re working through selections and feeling unsure about what holds up in practice versus what just looks good on a sample board, the Design on a Dime Interiors team in The Woodlands and Spring has seen enough finished projects to tell you exactly which combinations age well and which ones don’t.
What a Functional Plan Looks Like Before Demo Day
Source: Maxwell Design
A functional plan is not a mood board. It’s not a folder of saved Instagram posts. And it’s not a rough idea of what you want.
A real pre-demo plan is a specific document that answers every decision that can be made before anyone picks up a tool, so the project runs on decisions instead of running on questions.
Here’s what a complete plan contains before demo starts:
A dimensioned layout drawing showing every fixture in its final location, with clearances noted. This is not optional. Even if you’re keeping everything in place, confirming clearances and door swings on paper before demo starts costs nothing. Changing them after costs a lot.
A complete materials list with model numbers. Not “a white rectangular sink.” The specific sink, its dimensions, and where it’s been ordered from. Supply chain delays are real, and a project stalled because a vanity is backordered for six weeks is a painful and entirely avoidable situation.
A clear scope-of-work for every trade. Who is doing the plumbing? What exactly is included? Who is responsible for the electrical permit? When is the tile contractor scheduled relative to the plumber? A project where trade coordination is loosely defined almost always runs long and over budget.
A decision log for the things you’re not sure about yet. It sounds counterintuitive, but the fastest way to slow down a remodel is to reach a decision point mid-project with no answer ready. Document the open questions before demo starts and assign a deadline for each one.
This kind of planning is the thing most homeowners don’t know to do because they’ve never remodeled a bathroom before. It’s also exactly what a designer brings to a project. Not just the pretty part. The functional planning that keeps bathroom remodels on track.
Our ben-project bathroom remodel is a good example of what this looks like in practice. Every trade coordinated, materials selected and staged before demo, and the homeowner involved in decisions at the right moments rather than getting surprise questions mid-project.
If you’re managing this yourself, build the plan before you touch anything. If you’re working with a designer, the plan is one of the most valuable things they produce. Either way, the bathroom that finishes on time and on budget is almost always the one where someone did the pre-work.
Our Katy and Cypress bathroom remodeling clients often tell us the planning phase felt like the least glamorous part, right up until they saw how smoothly the project ran because of it.
Frequently Asked Questions About Primary Bathroom Remodels
What makes a primary bathroom feel luxurious rather than just expensive?
Luxury in a bathroom is almost always about proportion and restraint, not price. A bathroom with well-sized fixtures, thoughtful lighting, and a cohesive material palette will feel more elevated than one that mixes high-end finishes without a clear logic connecting them. Scale is particularly important: an oversized vanity in a small bathroom reads as cramped, not grand. The rooms that feel genuinely luxurious are the ones where every element looks like it belongs exactly where it is.
How do you know whether your layout actually needs to change?
If you find yourself regularly working around the space, stepping aside for the door, reaching over someone, waiting because there’s only one usable sink position at a time, the layout has a functional problem, not just a style problem. Style problems are solved with new finishes. Functional problems come back every single morning regardless of how beautiful the tile is. If your bathroom consistently frustrates you during use, the layout is worth addressing.
Does the primary bathroom really affect how a home feels to live in?
More than most people realize. The first room you walk into in the morning and the last one you’re in at night sets a tone that’s easy to underestimate until you change it. Homeowners who remodel a primary bathroom consistently describe the result as feeling like the whole house shifted, not just the room. There’s something about a space that functions well and feels considered that carries into the rest of the day.
Should both people in the household have equal input on the design?
Yes, but structured input works better than open-ended collaboration. Asking “what do you want?” to two people with different tastes produces conflict. Ask each person to identify their top three non-negotiables instead. Design around those six priorities and you end up with a bathroom both people feel ownership over. The aesthetic decisions outside the non-negotiables are usually much easier to resolve once the functional priorities are settled.
What’s the difference between a refresh and a full remodel, and how do you know which one your bathroom actually needs?
A refresh replaces surfaces and fixtures without touching plumbing or layout: new vanity, new tile, new mirror, new lighting. It can transform the way a bathroom looks and feels for a fraction of full remodel costs. A full remodel changes the layout, relocates plumbing, or addresses structural issues. If your bathroom functions well but looks dated, a refresh may be all it needs. If the layout creates daily friction, a full remodel is the only thing that actually solves it.
A Bathroom Worth Walking Into Every Morning
Look, the primary bathroom is the one room in your house that never gets a day off. It earns its renovation budget in a way that a guest room or a formal dining room just doesn’t, because you’re in it twice a day, every day, for as long as you live in the house.
Getting it right isn’t about spending the most money. It’s about making the right decisions in the right order, with a clear picture of what you actually want before anyone picks up a pry bar.
Start with layout. Decide the tub question. Build a realistic budget from the scope you actually want. Choose finishes that perform in the Houston climate, not just finishes that look beautiful in photos. And put a real plan together before demo day so the project runs on decisions instead of delays.
Sometimes that whole process is something homeowners can manage with good information and a clear head. Other times, it helps to have someone in your corner who has been through it hundreds of times and knows where the expensive surprises tend to hide.
That’s what Design on a Dime Interiors does for families across Montgomery County and Greater Houston. We help you get from “I want to fix this bathroom” to a finished space that actually works for the life you’re living in it.
If you’re ready to start planning, reach out to our team and let’s figure out what your primary bathroom can become.
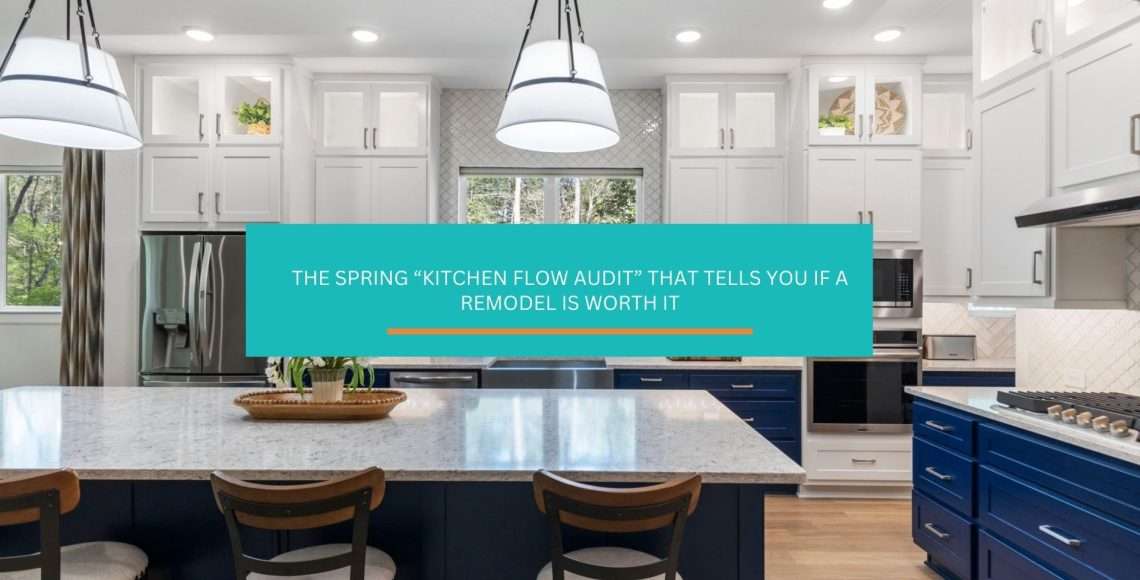
A kitchen flow audit can tell you more in one afternoon than months of second-guessing about whether you really need a remodel.
Before you start pricing cabinets or saving those backsplash photos, let’s slow down and look at how your kitchen actually works for you.
Do you glide through dinner prep, or do you feel like you’re running laps around the island just to boil a bit of pasta?
You see, hun, most folks don’t need more square footage. They need better flow.
This simple audit will help you spot what’s slowing you down, what could be fixed without tearing anything out, and when it might be time to think bigger. Grab a notepad and let’s take a closer look.
Step 1: Spot Layout Bottlenecks in Your Core Work Zones
Before you price cabinets or knock down walls, let’s look at how your kitchen actually functions. Most flow problems show up in three core zones:
Prep, cooking, and cleanup.
When those areas crowd each other or overlap in all the wrong ways, you feel it, darling. Dinner turns into laps between the sink and stove, and two people can’t pass without a side step and a sigh.
A solid layout keeps each zone clear, connected, and supported with the right amount of space. When one zone steals from another, though, that’s your first red flag.
The Prep-Cook-Clean Reality (Beyond the Triangle)
For years, everyone talked about the work triangle. You know, sink, stove, refrigerator. And sure, it made sense in smaller kitchens decades ago. But hun, most homes these days are larger, more open, and used by more than one cook at a time.
The “triangle” doesn’t account for islands, coffee stations, or kids grabbing snacks while you sauté onions. Plus, it ignores how we really cook now. You might prep at the island, rinse produce at the sink, season by the range, then plate near the dishwasher.
You get the idea.
So, instead of obsessing over a perfect triangle, think in zones:
Separate areas for prep, cooking, and cleanup that actually match how you move.
If those zones overlap in awkward ways, you’ll feel the friction.
That gorgeous refrigerator? It’s probably smacking your island every time you grab milk. Your dishwasher? It’s likely blocking cabinet access when open. And don’t get me started on your oven door turning the main walkway into an obstacle course.
Microwave installed too high or too far from the prep space
Outlets and water lines playing hide-and-seek with your actual appliances
Major appliances crowding one side, while the other side sits underused
These aren’t just small annoyances, hun. They multiply every single day.
Traffic Flow Vs. Task Flow
This is where many kitchens fall apart.
Traffic flow is how people move through the space. Task flow is how you move while cooking. When those two paths collide?
Well, let’s just say they make simple tasks unnecessarily frustrating.
If guests cut through your prep area to reach the patio, or your kids cross behind you to grab cereal while you’re draining pasta, that right there is a layout bottleneck.
Your cooking zone shouldn’t double as a hallway.
Okay, now, stand in your usual prep spot and imagine someone walking behind you.
Do you feel crowded? Do you have to pause what you’re doing?
That’s your kitchen telling you something, and you might wanna listen. You should check out our Tory Ann Project to see what’s possible when you do.
Even small layout tweaks can transform your kitchen, but sometimes the bones of the space need a fresh perspective. Design on a Dime can help you reimagine your kitchen.
Step 2: Run a Real-Life Movement Audit
Now that you’ve spotted potential layout trouble, it’s time to see how your kitchen performs in real life. Not in theory. Not on paper. No, I’m talkin’ in the middle of making dinner when everyone is hungry and asking questions.
This is where the truth shows up.
The 5-Minute Movement Test
Okay, it’s time to play the kitchen detective, honey. This 5-minute movement test is gonna blow your mind with what it reveals.
Grab your phone, set a timer for five minutes, and pretend you are making your favorite meal. Nothing too fancy. Just move the way you normally would. As you cook (or pretend to cook), pay attention to how often you’re darting around, reaching for things, or bumping into corners.
How many times do you move between the sink, refrigerator, and stove? Do you tend to backtrack ‘cause something’s not where you expected? Are you mostly reaching high, bending low, or sidestepping around obstacles?
You don’t need perfect answers here. You’re just looking for patterns.
If you feel like you’re pacing back and forth more than cooking, that’s a sign the layout is making you work harder than you should. Remember:
Your kitchen should support your rhythm.
Tracking Your Prep Pattern
Now, honey, I need you to pay attention to where prep actually happens.
Do you chop vegetables at the island but store the knives across the room? Is your trash pull-out nowhere near the cutting board? Are your spices by the stove while your mixing bowls live on the opposite wall?
These small separations create constant micro-movements. And sure, one trip may not seem like much, but twenty trips in one meal?
Baby, that’s gonna wear you out.
Notice where you naturally stand. That’s your true prep zone. Everything you use daily should live within arm’s reach or one easy pivot away. If you’re stretching, crossing the kitchen, or weaving around furniture to finish a simple task, that’s a flow issue, not a square footage problem.
Mapping Collision Points
If your kitchen feels like a bumper car arena every time two people try to grab coffee, you’ve got collision points that need serious attention.
So, mark every spot where paths cross, and watch what happens when someone else enters the room.
Does the fridge door block the walkway, and does the oven swing into your entry path? Do kids cut behind you to reach the pantry?
If the space feels tight or tense, your kitchen is doubling as a hallway, and you’ve got some major collision points. These crashes happen where your “work triangle” intersects with your main traffic paths, and once you see them clearly, you’ll know exactly where your remodel dollars need to go.
Constant backtracking and crowded pathways mean it might be time to rethink the layout. With a focus on real-life workflow, Design on a Dime creates kitchens where every step has a purpose.
Step 3: Audit Storage, Landing Space, and Everyday Ergonomics
Two things can be true at the same time, hun:
Your kitchen can look beautiful and still wear you out.
So, this step is about the quiet strain you feel at the end of the day. I’m talking about the extra bends, the nowhere-to-set-it-down moments, and the constant shifting of items just to find what you need.
These aren’t small annoyances. They’re design signals.
Landing Space Rules Most Kitchens Ignore
Let’s start with those counters of yours.
Every major appliance needs landing space beside it. That’s the safe, usable stretch of counter where you set things down without juggling.
Here’s what you actually need around those hardworking zones:
At least 15 inches next to your refrigerator
About 24 inches on one side of the sink and 18 on the other
At least 12 to 15 inches beside the cooktop or stove
A solid 24 inches of clear space near the dishwasher for unloading
If you are regularly balancing grocery bags on the floor and setting hot pans on your stove because there’s nowhere else to go, you’ve found your remodel’s biggest pain point:
Your kitchen is short on landing zones.
And no, decorative canisters don’t count. This space needs to stay usable.
Storage and landing zones truly make a big difference in daily comfort. Design on a Dime’s team can help you maximize functional space in your kitchen.
The Bend-and-Reach Reality Check
Now, let’s talk about your body.
Every single bend, stretch, and awkward twist adds up to serious wasted motion, and honey, your back is keeping score even if you’re not.
Stand in the kitchen and think about what you use every day. I’m talking skillet, cutting board, coffee mugs, and olive oil. Where do these things live?
If most of your daily items are below your knees or above your shoulders, you’re working way harder than you should.
The most efficient storage lives between waist and shoulder height. That’s your comfort zone. When the high-use items sit there, movement feels natural. When they don’t, you bend, squat, stretch, and twist over and over again.
And baby, those repeated motions add up fast.
Before you assume you need a full remodel, though, try this little exercise:
Move your most used items into your comfort zone, swap the rarely used gadgets into lower cabinets, and bring everyday tools closer to where you actually prep and cook.
If these tweaks dramatically improve how your kitchen feels, your layout might still be workable with better storage. If you still feel strain and clutter, no matter how you rearrange? Well, darling, that just tells you the issue runs deeper.
Step 4: Rank Problems by Impact and Cost
Now that you’ve gathered all this information, it’s time to get practical.
Every issue you spotted doesn’t deserve the same level of investment. Some problems are small but loud. Others quietly steal your time and energy every single day. Your job right now?
Separate inconvenience from true inefficiency.
So, grab your notes and ask two simple questions:
How much does this slow me down or strain my body?
It’s best to start with the easy victories. These are problems that create daily friction but can be solved with reorganization or minor upgrades.
Examples include:
Relocate high-use items into your go-to prep zone
Add pull-out shelves to deep cabinets
Create designated zones by grouping related items together
Install a rolling cart for extra prep space
If these small changes dramatically improve your movement, you just saved yourself from an unnecessary remodel.
Structural Changes That Signal a Remodel
Of course, there are problems that no amount of rearranging can fix. When your kitchen flow problems run deeper than a messy junk drawer, structural changes might be your only real solution.
Here’s when you might need to break out the sledgehammer:
Traffic constantly cuts through your main prep zone
The sink location makes a logical workflow impossible
Load-bearing walls create tight bottlenecks
Your zones are scattered all over the place
The placement of major appliance blocks the main walkways
These problems demand serious intervention, not just surface solutions. And yes, that could mean it’s time for a kitchen remodel.
I’m not sayin’ you should rush into construction, but let’s be honest:
When the cost of daily frustrations outweighs the cost of fixing it properly, darling, you’ve probably reached your tipping point.
Step 5: Signs Your Audit Points to a Remodel, Not a Quick Fix
Okay, sugar, this is the moment of truth.
If small adjustments made a big difference, wonderful. You might be able to improve your kitchen without tearing it apart. But if you worked through this audit and still feel some tension in the space, that can be a vital piece of information, too.
You see, some problems are cosmetic. Others, however, are built into the bones of the layout.
Here are the signs you’re likely looking at a remodel, not another round of organizing.
Persistent Workflow Bottlenecks
You rearranged those drawers, you cleared the counters, you shifted the appliances where possible, and yet, you’re still:
Backtracking between zones
Pausing to let someone pass behind you
Walking across the kitchen for basic prep tasks
Feeling crowded when more than one person cooks
These persistent pain points scream “remodel time” louder than a smoke detector at breakfast.
If friction shows up every single meal, the layout itself may be the issue, and no storage bin is gonna solve that.
Multiple Storage Failures Across the Room
Storage failures pile up like dirty dishes after Thanksgiving dinner, and they’re costing you way more than you think.
One awkward cabinet is pretty normal. But if you have deep corners that waste space, upper shelves you never reach, and a pantry that overflows no matter what you do?
Honey, that points to a larger design gap.
When storage fails in more than one zone, it usually means your kitchen was not planned around how you actually live. And that’s a structural conversation, not just an organizing project.
The Layout Contradicts How You Actually Cook
Maybe you prep at the island, but your sink is tucked in a corner. Maybe you love to bake, but your mixing area has no landing space. Maybe your family gathers in the kitchen, but the traffic cuts right through your cooking zone.
When your kitchen layout fights against every single thing you are trying to accomplish, that’s the universe screaming at you to call in a professional designer. I mean, why make daily life harder than it needs to be?
Traffic Cuts Through Your Prep Space
If your main walkway runs directly behind the stove or across the chopping area, that counts as more than an annoyance, sugar.
It’s a workflow issue and, more importantly, a safety issue, ‘cause when the kitchen doubles as a hallway, you’re constantly adjusting instead of focusing.
If several of these signs ring true, it may be time to bring in a designer who can rethink the layout from the ground up. Not just to make it prettier, but to make it finally work for you. Design on a Dime’s team focuses on layouts that match your lifestyle, creating spaces that are beautiful and functional.
Step 6: Turn Your Audit Notes Into a Smart Design Brief
If you decide to move forward with a designer, this audit becomes powerful. It shifts the conversation from “I want it to look better” to “Here’s how I need it to function.”
Let’s start with the basics.
Prepare clear measurements of the room, including wall lengths, ceiling height, and appliance sizes. Even rough numbers can help your designer assess the space more accurately from the start.
Next, snap those photos, including wider shots of the whole room and close-ups of the areas that frustrate you most. Trust me, a picture of a blocked walkway or a cramped prep corner says more than a paragraph ever could.
Oh, and bring your ranked problem list, too. I want you to show me which issues affect you every day and which ones are simply “nice to fix.”
And most importantly, honey, describe your habits.
Do you cook every night? Host big family gatherings? Need space for kids to do homework nearby?
‘Cause let me tell you, real life matters more than Pinterest boards.
Pretty is wonderful. Functional is life-changing. When you lead with how you live, your designer can create something that truly works for you. And that’s when things finally fall into place.
Frequently Asked Questions
How much does it cost to fix kitchen layout issues?
The cost depends on the level of change. Simple storage upgrades generally cost a few hundred dollars. Cabinet and appliance modifications can run you several thousand dollars, while structural layout changes involving plumbing or walls typically require a full remodel investment.
Can you improve kitchen flow without remodeling?
Yes, sometimes you can. Reorganizing existing storage, protecting landing space, and relocating high-use items can significantly improve efficiency. If the core layout of the kitchen is sound, these smaller changes may be enough.
What is the biggest mistake homeowners make when remodeling for flow?
The biggest mistake is focusing on finishes before function. Beautiful tile and lighting can’t compensate for poor zone planning. So, if you’re remodeling for flow, layout decisions should always come first.
How long does a professional kitchen layout redesign take?
Design timelines vary, but a thoughtful layout plan usually takes several weeks. That includes measuring, reviewing how you use the space, developing options, and fine-tuning the details before the construction begins.
Does kitchen flow really affect home value?
Yes, it absolutely does. Buyers may not use the words “kitchen flow audit,” but they can feel the awkward layouts immediately. A kitchen that moves well feels larger, more functional, and more desirable, which is only gonna drive your home value up.
When Your Kitchen Finally Starts Working for You
Think of your kitchen audit like a treasure map, minus the pirates but with way better rewards.
You’ve got the data, you’ve spotted the bottlenecks, and now you know exactly where your money should go. No more guessing games or designer-induced panic attacks, ‘cause you’re making moves backed by cold, hard evidence.
That’s what we call kitchen confidence, baby.
If your audit revealed deeper layout issues, you don’t have to figure that out alone. Design on a Dime can help you design your kitchen around real life. When you’re ready, you can reach out to our team and start the conversation.
Have you ever wondered why remodeling one room often reveals problems in another?
It comes down to one simple truth:
Your house is one connected system. The minute you open a wall or pull up flooring, the story behind your home starts unfolding.
What looked like a quick, simple kitchen refresh can suddenly point to plumbing issues in the next room or electrical quirks down the hall. It’s not bad luck, hun. It’s how houses work.
So, if you’ve ever wondered how and why a small update can grow legs, keep on reading. I’m gonna walk you through what’s really happening behind those walls and how to approach it with confidence instead of panic.
What Really Happens When You Remodel “Just” One Room
You may walk into a remodel thinking, it’s just the kitchen. Just the bathroom. Just the guest room. But the moment those walls open up, your home starts telling the full story.
Behind the drywall sits a network of plumbing lines, electrical wiring, framing, insulation, and ductwork that doesn’t stop neatly at the edge of one room. Everything connects. And when you disturb one part, the rest of your house usually responds.
That’s not bad news. It’s just how houses work, sugar.
Opening Walls Exposes Hidden Systems
The biggest shift happens during demolition. Once those cabinets come out and tile gets pulled, what was once invisible becomes… well, very visible.
You might discover aging wiring that doesn’t meet today’s safety standards, plumbing lines shared with the bathroom down the hall, subfloor damage from a slow leak you never realized was there, and framing that has settled over time.
You get the idea.
None of this means your home is falling apart, okay? It’s just that remodeling reveals what everyday living has quietly covered up.
It really helps to remember that your home is a system, not a collection of isolated boxes.
Rooms share load-bearing walls, electrical circuits, water supply and drain lines, HVAC runs; you name it.
So, when you upgrade a kitchen sink, you may affect water pressure in a nearby bathroom. When you add recessed lights, you might push that old electrical panel to its limit. When you level one floor, you can even discover that the hallway is slightly sloped.
It’s all connected.
Modern Upgrades Put Pressure on Older Systems
Today’s remodels typically include heavier appliances, brighter lighting, added outlets, larger showers, and better ventilation. Can you tell where I’m going with this?
All of that requires stronger support behind the scenes.
In many homes, especially those built a few decades ago, the original systems weren’t designed for how we live today.
The new induction range may require electrical capacity that the current panel doesn’t have. The spa-style shower might reveal undersized drain lines. New insulation in one space could highlight the “energy gaps” in another.
That’s why a seemingly simple one-room remodel can get out of hand.
Not ‘cause something went wrong, sweetheart, but ‘cause improvement in one area usually exposes limits elsewhere.
When budgets stretch, and timelines wobble, it’s usually because decisions were made room by room, not system by system. Design on a Dime builds structured plans that align scope and spending from the start, keeping your project steady and predictable.
What Demolition Reveals About Your Home’s Structure
Demolition day has a way of telling the truth.
Once the drywall comes down and the flooring is pulled back, you’re no longer guessing about what might be behind the surface. You’re looking straight at the bones of your house, sugar.
And sometimes, those bones have stories to tell.
Most of the time, what you find is just normal aging. But other times, it explains why that floor always felt a little soft or that doorway never quite closed right.
Framing Weaknesses That Stayed Hidden for Years
Framing is the skeleton of your home, hun. And when it’s strong and properly supported, everything above it performs the way it should.
But over time, homes tend to settle. Lumber dries out. Past renovations might’ve altered supports without fully reinforcing them. And in some cases, a previous repair solved the cosmetic issue without addressing the structural cause.
You might see improperly altered load-bearing walls, water damage that compromised studs, and termite damage, among other things.
And the worst part?
These issues rarely announce themselves from the finished side of the wall. Remodeling simply gives you access to see them.
Settling and Sagging That Affects More Than One Room
One of the most common surprises is sagging or uneven framing.
Maybe the kitchen floor dips slightly toward the center. Maybe those cabinets were shimmed years ago to compensate for a slope. Either way, once the finishes are removed, the underlying cause becomes easier to identify.
Here’s where that connection I talked about comes in:
Load-bearing elements don’t serve just one room. A beam in the kitchen may also support the dining room ceiling. A shifted foundation corner may show up as cracks down the hallway.
You see, honey, since structural loads travel through the entire frame, adjusting or reinforcing a single area often means evaluating adjacent spaces, as well.
That’s not overkill. That’s responsible planning.
Subfloor Deterioration You Couldn’t See From Above
Subfloor damage is another common discovery.
A slow plumbing leak, minor appliance overflow, or years of humidity can weaken plywood and create soft spots. Tile and hardwood can hide that damage surprisingly well… until they’re removed, that is.
Once exposed, you might find:
Darkened or delaminated plywood
Spongy areas near sinks or tubs
Fasteners that have loosened due to movement
Uneven transitions between rooms
Replacing a damaged section in one room can reveal that the issue extends beneath the adjoining space. That’s how a one-room flooring project turns into a greater (and more expensive) effort. But ignore it, and you’ll risk structural failure… with even bigger repair bills.
Shared Load Paths Between Rooms
There’s one more thing folks commonly overlook, and that’s shared load paths.
When you crack open one room for a remodel, you wake up problems hiding in the next one over, like you just poked a sleeping dragon in your floor joists.
You see, the weight from your roof, upper floors, and walls doesn’t stop neatly at the edge of a remodeled space. It transfers through beams, joists, and posts across multiple rooms.
And what happens when you remove a wall, widen an opening, or add heavier finishes? You change how that weight is distributed.
That doesn’t automatically create a problem, sure, but it does require careful evaluation.
You need to account for these shared structural relationships from the beginning. That way, strengthening one area doesn’t unintentionally stress another.
When demolition reveals something unexpected, it’s not a disaster. It’s information, baby. And information, handled early, gives you the chance to fix the foundation properly so every beautiful finish that follows has something solid to stand on.
Why Plumbing Surprises Rarely Stay in One Room
If there’s one thing that reminds you that your house is one connected system, it’s plumbing.
I know it seems like your bathroom, kitchen, and laundry room all mind their own business. But, hun, your plumbing actually behaves more like a family group chat where everyone’s connected.
You begin with a simple kitchen refresh, then the wall opens, and suddenly, that bathroom down the hall is part of the conversation.
That’s because water lines and drain lines don’t belong to just one room. One main water line feeds every faucet, and one drain stack carries away all the drama. So, trust me, issues travel fast.
It can feel like the house is turning against you. In reality, the remodel simply created an opportunity to see what was already there. Remember, baby, these discoveries protect you from future damage. Instead of covering up aging pipes with new finishes, you get the chance to strengthen the system behind them.
Shared Supply Lines Mean Shared Problems
If you think upgrading your kitchen plumbing is just about that cute new faucet, fasten your seatbelt, baby, ‘cause your bathroom is about to crash the party.
Most homes run hot and cold water through shared supply lines before splitting off to individual fixtures. So, when you increase demand in one space, you sometimes expose weaknesses in another.
You might notice lower water pressure at nearby sinks, temperature fluctuations in the shower, slower fill times in older fixtures, or even minor leaks at joints that were already stressed.
Upgrading a kitchen faucet can increase the flow rate. Installing a larger sink or relocating plumbing can shift pressure. Suddenly, pipes that were “good enough” start showing their age.
A slow drip inside a wall cavity can dampen insulation, stain subfloors, and soften framing for years before anyone notices. By the time you remove cabinetry or tile, the damage might extend beyond that one room you planned to remodel.
Here are some common signs you should watch out for:
Darkened or spongy subfloor near sinks
Stains on the ceiling below
Musty smells behind cabinets
Loose or swollen baseboards in adjacent areas
One thing you need to know about water is that it doesn’t respect room boundaries. It just follows the path of least resistance.
Fixing the source in one room usually requires checking the surrounding spaces to make sure moisture hasn’t traveled.
When Electrical Upgrades in One Room Affect the Whole House
Electrical work has a way of expanding the moment you touch it.
You may just plan to add recessed lighting in the kitchen or upgrade outlets in the bathroom. That sounds simple enough, right? But the second a licensed electrician starts tracing circuits, the bigger picture comes into view.
Electricity doesn’t stop at the doorway. It runs through the shared circuits, panels, and safety systems that serve your entire home.
Outdated Wiring Hiding Behind the Walls
When you begin opening walls in an older home, you’re not just finding dust bunnies. You’re often meeting wiring that’s one bad day away from a fire hazard.
I mean, that wiring might’ve been perfectly acceptable decades ago, hun, but trust me, it struggles to meet modern demands. And every time you run the microwave, hair dryer, and vacuum, your system’s basically whispering, “I can’t keep up, honey.”
If you see cracked insulation, cloth-wrapped wires, or ungrounded outlets, that’s not “vintage.”
That’s a wake-up call.
Outdated wiring is one of the biggest hidden fire risks lurking behind your walls, and this remodel is your opportunity to see and correct these issues before they turn into disasters.
Panel Capacity and Modern Power Demands
Let’s be real:
Today’s homes draw far more power than they did 30 or 40 years ago.
So, even if your home looks all charming on the outside, your electrical system might be trying to power a 2026 lifestyle with 1960s muscles, and that math just doesn’t work, hun.
Think about it.
Large refrigerators, double ovens, air fryers, hair tools, home offices, charging stations, smart devices, all running at once.
Older electrical panels weren’t designed for that lifestyle. When you add new lights, upgraded appliances, or dedicated circuits in one room, everything that’s piggybacking on those tired circuits starts complaining.
At that point, you have two options:
You can scale back the upgrade, or you can strengthen the electrical backbone of the house so it supports what you truly want.
That’s up to you. But either way, you need to make sure that the panel can handle the increased load.
AFCI and GFCI Requirements That Trigger Broader Updates
Open any wall mid-remodel, and every shortcut and safety hazard comes tumbling out. Once an inspector sees them, you’re obligated to bring them up to today’s standards, and before you know it, a “simple” room refresh turns into an investigation for past owners’ shortcuts.
And the current code typically requires updated protection. Think GFCI outlets near water sources, AFCI protection for living spaces, and proper grounding and bonding.
Here’s where the ripple effect kicks in:
If you modify a circuit in one room, inspectors might require that the entire affected circuit meet the current standards. And that could mean updating additional outlets, breakers, and wiring beyond the initial scope.
Remember, honey:
Strengthening the electrical system behind your walls ensures that when you flip that new light switch, the only spark in the room is the one you planned. It’s protection for your family and your investment.
The Insulation and Flooring Surprises Lurking Under the Surface
Flooring day can be so exciting, darling. Samples are chosen, the room is cleared, and everything is ready for that fresh, clean reveal.
Then the old floor comes up, and sometimes, what you see underneath changes the whole plan.
Moisture, insulation gaps, and subfloor issues can stay hidden for years. This remodel just gave you the first real look at the situation.
Insulation Gaps You Never Knew Were There
Hidden insulation gaps are the sneaky little energy thieves you usually don’t catch until you begin tearing things open for a remodel. You could find missing batts in exterior walls, compressed insulation that lost its effectiveness, gaps around plumbing penetrations, and poorly sealed rim joists.
All I’m sayin’ is, renovation time is prime time to fix the issues for good. After all, poor insulation accounts for up to 30% of your home’s energy loss.
Flooring Transitions That Expose Level Problems
I know those little transition strips between rooms may seem minor, sugar, but in reality, they can reveal a lot.
You see, when one floor sits noticeably higher than the next, it usually points to uneven subfloor thickness, added layers from past remodels, settling or framing shifts, or improper leveling during earlier installations.
Trust me, tile meeting hardwood can highlight even seemingly small variations. New flooring installed flush in one room might make the neighboring floor look all sloped.
And I’m guessing you want connections, not tripping zones between rooms, right?
So, don’t treat these transitions as just cosmetic details. They’re what keep that gorgeous new room from looking like it belongs in a different ZIP code.
When A “Simple” Remodel Starts Growing Legs
You walk into this thinking, “We’re just freshening up a single room.” Then a wall opens up and, suddenly, your house starts telling stories.
Electrical that’s not up to code. Plumbing that’s seen better… decades. Insulation that looks like it gave up somewhere around 1998.
One small update pulls on a thread, and before long, you’re staring at a bigger picture that needs a better plan.
And here’s the truth, said with love:
That’s not always bad news.
No, really, our Arbor Project is the perfect example of that.
When you zoom out and plan strategically, instead of reacting room by room, you protect your investment and your sanity.
But first, let’s talk about how these “tiny” remodels start snowballing in the first place.
Budget Creep And Timeline Delays
It usually begins innocently.
“We’re just redoing the guest bath.”
Next thing you know, you’re upgrading fixtures. Then, that old vanity starts looking tired. The hallway lights suddenly feel embarrassing. And that flooring outside the bathroom? Oh, no. Now you see it.
That’s not because people are reckless, though. It’s because once one space looks beautiful, the contrast exposes everything around it.
New tile makes the old trim look worn out. A new shower makes dated countertops feel kind of sad. Fresh paint highlights the aging floors.
You say, “While we’re at it…” and that sentence costs money.
Now, layer in timeline delays and… well, you can probably tell where this is going.
Every surprise adds new steps. Every new step adds time. Every delay shifts your schedule again. Before long, that one-room refresh has turned into a living-in-a-construction-zone marathon.
Scope Expansion And Decision Fatigue
There’s a second snowball nobody talks about enough.
It’s not just your budget. It’s your brain.
At first, you’re excited. You’re picking tile, lights, paint colors, and it all feels creative and fun. But then, the decisions multiply.
Do we match the floors in the hallway? Should we upgrade the baseboards everywhere? If we’re rewiring this wall, should we add outlets?
Scope expansion is logical. You’re already in there, so it feels efficient to fix the adjacent issues, but every added decision costs mental energy. And just a few short weeks later, even choosing a faucet finish can feel overwhelming.
That’s your cue to check in, ‘cause when you’re tired, you’re more likely to rush decisions just to be done, approve upgrades you didn’t fully evaluate, and second-guess everything later.
When To Pause And Reassess Instead Of Powering Through
Let me say this clearly:
Pausing isn’t quitting. It’s protecting your home and your wallet.
Termites, foundation cracks, or major wiring problems appear.
Costs climb more than 15% above your original budget.
Permits, inspections, or material delays stretch your timeline and your stress levels.
If you’re feeling more frazzled than excited, that’s your sign.
Take a breath. Review the full scope. Think about whether it makes sense to complete adjacent work now instead of patching and reopening later.
Sometimes, the best move is zooming out and creating a whole-home plan, even if you phase that work over time.
And honey, when you step back, gather the right team, and make decisions with clarity instead of urgency, that snowball can turn into momentum instead of mayhem.
When a one-room project starts revealing bigger patterns in a home, that’s the moment when experience matters most. Design on a Dime handles every remodel with a whole-home perspective, so that smaller updates don’t spiral into expensive surprises.
The Design Ripple Effect That Makes The Rest Of Your House Look Tired
Nobody warns you about this part:
You finish one gorgeous room. It is fresh. It is polished. It feels like a magazine spread. Then you walk into the next space and think… oh no.
That’s the design ripple effect.
One updated room doesn’t quietly sit there looking pretty. It shines a spotlight on everything around it, and suddenly, the old floors feel heavier. The lighting feels off. The trim looks forgotten. What used to feel “fine” now feels dated.
You see, design doesn’t live in isolation. It flows.
On that note, you should be watching for these disconnects:
Warm wood cabinets next to cool gray flooring
Modern matte black fixtures beside shiny chrome in the next room
Thick traditional baseboards meeting slim contemporary trim
Trend-forward tile next to dated carpet
Individually, none of these are disasters. But together, they create the patchwork effect.
And patchwork rarely feels intentional, sugar.
So, let’s talk about what actually creates that “patchwork” feeling and how to prevent it.
Flooring Transitions That Tell On You
Flooring is one of the biggest visual connectors in a home.
When plank direction shifts randomly, heights are uneven, or transition strips look like an afterthought, the eye feels the interruption.
And yes, even subtle changes, like wide planks meeting narrow boards without a clear reason and glossy tile beside matte hardwood, can have the same effect.
Remember, transitions should feel deliberate.
Same-height surfaces call for cleaner T-molding. Level changes need proper reducers. Undertones should complement each other, even if the materials differ.
When floors flow, the whole house feels calmer. When they fight, everything feels disjointed.
Lighting Temperature Mismatch That Feels Chaotic
Lighting is sneaky, darlin’.
You can have beautiful finishes, but if one room glows icy white and the next glows all buttery yellow, your house feels… well, confused.
Now, lights account for around 15% of home electricity use and switching to LED bulbs that use up to 90% less energy and last dramatically longer does save money, sure. But consistency matters just as much as efficiency, hun.
So, think in layers across the house. I’m talkin’ ambient lighting for the overall glow, task lights where you work, and accent lighting for a bit of personality.
Then, match your color temperature. If your kitchen runs at 3000K, don’t let your hallway drift up to 5000K. Keep the warmth consistent so your spaces feel connected.
And please, hun, plan fixtures around sightlines, so that one glam chandelier doesn’t end up fighting three random flush mounts.
Finish Coordination That Prevents The Patchwork Effect
Here’s where strategy changes everything.
Once you renovate one room, it becomes a design reference point. The rest of your home should respond to it, not compete with it.
Of course, that doesn’t mean you must remodel everything at once. It means you build a roadmap.
Ask yourself:
Are my metal finishes repeating intentionally throughout the house?
Do my paint undertones connect room to room?
Are my flooring transitions planned or reactive?
Does my lighting temperature stay consistent?
Do trim profiles and door styles align?
Surveys show that after completing one project, up to 86% of homeowners feel motivated to update more spaces. So, no, you’re not imagining that urge to keep going.
Design momentum is real. But momentum without coordination leads to patchwork.
And that, hun, is the difference between a room that looks updated and a home that feels designed.
A beautifully updated space should improve your home, not expose inconsistencies. Design on a Dime’s team creates cohesive design plans that connect finishes, lighting, and flow from space to space, so your home feels intentional instead of pieced together.
Planning One Room The Smart Way So The Whole House Stays Calm
A one-room remodel should feel exciting, sugar, not like you accidentally tipped over the first domino in a whole-house avalanche.
The secret isn’t shrinking your vision, though. It’s planning wider than a single room.
When you think ahead, inspect early, and phase intentionally, you stay in control. But when you skip that groundwork?
Surprises take over.
Here’s how to remodel one room without triggering chaos everywhere else:
Start With Pre-Demo Eyes Wide Open
Before a single tile comes up, you want clarity on what is hiding behind those walls. Nearly half of renovating homeowners report unexpected problems once work begins. That number alone shows that pre-demo preparation isn’t optional. Home inspections average around $343, and often reveal three or four defects. That’s not bad news, though. That’s information.
Scope The Drains And Check The Electrical Load
Bathrooms and kitchens deserve deeper investigation. Camera scoping drains before demo could reveal root intrusion, cracked sewer lines, sludge buildup, and improper slope, among other things. Fixing these after new flooring and cabinetry are installed is painful and expensive. Catching them early is a strategic move, hun. It should go without saying, but electrical load analysis matters, too. Overloaded circuits aren’t just inconvenient. They’re flat-out dangerous.
Build A Phased Master Plan, Even If You Remodel In Stages
This is where most people get tripped up, darlin’. They plan one room at a time instead of mapping the whole house first. And no, a phased master plan doesn’t mean you should renovate everything at once. It simply means you design the full vision, then execute in smart steps.
Now, remodel regret usually comes from one of two things:
You discovered problems too late. Or you realized too late that the new room doesn’t connect to the rest of the house.
You can absolutely remodel one room at a time, just do it with a whole-house mindset. That, sweetheart, is how you upgrade one room without accidentally signing up to renovate the entire house in a panic.
The difference between a stressful remodel and a smooth one is preparation. With Design on a Dime, the inspections, planning, and phased strategy all happen before demolition begins. Our team helps you move forward with clarity instead of guesswork.
Frequently Asked Questions
How much contingency should I realistically set aside for a one-room remodel?
Most professionals recommend setting aside 15–25% of your projected budget, depending on the age and condition of your home. Keep in mind that older houses or homes with previous DIY work typically warrant a higher “cushion.”
Will remodeling just one room raise my home’s appraised value?
It can, but usually, a single-room remodel protects value more than it dramatically increases it. Appraisers look at your house as a whole, so cohesive updates and system improvements typically carry more weight than one standout space.
How do I decide which room to remodel first if multiple areas need work?
You should start with safety and water-related concerns. After that, focus on the rooms that actually impact daily function, like kitchens and primary bathrooms.
How long should I wait between remodel phases?
How long you should wait between remodel phases depends on budget, lifestyle, and material availability. Some homeowners phase their projects over several years, while others complete adjacent spaces within months to maintain design continuity.
Are permits always required for a one-room remodel?
Not always, but many projects involving plumbing, electrical, structural changes, or any load-bearing walls do require permits. Remember, skipping them can create problems during resale or refinancing.
Ready to Remodel the Smart Way?
So, sugar, when you crack open one room, don’t be shocked if your whole house starts spillin’ secrets like a dramatic soap opera. But here’s the beautiful part:
Discovering more than you expected isn’t a sign that your project failed. It’s merely a sign that your home needs a better plan. The difference between chaos and confidence is having the right strategy before you start swinging hammers.
That’s where Design on a Dime comes in. Every project begins with clarity, coordination, and a vision that looks beyond just one set of walls.
Have you ever wondered how remodeling decisions affect each other?
In my experience, it’s one of those things homeowners don’t fully realize until they’re already knee-deep in dust, delays, and “Why didn’t anyone tell me this sooner?” moments.
When you remodel, the order you make decisions in is everything, ‘cause if you pick pretty tile before you move walls or upgrade wiring, you’re basically frosting a cake that’s still raw in the middle.
When decisions are made in the right order, though, things start clicking into place, and the whole process feels calmer and far more intentional.
Smart planning isn’t optional, hun. It’s your best friend. Stick around, and you’ll see what I mean.
Start With the Big Picture Before You Remodel a Single Room
Before you fall in love with a countertop and start pinning backsplash ideas, take a breath and zoom out. A successful remodel starts with how you want to live, not how one room looks on its own.
Picture a regular Tuesday ten years from now.
Who’s home? Where does the day start and end? Where do you work, gather, unwind, and recharge?
Those everyday rhythms guide every decision that follows.
Kitchens that handle daily traffic, bathrooms that serve multiple people, and storage that keeps clutter from creepin’ in tend to rise to the top. From there, you outline a simple roadmap that tackles structure, layout, and systems first, then saves surface upgrades for later phases.
When habits come first, costly do-overs tend to disappear.
See the Remodel Sequence Clearly From the Start
With your vision set, the next step is matching it to a realistic sequence.
Okay, you’ve sketched out how you want to live in your home. Now, it’s time to match that dream to a clear step‑by‑step game plan, so you’re not picking grout while someone is tearing out your subfloor.
Each phase sets up the next. And when design, construction, and trades are all coordinated from the start, decisions happen at the right moment, and work moves forward without unnecessary backtracking.
Here’s what a simplified timeline often looks like:
Weeks 1 to 4: Demolition, structural work, permits, and finalized plans
Weeks 5 to 7: Windows, drywall, and major flooring installed
Weeks 8 to 9: Paint, cabinetry, fixtures, and final cleanup
Projects that skip this kind of planning tend to stretch longer and cost more than expected. Sequencing is one of the most effective ways to protect both your timeline and your budget.
When your lifestyle, priorities, and future plans are mapped out early, every later decision gets easier. This is exactly how Design on a Dime approaches remodeling, by helping clients define how their home should work before a single surface gets touched.
Align Remodeling Decisions With Long-Term Plans
Let’s be real; most folks aren’t remodeling for a quick flip. They’re planning for years of living, hosting, and growing into their space.
So, your remodel should support where you’re headed, not just how you feel right now.
Plus, long-term planning keeps your spending in check. Instead of trying to tackle it all at once, many folks find that it’s smarter to budget for future phases that build on each other. That way, you’ll preserve function along the way and keep the home feeling finished, even as improvements continue.
Resale still matters, of course, but it should be balanced with livability.
Projects that improve the layout, efficiency, and everyday comfort tend to serve both goals well. And since most homeowners rely on professional help rather than going fully DIY, having a long-range plan makes it easier to coordinate different phases with the right team.
Remember, sugar:
When the big picture is clear, every smaller decision has a place to land. And that’s when a remodel starts to feel intentional instead of overwhelming.
Fix What Cannot Be Easily Changed First
Once you see which decisions belong in which phase of your remodel, the whole process stops feelin’ like chaos and starts feelin’ like a plan.
Start With Safety, Structure, and Code Basics
Now, honey, every smart remodel starts with safety.
Not ‘cause it’s exciting, but because it protects everything that comes after it. I mean, stunning finishes are gonna mean very little if the bones of your house aren’t sound.
This is where things like smoke and carbon monoxide detectors, updated electrical panels and wiring, and safe exits belong. Working alarms alone can cut the risk of fire-related deaths by 60%, and outdated wiring remains one of the most common sources of household fires.
These upgrades aren’t optional, even if they’re not the fun part.
Now is a good time to bring in a professional to review foundations, beams, and load-bearing walls. When structure and code requirements are addressed early, you can avoid tearing into finished work later just to fix something that should’ve been handled from the start.
See, now the rest of your remodel has a solid place to stand.
Structural Changes That Set Off Chain Reactions
Any time you change the structure of a house, you change how the entire house behaves. Moving a wall, opening up a ceiling, or altering a floor plan does far more than shift a room’s look. It rewrites your whole house’s rulebook.
Structural changes set off a chain reaction. So, you’d better tackle them before the pretty stuff, sugar.
You see, structural changes usually require new beams, reinforcements, and even foundation work. Those updates affect electrical runs, plumbing paths, and HVAC layouts, and the last thing you want is to have to deal with these once your finishes, cabinetry, and lighting plans are finalized.
And no, these aren’t optional. Roughly 25% of existing homes show some form of structural problems, and once you start opening things up, those realities surface quickly.
When the bones of your home are handled first, everything can move forward with confidence.
Plan the Layout Before You Touch a Single Finish
Your floor plan isn’t just lines on paper, hun. It’s the blueprint for how your home will actually work for your family every day. When you plan layouts first, you save yourself headaches, surprise costs, and a whole lot of frustration later.
Everything else, including walls, lighting, and plumbing, follows the path you create here.
Layout Decisions Shape Plumbing, Electrical, and Airflow
Before you fall hard for tile or countertops, lock in your layout, ‘cause moving walls, doors, or fixtures after finishes are installed is one of the fastest ways to pay for the same remodel twice. And I’m sure you’re not lookin’ to waste that hard-earned cash here.
I suggest you start with the floor plan.
When walls shift and doorways move, you solve everyday problems early.
Tight walkways open up, furniture finally fits where it should, and rooms start working with you, not against you. Besides, reviewing your layout with a professional helps you spot issues, such as awkward bathroom clearances, shallow closets, and privacy conflicts, before you commit to construction.
When the layout comes first, everything else, from lighting to plumbing, lines up more smoothly.
A strong layout is the difference between a remodel that’s effortless and one that keeps surprising you for all the wrong reasons. Working with Design on a Dime’s team can prevent costly revisions later and make sure your home functions beautifully long after construction dust settles.
Kitchens and Baths Start With Plumbing Every Time
Let’s talk about the part of remodeling nobody posts on Instagram:
Plumbing moves.
It may not be glamorous, but it quietly controls how kitchens and bathrooms function. Any time sinks, tubs, or appliances move, plumbing has to be addressed before finishes are even considered.
This is especially important in older Texas homes, where the original pipes might already be near the end of their lifespan.
You want to tackle this early so your pretty tile and cabinets never meet a surprise leak. With walls open, a licensed plumber can check for corrosion, slab concerns, or any code issues while access is still easy and the repairs are less disruptive.
Again, this isn’t some “nice-to-have.” Household leaks can waste up to 10,000 gallons of water each year, and many homes have small leaks that homeowners never notice. Let’s make sure your home isn’t one of them, okay?
Electrical and HVAC Follow the Floor Plan
I know it’s tempting to jump straight to pretty pendants and shiplap ceilings, but darling, you need to tackle the electrical first if you want a drama-free remodel.
You deal with all the wiring and HVAC planning while those studs and joists are open, not after drywall and ceilings are finished. That’s when outlets, switches, lighting, and vents all get placed where people actually live, not where the builder guessed back in 1997.
Open walls mean smart outlet and switch placement now, before post-drywall changes triple the expenses and potentially damage your finished surfaces.
The same goes for HVAC planning. Ducts, vents, and returns need to align with room layouts and furniture placement, so the air actually reaches people, not corners. I mean, vents and ducts are basically the lungs of your home, hun. You can’t just sprinkle them around like décor and hope for the best.
When layout, plumbing, electrical, and HVAC are planned together, finishes become the final layer instead of the first mistake.
Build Your Budget Around How Decisions Connect
Money matters, honey, and the smartest budgets don’t treat rooms in isolation. Every choice you make tends to invite a few friends along, and you need to make sure that your dollars go exactly where they are supposed to.
How One Change Quietly Triggers Multiple Costs
The biggest budgeting mistake I see folks make is planning by room instead of by decision.
One change rarely stays in its lane. Move a wall, and suddenly, flooring shifts, lighting plans change, and trim details need rethinking, too.
That’s why a smart remodel budget accounts for chain reactions from the start.
What feels like a small upgrade can bring a few tag-along costs with it, especially when structure, layouts, and exterior elements are involved.
Our team saw this firsthand in the Sarah Project, where years of back-and-forth over the master bathroom disappeared once decisions were sequenced properly, turning hesitation into a clear plan and a space she now loves using every day.
Trust me, honey, costs stack up fast. And to make matters worse, 39% of homeowners end up going over their budgets. But when the remodeling budget is built around how decisions affect one another, there are fewer shocks and far fewer moments of wondering, “Wait, where did my money go?”
Plan for Phases Without Creating Rework Later
Most remodels are not “one-and-done” projects, and that’s perfectly fine. What matters is planning phases intentionally so that today’s work doesn’t undo tomorrow’s plans.
So, before you pick finishes, get honest about how many phases your remodel will really have. That clarity guides where money should be spent now and where it’s better to hold back.
As you know by now, structural work, layout improvements, and system upgrades almost always belong in earlier phases. They support everything that comes later.
I noticed that folks tend to run into trouble when budgets stretch thin, and projects stall halfway through. Costs rise, priorities shift, and unfinished work lingers longer than expected. Setting aside funds for future phases and having a 10–15% contingency helps keep momentum without panic.
Budgets stretch further when decisions are planned together, rather than in isolation. Design on a Dime’s team helps you see how these phases connect, so that spending feels intentional, not reactive.
Choose Major Materials in the Right Order
Think of major materials as anchors; they’ll set the tone for color, lighting, and style throughout your home. Choose wisely and early, and the rest of your decisions will fall into place naturally.
Flooring Sets the Foundation for Walls and Trim
Let’s clear this up early:
Flooring decisions come before wall color and interior trim, every single time.
Floors cover the largest surfaces in your house, hun, and they stick around for decades. Paint and trim, on the other hand, are flexible and easy to change. When flooring is chosen first, it quietly sets the color story for everything else, from wall tones to wood finishes.
Besides, flooring represents a significant slice of your budget. Planning it early helps avoid damage, dust, and rework later. When floors go in at the right stage, walls stay cleaner, trim lines stay crisp, and the final result looks intentional instead of patched together.
Once you’ve got your flooring plan locked in, everything else falls into place more easily. On that note, you need to follow a specific order with drywall, paint, and trim.
Otherwise, your remodel could turn into one messy circus.
Drywall comes first, and primer follows to create an even base. Ceilings are painted next, then walls. Trim and interior doors come in last for clean, sharp lines.
Cabinets and Counters Set the Rules for Everything Else
In kitchens and baths, cabinets and countertops are the ones running the show, hun. Appliances, lighting, and plumbing details should always follow their lead.
Cabinet layout defines traffic flow, storage, and work zones. Once cabinets are set, appliance sizes make sense, lights can be placed where tasks actually happen, and budgets become far more accurate. That’s how you stay sane, honey, ‘cause here’s the thing:
Changing the layout later typically means moving your plumbing or gas lines, which can add thousands in avoidable costs.
Countertops come next. They set the true height and level line for your backsplash, so if you tile first, you’ll be looking at those crooked edges forever. Backsplash tile and plumbing trim should wait until countertops are installed, period.
That way, the rest of your kitchen or bath falls into place with far less stress.
From flooring to cabinetry and finishes, having a team like Design on a Dime that understands timing and dependencies can protect both your investment and your sanity. That kind of guidance turns a long list of choices into a clear, confident plan.
Use Lighting and Color to Pull Everything Together
Once the big decisions are made, lighting and color are what make the whole remodel feel intentional, not accidental. That’s where the real magic happens, hun:
You use lighting to pull all those colors, textures, and finishes into one gorgeous, united story.
Suddenly, your paint, countertops, and flooring stop fighting each other and start looking like they actually planned this remodel together. And that’s exactly the vibe you’re going for here.
With the right fixtures highlighting texture and sheen, that “nice” backsplash or wood grain suddenly looks custom, expensive, and totally intentional. By layering ambient, task, and accent lighting, you can create a flexible backdrop that makes all those choices feel cohesive day and night.
I know everyone obsesses over paint colors and throw pillows, but the real “ringmaster” pulling your whole room together is color temperature in your lighting. Because it influences both mood and how spacious a room feels, choosing it early helps every finish and fixture support the overall vibe.
Be sure to pick a consistent temperature within each room; this keeps surfaces from shifting or clashing as the day goes on.
When it comes to paint, let the fixed elements lead. Floors, cabinetry, and fixtures are harder to change, so paint should support them, not fight them. Balanced contrasts, tested in both daylight and evening light, keep your rooms feeling connected from one space to the next.
Do this right, and lighting and color become the glue that ties every earlier decision together. This is where your remodel stops feelin’ like a collection of choices and starts feelin’ like one cohesive home.
Coordinate Interior and Exterior Decisions Early
Before you even crack open a paint can, you need to know this:
Your walls, floors, and fixtures are all in a serious relationship, and your paint has to get along with every single one of them.
Too often, people pick finishes inside and worry about curb appeal later. But darling, the strongest results happen when the outside sets the tone and the inside carries the story forward.
Think of it as one continuous experience, from the sidewalk all the way to the sofa.
Windows and Doors Shape Layout, Light, and Flow
Once you start thinking about the windows and doors like “traffic directors” for your home, the layout game changes.
Trust me, they’re not just exterior details. They actually control how your home moves, breathes, and feels every single day.
And you want those rooms to connect and actually work for how you live, right? Then go with large sliders, stacker doors, and bifolds that can open up to two-thirds of their width, so people move easily between the kitchen, living room, and patio.
Plus, well-placed windows bring in that Texas sun. And we all know that’s a big mood booster.
The key is choosing openings that support real life; where people gather, where they walk, and where they pause.
Exterior Choices Set the Tone for Interior Finishes
When you remodel, you can’t treat your exterior and interior like distant cousins who barely speak, darling. They need to look related and show up together.
I mean, your exterior already tells a story before anyone steps inside. The materials, colors, and style you choose here create expectations, whether you realize it or not.
When the interior ignores that story, something feels off. Not quite “wrong,” just disconnected.
If the exterior leans soft and neutral, the interior should ease into that same calm. If the outside has strong architectural lines or natural stone, echoing those elements indoors helps your home feel cohesive instead of chopped up.
This doesn’t mean everything has to match. It means everything should belong to the same family.
This, sugar, is the part of planning where you stop designing for photos and start designing for mornings, groceries, backpacks, laundry, and real routines. When storage and function are considered early, you stop fighting your space and start letting it work for you.
Design Storage and Closets Around Room Flow
Good storage starts with movement, not containers.
Before you think about shelves and drawers, look at how people walk through the space. Storage should support that flow, not block it.
For starters, leave clear walkways so that doors open easily, and no one has to squeeze sideways to get dressed or grab a coat. So, grab that tape measure like it’s your new best friend.
Then you build up, not out.
I’m talkin’ floor-to-ceiling storage that increases capacity without stealing precious square footage. Mixing hanging space, drawers, and open shelving keeps things visible and easier to grab, which makes morning routines drama-free. Trust me, you’ll use the height.
Add hooks by the door for bags, and you’ll catch clutter before it spreads through the house.
When storage lives where life happens, it actually gets used.
Balance Style With How You Live
Don’t worry, sugar, function doesn’t mean giving up style. It means letting style support the way your home runs day to day.
The smartest layouts make everyday tasks feel natural.
Kitchens need storage close to the prep zones. Living rooms need places for games, throws, and remotes that don’t interrupt traffic paths. Bedrooms benefit from efficient storage that keeps visual noise low.
You get the idea.
When your storage is planned intentionally, rooms feel more organized without trying too hard.
Frequently Asked Questions
What is the best season in Texas to start a whole-home renovation?
Spring is ideal for a whole-home renovation. Mild weather reduces delays, contractors are more available, and material costs are often lower compared to summer heat and rushed pre-holiday schedules.
How do remodeling permits and inspections affect my timeline?
Permits and inspections set your project’s pace, because you can’t start work before approval or continue after failed checks. Each review, correction, and final sign-off slot into your sequence, so any delays ripple forward.
How do I live in my home safely during a major remodel?
You stay safe by sealing off work zones, keeping traffic paths clear, wearing shoes indoors, and enforcing boundaries for kids and pets. Don’t hesitate to ask your contractors about structural safety, air quality, and security, and be sure to update your insurance before demolition or major work starts.
How can I protect existing furniture and décor while remodeling multiple rooms?
You can protect furniture by clearing rooms when possible, covering everything with protective sheets, and choosing climate-controlled storage for valuables. Proper dust control also prevents potential damage and reduces the risk of mold.
How can I minimize surprises when remodeling older homes?
You can’t minimize surprises, but you can budget for these hidden issues; think outdated wiring, plumbing corrosion, or foundation quirks. Early inspections and structural reviews save money and headaches later.
Make Every Remodel Choice Count
Here’s the bottom line:
Your remodel isn’t a grab bag, hun. It’s a domino line. And every choice you make either keeps it standing or knocks it flat.
When you plan with purpose, sequence wisely, and think ahead, your house becomes a space that works for your life, not against it. Solid planning today keeps surprises, stress, and unnecessary expenses at bay tomorrow.
Remember the old saying, “Measure twice, cut once”? That’s your mantra now.
If you want guidance that turns your vision into a practical, beautiful plan, the Design on a Dime team can help every step of the way. Contact us today, and we’ll guide you through it, from start to finish.
You know why bathroom remodels fail without a functional plan?
Because some folks skip the boring but critical thinking up front, and jump straight to those cute photos on Pinterest.
I’ve seen gorgeous tile, fancy fixtures, and huge budgets still end in daily frustration, busted timelines, and money flyin’ out the window. Not because the homeowner did something wrong or lacked taste, but ‘cause nobody slowed down long enough to ask how the space actually needed to work.
Bathrooms are busy, and unforgiving. So, every inch, outlet, and decision either pulls its weight or ends up causing trouble later.
Stick with me, we’re about to connect some dots that Pinterest never talks about.
Why Every Bathroom Remodel Needs a Functional Plan
Before you fall in love with tile and start saving inspo photos, your bathroom remodel needs something far less glamorous and far more important:
A functional plan.
Not a Pinterest board. Not a loose idea of what you want it to look like. I’m talkin’ a real plan that accounts for how the space actually works, day in and day out.
A functional plan answers the not-so-fun questions upfront.
How many people use your bathroom on a daily basis? Where do towels, hair tools, and cleaning supplies live? How does moisture move through the room?
You see, honey, when those answers come later on in the process, they tend to arrive with change orders, delays, and surprise costs. And that’s the last thing you want.
That’s where Pinterest bathrooms tend to fall apart in real life. I mean, they look stunning, sure, but they’re not designed for morning traffic, long showers, or aging joints. When a remodel starts with finishes instead of flow, function becomes an afterthought.
Plus, skipping proper planning leaves you exposed when hidden issues show up. Think water damage behind walls or outdated plumbing that can’t support your new fixtures. A functional plan anticipates those realities instead of reacting to them mid-project, when fixes cost more and choices shrink fast.
Most importantly, planning puts you back in control. And hun, you deserve control, not chaos, every step of the way.
Remember, when function leads, style has something solid to stand on.
That’s why Design on a Dime Interiors never starts with finishes alone. Our bathroom remodels begin with how your space needs to function, so beauty is built on something solid and practical from day one.
The Most Common Reasons Bathroom Remodels Fail
The truth is, bathroom remodels rarely fall apart because of just one big mistake. More often, they unravel because of a handful of small planning gaps that snowball once construction begins.
Here are the failure points I see most often, and chances are, at least one of them will feel familiar.
Layouts that ignore real daily routines
A bathroom can look beautiful on paper and still function terribly in real life. When the layouts don’t account for how many people use it, when they use it, and what they need access to, frustration is bound to set in. Tight clearances, awkward door swings, and vanities that block movement usually trace back to a plan that never considered everyday habits.
Budget decisions made without a clear plan
When folks start spending before priorities are defined, money gets eaten up by finishes instead of fundamentals. The result is a remodel that looks expensive but still feels unfinished, with shortcuts taken in areas that actually matter. You need a functional plan guiding the budget. Otherwise, costs creep up and confidence goes down.
Moisture and ventilation oversights
Bathrooms are wet environments, right? Well, remodels fail when moisture management is treated as an afterthought instead of one of core design requirements. Lack of proper ventilation and poor waterproofing, along with material choices that can’t handle humidity, quietly damage the bathroom long before problems become visible.
Poor coordination between layout, plumbing, and electrical
The layout can’t succeed if plumbing and electrical planning happen separately or too late. Fixtures end up boxed in, lighting lands in all the wrong places, and last-minute changes only drive up labor costs. When these systems aren’t planned together from the start, functionality suffers, period.
Now, I’ve got some good news, too.
Every one of these failures is preventable.
They’re not about bad taste or bad luck. They’re about planning decisions that came too late… or, in some cases, not at all. You just need to address these issues before they get a chance to derail your remodel.
How a Functional Plan Starts Before Design Decisions
You’ve got your why, now, let’s talk about the how, ‘cause, sugar, a functional bathroom doesn’t happen by accident.
Before those tile samples hit the table, you need to get clear on your priorities. When people skip this step and jump straight to finishes, the remodel often ends up reacting instead of leading. Decisions get rushed, budgets get stretched, and compromises pile up fast.
And no, planning first isn’t about slowing things down. It’s about making smarter choices earlier, when they tend to be cheaper, easier, and far less stressful.
Clarifying Goals, Priorities, and Non-Negotiables
Before you start swingin’ hammers, you’ve got to get crystal clear on what you actually want this bathroom to do for you.
For some homes, the goal is smoother mornings with less congestion. For others, it is safety, resale value, or finally fixing a layout that never worked.
Once that main purpose is clear, priorities fall into place and every decision gets easier.
This is where non-negotiables matter. Fixing leaks, improving ventilation, meeting code, and creating safe clearances should always come before upgrades that are purely decorative.
Start by brain-dumping everything that bugs you, then sort the real problems from the “Oh, shiny” wish list. You’ll thank me later.
You’ll need a functional plan that connects your budget directly to how your bathroom will be used. Without that connection, money tends to disappear into surface-level upgrades, but core issues remain untouched.
Like I said, you anchor your bathroom budget to function first, then let the pretty follow.
You need a clear, realistic cost forecast upfront, so you don’t find yourself gasping at the total when those invoices roll in. Then, you back that up with a contingency fund for any “Surprise, there’s mold behind your wall” moments. For most bathrooms, that means stashing around 10–20% of your total budget.
That way, your project stays on track and your wallet doesn’t panic.
Planning for How Your Bathroom Will Be Used Over Time
Even if you’re only thinking about this year’s chaos, a smart bathroom remodel plans for the next chapter of your life, too.
That means wider clearances for growing kids, a curbless shower that supports aging in place, or storage that adapts as your routines change. Even resale plays a role here, hun. Buyers tend to judge bathrooms quickly, and functionality often matters more than style alone.
Think of it this way:
You’re not just picking tile. You’re scripting how you’ll live and age.
And no, thinking ahead doesn’t mean you’re sacrificing design. It simply makes sure that beauty is built on a foundation that lasts. Plan a bathroom around real life, both present and future, and it stays comfortable, flexible, and valuable long after the remodel is finished.
By defining priorities and usage first, Design on a Dime helps you move into design decisions with clarity instead of guesswork.
Finishes can always be swapped later. But a bad floor plan? It sticks around, darling, quietly annoying you every single day.
If you want a better bathroom floor plan, you can’t start with where fixtures fit. You’ve got to begin with how you actually live in there, ‘cause your daily routines are the real boss here.
Designing Around Real Daily Routines
The smartest bathroom layouts are built around habits, honey, not assumptions.
Mapping your morning traffic patterns is gonna be essential homework here. Morning routines reveal more about what a space needs than any inspiration photo ever could.
So, grab a notepad and map one week of your regular mornings:
Who gets ready first? How long do they stay? Who needs the mirror the most? Where do bottlenecks tend to happen?
These patterns determine how your bathroom feels.
In small bathrooms especially, even minor adjustments make a huge difference. Shifting a vanity, choosing vertical storage, and adjusting fixture placement can eliminate bottlenecks that slow everyone down.
When the layout mirrors real routines, the room works harder without feeling crowded.
Circulation, Clearances, and Door Swings That Actually Work
That cramped shuffle you do around the toilet, past vanity, toward the shower? You can plan circulation so you glide in a loop, not crab-walk through chaos.
It sounds so simple and obvious, and yet, it’s one of the most common planning failures.
Clearances around sinks, toilets, and showers should support natural movements, not just minimum code.
Before you start scooting toilets closer “just to make it fit,” remember that you need clearance to keep your bathroom safe, comfy, and actually usable.
Whenever your space allows it, comfort should guide all your decisions.
And once you start paying attention to bathroom doors, you’ll realize that they’re either working with you or plotting against you.
An outward swing can blast into your hallway, nearly hitting someone, while an inward-swinging door could steal valuable floor space. You get the picture. That’s why I usually suggest pocket doors; they solve these issues, keeping pathways open and movement intuitive.
Zoning the Bathroom for Comfort and Efficiency
When you break your bathroom up into clear “zones,” the space suddenly behaves, instead of acting like a wet, cluttered circus.
You see, functional zoning brings order to the bathroom. So, instead of everything competing for space, each area has a purpose.
A well-zoned bathroom usually flows from dry to wet. Think entry and storage first, followed by the vanity, with bathing areas placed farther in. That’s how you keep water contained, reduce the clutter, and support privacy.
Another plus of zoning? It allows multiple people to use the bathroom at once. Separating the toilet area or aligning storage with where it’s actually used prevents those traffic jams during peak hours.
This kind of thoughtful layout work is where Design on a Dime shines. We design around real routines, not showroom setups, so the finished space feels easy, intuitive, and comfortable long after the dust settles.
Moisture, Waterproofing, and Ventilation Are Never Optional
If a bathroom remodel fails quietly, moisture is usually the reason.
Not dramatic leaks. Not obvious floods. Just slow, steady water where it doesn’t belong.
You want to plan your layers so water has nowhere to hide, then back it up with materials that can actually handle daily steam and splash zones. ‘Cause, baby, when waterproofing, ventilation, and material choices are treated as separate decisions, gaps form.
And those gaps turn into mold, rot, and repairs that cost far more than doing it right the first time.
Waterproofing as the Backbone of Your Bathroom Plan
One of the biggest mistakes folks make is thinking waterproofing is a single product instead of a complete system. Tiles aren’t waterproof. Grout isn’t waterproof. Even water-resistant materials can fail if the layers under them aren’t planned correctly.
If you think about it, bathrooms are basically tiny water parks inside the home. So, waterproofing has to be the backbone of your remodel plan, not an afterthought slapped on at the end.
Subfloors, wall assemblies, slopes, seams, and transitions all have to work together to direct water where it belongs. Miss one connection and moisture finds it. Trust me, it always does.
This is why showers leak long before tile cracks.
Water slips through the joints, corners, and transitions, then settles into the subfloors, where damage gets to spread unseen. By the time stains or smells show up, repairs are no longer simple.
Even the best waterproofing can’t save a bathroom that stays damp. Steam has to leave the room, darlin’, not just circulate inside it.
If you skip proper ventilation in your bathroom remodel, you’re basically inviting moisture to throw a daily pool party on your walls. And before you know it, that gorgeous grout, your drywall, even the subfloor, turn into an all-you-can-eat mold buffet.
Not cute, and definitely not functional, either.
Don’t make the mistake of assuming that any ventilation is enough. It’s not. Fan sizing and airflow matter as much as tile and fixtures, ‘cause when ventilation is weak, bathrooms age fast.
None of that is a mystery, hun. It’s moisture that was never fully removed.
Materials That Fail in Real Bathrooms
When it comes to bathrooms, materials don’t fail because they’re ugly or unfashionable. They fail because they can’t handle repeated exposure to water and humidity.
Even the prettiest bathroom can betray you if you sneak the wrong porous materials into the wet zones. You see, porous surfaces will absorb moisture and release it slowly, feeding mold and weakening what sits beneath.
These failures happen quietly and consistently, not all at once. By the time you notice, a tiny leak that cost $100 to fix turned into thousands in repairs.
Bathroom humidity is a sneaky little troublemaker, hun, so you need materials that will handle daily steam, splashes, and the occasional “somebody left the shower on forever” situation.
When materials, waterproofing, and ventilation are aligned, that bathroom holds up. But when they’re not? Even the prettiest remodel starts to break down.
Lighting, Electrical, and Tech Planning That Supports Function
Great bathroom lighting isn’t about showing off fixtures. It’s about seeing clearly, moving safely, and letting this space shift with your day. Electrical and tech planning works the same way.
When these systems are planned together, the bathroom feels calm, capable, and easy to live with. When they’re not?
Even a beautiful remodel feels awkward fast.
Lighting That Supports Daily Life
Most bathrooms end up looking “off” because the lighting is doing the bare minimum. You can’t rely on one overhead light and hope for the best. You need to think in layers, hun, with each one doing a specific job:
Ambient for glow, task for shaving, and accent for drama and depth.
Start with ambient lighting that fills the room evenly, so you’re not stepping into shadows. Add task lighting at the vanity; think wall sconces or vertical fixtures at eye level, since they light your face evenly instead of casting harsh shadows from above.
Then you seal the deal with the right color temperature, sticking in that sweet 2700K to 3000K range that mimics flattering natural light. Slightly cooler lights can work for your vanity, as long as the color rendering is high enough to show true skin tones.
Reserve those 5000K “daylight” bulbs for detailed makeup, not relaxing soaks, or you’ll feel like you’re in a fitting room.
I’m talkin’ dimmers, motion sensors, color-changing LEDs, and scheduling. Plus, many smart vanity lights integrate with voice assistants and smart-home hubs. How’s that for convenient?
Electrical Planning That Prevents Costly Rework
Before you start poppin’ outlets all over the bathroom like confetti, you need a game plan that keeps things safe and seriously convenient.
The thing is, electrical mistakes tend to get expensive ‘cause they hide behind walls. By the time problems surface, repairs usually mean opening finished surfaces and redoing stuff you already paid for once.
My advice is to start with real habits.
Hair tools, electric toothbrushes, razors, and chargers all compete for space at the vanity. You want to plan outlet locations early on to avoid all those cluttered counters and overloaded circuits later. Oh, and let’s not sleep on drawer outlets; they keep things useful without adding visual noise.
Don’t forget to plan for tech.
Heated floors, smart mirrors, bidet seats, and ventilation upgrades all require power decisions before walls close up.
This should go without saying, honey, but safety is non-negotiable here. GFCI protection, proper spacing from water sources, and dedicated circuits are code requirements for good reason.
When wiring is planned alongside layout and lights, everything fits and functions the way it should.
Storage and Accessibility Planning That Pays Off Long-Term
A bathroom that works today but fights you five years from now isn’t a win. Plain and simple.
And while I get that it’d be easier to design your bathroom just for “right now,” the smartest move is to plan it so that Future You can still use it safely, comfortably, and without drama.
This is where thinking ahead saves real money, real effort, and a whole lot of frustration later.
Storage That Reduces Visual and Mental Clutter
Truth time:
The only things that belong on your bathroom counter are what you actually use every day, not everything you’ve bought since 2012.
But when storage is an afterthought, your bathroom ends up working against you. Bottles pile up, drawers overflow, and every morning starts with visual noise. Honey, you want functional storage built around how you actually use the space, not how it looks in a staged photo.
Countertop clutter isn’t a styling problem, sugar. It’s a planning problem.
Deep vanity drawers hide backups and daily tools without stacking. Drawer dividers keep small items from becoming a jumbled mess. Medicine cabinets with real depth pull storage off the counter while keeping the essentials close.
In smaller bathrooms, vertical storage does the heavy lifting. Think tall cabinets, recessed niches, and slim shelving that use wall space instead of crowding your floor. Plus, if you slide under-sink organizers around the plumbing, you’ll reclaim space that usually goes to waste.
When storage is planned intentionally, the bathroom feels lighter. You move through it with less effort, and it stays tidy without constant resetting.
Designing for Safety and Aging (Without Sacrificing Style)
The smartest bathrooms are designed for more than one chapter of life.
Don’t worry, though; you don’t need a clinical look to plan for safety. You can future-proof your bathroom with style, not hospital vibes, by making a few thoughtful choices early.
I’m talkin’ wider clearances, easier entries, and stable surfaces.
Slip-resistant flooring is one of the most important decisions in a bathroom. So, before you fall in love with that gorgeous tile sample, let’s make sure it won’t turn into a skating rink. You want tile with actual grip and a DCOF of at least 0.42, not a shiny slip-and-slide pretending to be flooring.
You’ll also need something solid to grab when life (or soap) gets slippery. Yes, I’m talkin’ about grab bars, and no, they don’t have to look like medical equipment. They can match fixtures and blend into the design while still being anchored properly for real support.
The goal is to make daily routines easier now and safer down the line. These choices quietly protect your independence and help the bathroom stay functional for decades, not just the first few years.
Key Questions to Ask Before You Finalize a Bathroom Plan
So, where do you start when your brain is swimming with tile samples and Pinterest boards?
Well, baby, before you lock in finishes and sign off on drawings, I suggest you pause right here. This is the moment where a few honest questions could save you years of daily irritation and, not to mention, a whole lot of money later.
Think of this as a gut check for your bathroom plan.
Who actually uses this bathroom, and when?
Is this a solo space, a shared family bath, or a morning traffic jam waitin’ to happen? All I’m saying is, one person brushing teeth is very different from two adults, a kid, and a curling iron all at once.
Does the layout work without gymnastics?
Can the door open fully without hitting a toilet or vanity? Can you move from sink to shower without side-stepping or hip-checking cabinetry? If you have to shimmy on paper, it’ll only feel worse in real life.
Where does everything live when it’s not on the counter?
I’m talking towels, daily toiletries, cleaning supplies, hair tools, and yes, the plunger. If storage isn’t planned now, trust me, clutter will take over later.
Is this space safe and comfortable for future needs?
Even if aging in place feels far away, small decisions you make now, including door width, shower entry, and lighting placement, can prevent expensive changes down the road.
Are lighting and outlets planned for how you actually use the room?
Can you see your face clearly at the mirror? Are there enough outlets for real routines, not just the code minimums? Do you have lighting that works for mornings and nights?
Have materials been chosen with time and maintenance in mind?
Does this plan rely on finishes that require constant upkeep or slow the build? Or does it support a smoother timeline and easier long-term care?
If you can answer these questions confidently, your plan is doing its job. If not, that is your signal to pause, adjust, and get clarity before construction begins.
Remember:
A bathroom that works well isn’t about perfection. It’s about foresight.
If answering these questions feels overwhelming, that’s a sign your plan needs another set of experienced eyes. Design on a Dime is here to help you slow the process down enough to get it right, before decisions get locked in and regrets get expensive.
How Design on a Dime Interiors Builds Function Into Every Detail
One thing we at Design on a Dime Interiors don’t do is start with finishes. No way, baby. We start with how the bathroom needs to work on a real Tuesday morning.
Before a single tile is picked out, I’ll look at who usually uses the bathroom, how they move through it, and where friction already exists. That way, tight clearances, lack of storage, poor lighting, and moisture issues all show up early on paper, not after construction begins.
That decision logic guides everything that follows.
We design the layout first, then dress it up.
Vanities are sized for storage needs, not just symmetry. Showers are planned for safe entry, easier movement, and simple maintenance. Circulation paths are checked so doors, drawers, and bodies can move without bumping into each other.
We plan storage around habits, not hope.
Deep drawers replace stacked shelves. Vertical storage takes pressure off small footprints. When storage is intentional, counters stay clearer and daily routines feel calmer.
We layer lighting and electrical with purpose.
Vanity lighting is placed to light faces evenly. Ambient lighting supports safety and comfort. Outlets are planned for real tools and real routines, so cords don’t dictate layout later.
We choose materials and systems that support longevity.
Waterproofing, ventilation, and durable surfaces are treated as functional infrastructure, not merely upgrades. This protects your investment and reduces maintenance stress long after the remodel is finished.
You can see this in our Arbor Project, where layout adjustments and updated tile and lighting transformed an outdated bathroom into a space that feels open and intuitive. Or the Ben Project, where smart planning balanced style with long-term functionality, creating a lighter and more personalized Jack & Jill bathroom.
If you want a bathroom that feels good to use, not just good to look at, Design on a Dime’s team will make it happen.
Frequently Asked Questions
Do I need permits or inspections before starting my bathroom remodel in Texas?
Yes, you usually need permits for Texas bathroom remodels involving plumbing, electrical, and structural changes, along with inspections to verify safety and code. It’s best to check with the local authorities and, if needed, get the permits before the work starts.
How do I live in my home during a bathroom remodel with minimal disruption?
You’ll live in your home with minimal disruptions by phasing the work, setting up a temporary bath station, sealing dust zones, scheduling loud work during the day, and coordinating routines, updates, and access with family, neighbors, and contractors.
How long does a typical bathroom remodel take from design consultation to final walkthrough?
You can expect a typical bathroom remodel to take 6 to 10 weeks from design consult to final walkthrough, with roughly 3 to 4 weeks dedicated to planning and permits and another 4 to 6 weeks left for construction and final touches.
Should I design differently if this is a guest bath versus a primary bath?
Yes, you should. Guest baths prioritize durability and easy maintenance, while primary baths benefit from more tailored storage, lighting, and circulation, based on your household’s daily routines.
What parts of a bathroom remodel are the hardest to change later?
The parts that are generally the hardest to change later on are plumbing locations, waterproofing systems, ventilation routes, and electrical rough-ins. These should be finalized early on, since fixing them later often requires demolition.
Smart Planning Means Peace of Mind
Here’s the bottom line:
A bathroom remodel should make your life easier, honey, not add stress every time you flip on the lights or reach for a towel.
When the planning is solid, the space supports your routines. Things fit. Decisions feel intentional. Nothing nags at you six months later. Skip it, and you’re basically gambling with your bathroom and your wallet.
It all comes down to slowing down early, asking the right questions, and making choices that work together instead of fighting each other.
If you need help shaping a bathroom that works for how you actually live, Design on a Dime’s team is here to guide the process from the first decision forward.
It’s usually when you’re standing in your kitchen, coffee in hand, wondering if this space is mildly annoying or truly working against you.
You know something is off, but you’re not sure if it’s worth the mess, the money, or the mental energy of a full renovation. One minute you’re pricing cabinets, and the next you’re thinking maybe new lighting would fix everything.
That back-and-forth is normal.
I mean, kitchens carry a lot of pressure.
They’re expensive to change, hard to undo, and everyone has an opinion.
Before you commit to anything, it helps to slow down and figure out what’s actually broken and what’s just bothering you. Stick with me, and you’ll spot exactly which move is right.
When a Kitchen Remodel Actually Makes Sense
Your kitchen’s begging for attention, but here’s the real question:
Do you give it a quick glow-up or a full-on gut job?
You see, baby, a kitchen remodel isn’t about keeping up or showing off. It’s about finally admitting that the space is working harder against you than for you. When the frustration shows up daily, that is usually your first clue that patchwork fixes are no longer enough.
Here’s when a kitchen remodel actually makes sense:
Functional problems you can’t work around
If you’re constantly shuffling appliances, stacking groceries in odd places, and doing that sideways dance to open your dishwasher, your kitchen is asking for more than cosmetic help. These are the kinds of problems that linger, no matter how cute the paint color is. When storage fails, prep space disappears, or traffic jams form during the simplest meals, a remodel makes sense. Function is the foundation. Without it, everything else feels like a temporary bandage.
Safety, structural, or code issues
This one is non-negotiable. If your kitchen has outdated wiring, poor ventilation, failing cabinetry, or signs of moisture damage, those issues deserve attention, sugar. Safety concerns rarely announce themselves politely. They show up as flickering lights, sagging shelves, and that lingering smell you cannot quite place. A remodel allows you to address what is hidden behind the walls and under the surfaces, protecting both your home and the people in it. I’m sure you’ll agree that peace of mind is a solid return on investment.
Layouts that fight daily use
Some kitchens were just designed for a different era and a completely different lifestyle. When your refrigerator blocks the main walkway, the sink sits miles away from your prep space, or the cooktop feels isolated from everything else, daily routines turn into chores. A remodel makes sense, ‘cause the layout itself is the problem, not only the finishes. Reworking the flow can change how a kitchen feels and functions, making it easier to cook, gather, and live without friction.
In short, when the issues are baked into the bones of the space, a full remodel stops being optional and starts being practical.
Guessing your way through fixes can get expensive fast. Design on a Dime’s team can help you separate what needs reworking from what can stay, so your updated kitchen solves daily frustrations instead of just covering them up.
When a Kitchen Remodel Probably Doesn’t Make Sense
Sometimes, the smartest design decision is knowing when to sit tight.
A full kitchen remodel is a big emotional and financial lift, and there are plenty of situations where pressing pause protects both your wallet and your sanity. All I’m sayin’ is, not every kitchen problem needs a full-on teardown.
Here’s when you might want to hit pause on that kitchen remodel, not power through it:
Cosmetic boredom versus real dysfunction
If your kitchen works, but you’re simply tired of looking at it, that’s not a remodel emergency. Visual fatigue is real, but it’s also fixable without demolition. When cabinets open smoothly, storage meets your needs, and the layout flows, a full remodel actually delivers less satisfaction than expected. In these cases, smaller changes can refresh the space while keeping your budget intact.
Short-term living situations
If you intend to move in the next few years, a full remodel deserves a long, thoughtful pause. Major kitchen renovations rarely pay you back dollar for dollar in the short term, especially if your choices lean toward personal or high-end. If your time in the home is limited, flexibility will matter more than perfection. Strategic updates that photograph well and attract a wide range of buyers usually serve you better than a deeply customized space you won’t even live in long enough to enjoy.
Budget pressure without clear priorities
Remodeling under financial strain almost always leads to regret, baby. If the budget is tight and the priorities are all fuzzy, decisions get rushed, and compromises pile up. This kitchen remodel should feel intentional, not stressful. Without room for surprises and clarity on what really matters, it’s easy to overspend in the wrong places and underspend where it counts. Waiting until the goals are clear isn’t a setback, hun. It’s smart stewardship of your home and your peace of mind.
Remember, hun:
A remodel makes sense when the kitchen fails you, not when it just fails to excite you.
Is Your Kitchen’s Problem the Layout or Just Looks?
Did you ever stare at your kitchen and wonder, “Do I need a full remodel, or do I just need my cabinets to stop mocking me?”
Sweetheart, that’s one of the most important questions to answer before you even think about pickin’ up a sledgehammer.
A lot of kitchens get blamed for being ugly when the real problem is how they function. Others will get torn apart when a lighter touch would’ve done the trick.
Knowing the difference saves you money, time, and a whole lot of regret.
Workflow Pain Points That Signal Deeper Issues
If your kitchen makes everyday tasks harder than they need to be, that’s usually a layout problem.
You know those kinds of kitchens where you keep bumpin’ into people, opening appliances into walkways, and walking laps just to make dinner. When the fridge door blocks the main aisle and the dishwasher traps someone at the sink, no amount of new finishes will fix that frustration.
If those prep zones are cramped, storage is far from where it’s used, or there’s no clear flow between sink, stove, and refrigerator, you’re likely dealing with a functional issue. Our team saw this firsthand during the Rock Daisy Kitchen Transformation, where years of living with an awkward layout made the space feel far more limiting than it needed to be.
In those cases, a remodel that addresses cabinet placement, appliance locations, or circulation paths can dramatically improve your daily life. And that’s where structural changes earn their keep.
Visual Dissatisfaction That Can Be Solved Easily
Now, let’s talk about kitchens that work just fine but feel… well, tired.
If that layout flows, storage meets your needs, and nothing feels unsafe or awkward, the main issue might be visual fatigue. That’s more common than you think, especially in homes with builder-grade finishes and dated color palettes.
When the bones are solid, lighter updates often deliver the greatest satisfaction.
Think updated lighting, new hardware, refreshed paint, or smarter storage inserts inside existing cabinets. These changes can make the kitchen feel new again without the costs (or the disruption) of a full remodel.
Here’s a good rule of thumb:
If most of your complaints start with how it looks, not how it works, pause before committing to demolition.
Kitchens don’t have to be perfect to be lovable. Sometimes they just need a little polish, a little personality, and a plan that respects what’s already working.
Knowing whether your kitchen needs structural changes or just a visual refresh could save you thousands and spare you unnecessary disruption. Design on a Dime helps you evaluate how a kitchen functions first, then recommends updates that make sense for your space instead of defaulting to demolition.
Refresh, Partial Remodel, or Full Remodel?
In my experience, this is where most homeowners get stuck.
Everything feels wrong, Pinterest is yelling, and suddenly you are pricing out a gut job when you might not need one.
The right answer?
Well, hun, it mainly depends on what’s broken, what’s tired, and what you actually want your kitchen to do for you.
What a Cosmetic Refresh Actually Fixes
A cosmetic refresh is reserved for kitchens that technically work, but look worn out.
You know what I mean, sugar; the layout flows, storage is adequate, and nothing feels unsafe or awkward. The problem is just… visual fatigue.
Think dated finishes, poor lighting, and surfaces that have seen better decades.
With this kind of update, you want to focus on what your eyes land on first, like paint, lighting, hardware, countertops, backsplash, and sometimes, cabinet refacing. These changes can dramatically improve how the kitchen feels without touching plumbing or electrical.
It’s the fastest path to feelin’ happier in your space. Plus, it delivers strong resale appeal, given the money spent.
If you cook comfortably but sigh every time you flip on the lights, a refresh is likely enough.
When Targeted Upgrades Are Enough
There comes a point when fresh paint and cute hardware just won’t cut it anymore. That’s usually when a midrange kitchen remodel starts to make real sense.
These partial remodels live in the middle ground. These kitchens have one or two real pain points, but not a full system failure. Maybe the storage is inefficient, appliances are poorly placed, or one wall of cabinets needs reworking, but the rest are solid.
You get the idea.
Targeted upgrades include replacing lower cabinets with deep drawers, adding a pantry wall, reworking an island, or upgrading counters and backsplash together. The idea is that you fix what is actually causing the friction and get that “new kitchen” feelin’ without tearing the whole room apart.
I’d recommend this type of upgrade when the bones are good, but daily use could be smoother. It’s where thoughtful design makes the biggest difference, ‘cause every change needs to pull its weight.
Thinking of polishing your kitchen, not gutting your savings? Design on a Dime can make it happen.
When Full Remodels Are the Right Call
Before you pick cabinet colors or argue about islands, you need to know this:
Serious structural problems will turn a “cute little refresh” into a full-blown major remodel, whether you like it or not.
That is to say, full remodels make sense when the kitchen fights you on every level. I’m talkin’ poor layout, safety issues, failing cabinets, outdated wiring, and structural problems; they’ll push you into this category.
At that point, patchwork fixes cost more in frustration than they save in dollars.
You’ll get to reset flow, storage, lighting, and function together, and create a kitchen that supports how you actually live.
The goal isn’t bigger or fancier, hun. The goal is right-sized, well-planned, and built to last.
Match Your Kitchen Remodel to Your Home’s Value
This part right here saves folks a whole lot of heartache and wasted money.
A kitchen remodel should lift your home up, hun, not price it out of its own neighborhood. The sweet spot is finding that balance where your kitchen feels updated, functional, and appealing, without overspending past what your home can reasonably return.
So, you’ve got to pick the lane that fits your house, not your Pinterest daydreams. Otherwise, you’re just sprinkling caviar on a grilled cheese sandwich.
Matching Your Investment to Home Price
Your kitchen doesn’t live in a vacuum, sugar. It lives inside a house with a very real market value.
When your remodel budget climbs too far past what similar houses sell for, that money usually doesn’t come back to you.
A good rule of thumb?
Keep your kitchen investment around 10–15% of your home’s value.
That range tends to support updates that feel meaningful without raising red flags for future buyers. Think minor and mid-range remodels that keep you out of the “What were they thinking?” zone.
You want your kitchen to feel like a smart upgrade, not a financial gamble.
Neighborhood Standards and Overbuilding
Before you splurge on the marble island of your dreams, let’s make sure your kitchen is playing nicely with the rest of the neighborhood.
Every neighborhood has its own quiet expectations. And trust me, when that kitchen is dramatically fancier than everything else on the block, it can actually work against you.
Overbuilding usually shows up as fully custom cabinetry, luxury, high-end appliances, and finishes that feel more “showroom” than home. I’m not saying that those features won’t be beautiful; I’m sure they will. But if nearby homes don’t support that level of investment, buyers rarely pay extra for it.
All I’m sayin’ is, your goal is to meet local standards, not build the Taj Mahal.
Why Upscale Remodels Rarely Pay Off
Here’s the hard truth, sugar:
Upscale kitchen remodels usually return only a fraction of what they cost. In fact, national data shows that high-end, six-figure kitchen projects recoup far less than modest updates at resale. Given that the average ROI for a minor kitchen remodel is 113%, treating this project as a targeted refresh rather than a full-blown gut job usually makes the most financial sense.
Buyers want updated kitchens, not overdesigned ones.
Once those finishes start looking too expensive to maintain, their enthusiasm cools down fast. You write a six-figure check for the remodel, only for potential buyers to say “Cute” and move on.
A smart kitchen remodel respects the home it lives in. Design on a Dime’s team focuses on upgrades that improve function and appeal while staying aligned with neighborhood expectations.
Are you fixing up the kitchen for the next owner, or are you building a space you plan to live in and love for years? Those are two very different goals, and mixing them up can get expensive fast.
If resale is on the horizon, the smartest move is restraint.
Potential buyers want kitchens that read clean, updated, and easy to picture themselves using. I’m talking neutral finishes, reliable appliances, and good lighting; they do more for resale than bold personal choices ever will.
Minor remodels and focused updates tend to shine here because they improve first impressions without inflating the price.
You want buyers saying, “This feels move-in ready,” not “Who paid for all this?”
Long-term living flips the script.
When you plan to stay put, function matters more than broader appeal. That’s when it makes sense to fix those layout issues, invest in durable materials, and tailor storage to how you actually cook and live. Deep drawers, better workflow, and finishes that hold up to real life will pay you back every single day, not just at resale.
The key?
Being honest about your timeline.
If you are selling in the next few years, prioritize updates that’ll protect value and avoid overcustomizing. If you’re settlin’ in for the long haul, focus on comfort, efficiency, and choices that’ll make your kitchen easier to use and maintain.
Now, I know that plenty of folks land somewhere in the middle, wanting a kitchen that works great now and still sells well later. That’s where thoughtful planning makes all the difference.
Common Kitchen Remodel Regrets and How to Avoid Them
Before you swing a single hammer or order that dreamy range, let’s talk about the kitchen remodel regrets that make people want to scream into their dish towels.
Here’s the truth:
Regrets have very little to do with style and everything to do with how the space works day to day. Usually, they come from skimping on space, storage, and planning, not from picking the “wrong” backsplash.
Design choices that ignore how you actually cook and live, such as installing porous tiles that stain easily, for example, can turn beautiful finishes into constant frustrations.
One of the biggest heartbreaks? Not leaving enough counter space.
It sounds small until groceries, coffee makers, and meal prep all fight for space. Another common (and, I’d say, related) regret would be underestimating your storage needs.
Shallow cabinets, awkward corners, and a lack of pantry space can turn everyday cooking into a constant shuffle.
Those problems don’t age well.
Lighting mistakes show up fast, too. A kitchen that looks fine in daylight can feel gloomy by dinner if task and under-cabinet lights get skipped. And believe me, poor lighting makes even beautiful finishes feel tired and impractical.
Then you’ve got rushed decisions. Tight timelines and budget stress could push folks to approve finishes and layouts they’re not confident about. Months later, that rushed “Yes” becomes a daily annoyance.
Overspending in the wrong places creates regret, too, especially when you realize money went toward flashy features instead of function and durability.
The way around all of this?
Slower, smarter planning.
Map out how you cook, where clutter tends to build up, and which tasks require breathing room. Focus on storage, workflow, and lighting before worrying about statement pieces. Last but not least, go for materials that can handle real life without constant upkeep.
When function leads, and style follows, you get a kitchen that works. And that, darlin’, rarely ends up on a regret list.
Frequently Asked Questions
How long does a typical kitchen remodel take from design to move-in?
A typical full remodel usually takes about three to six months, covering planning, permits, material orders, construction, inspections, finishing touches, and cleaning. For minor upgrades, you’re looking at a couple of weeks.
Do I always need permits for a kitchen remodel?
No, not always. Cosmetic updates, like paint, hardware, or lighting swaps, usually skip permits. Structural, plumbing, electrical, gas, and layout changes, on the other hand, typically require city approval, which can be handled by your contractor.
How disruptive is a remodel to family routines?
You can expect some chaos. Daily cooking, meal prep, and family schedules are all temporarily disrupted. You’ll have to live with dust, noise, and makeshift setups until the remodel is complete and the new kitchen finally functions.
What are some common hidden costs in kitchen remodels?
Common hidden costs in kitchen remodels often include unexpected plumbing, electrical issues, structural surprises, and material delays, which could add 10–20% to your budget. That’s why a contingency fund is essential.
How do I maintain my new kitchen after a remodel?
You should follow manufacturer care instructions, avoid harsh cleaners, protect the surfaces from heat and moisture, and schedule routine maintenance for appliances and hardware.
Let’s Plan a Remodel That Actually Works for You
At the end of the day, you shouldn’t swing a sledgehammer just ‘cause your cabinets look a bit boring, and you saw something better on Instagram.
It’s not about keeping up with Pinterest and chasing trends you’ll forget in six months. You remodel when it solves real headaches, fits your budget, and actually boosts value.
Sometimes, a few thoughtful updates make a bigger difference than a full gut.
If you’re ready to turn your “ugh” into an upgrade that works for your family and your home’s value, Design on a Dime Interiors can help you plan this kitchen remodel with calm, confidence, and a touch of everyday glam.
Living room remodel costs can vary widely, but one thing’s for sure—you don’t want any surprises when it comes to your budget.
Whether you’re dreaming of a full transformation or just freshening things up, knowing what to expect can save you time, money, and stress. Some folks get by with a $2,500 refresh—while others invest $8,000 or more for a full-on upgrade. But those numbers only tell part of the story. Materials, labor, and even the size of your space all play a role in what you’ll end up spending.
So before you start picking out paint swatches and scrolling through furniture catalogs, let’s explore what’s involved in transforming your living room into the stylish haven you’ve always wanted and break down the real costs of bringing your vision to life.
National Averages and Typical Cost Ranges
Okay, darling, let’s talk about the not-so-glamorous but oh-so-important part of sprucing up that living room of yours—the cost.
On average, you’re looking at spending anywhere from $2,500 to $15,000 to give your space a fresh new face. But don’t fret! This range includes standard updates like painting and basic flooring.
Sprucing up your living room costs $2,500 to $15,000 for standard updates like painting and flooring.
If you’re keeping it simple, you might even get away with around $2,500. But if you’re feeling fancy? Well, luxury projects could skyrocket to $40,000 or more—especially if you’re in a bustling city where everything costs a tad more.
Labor costs can account for 40% to 50% of the total project cost, but hiring the right professionals is key to ensure quality and compliance with building codes—it’s not something to skimp on. Oh, and remember to budget at least another 10% to cover any unforeseen expenses during your renovation.
Alright, let’s talk numbers. When it comes to remodeling costs, size matters—because more space means more materials, more labor, and, yep, more money. Bigger rooms, bigger bucks, honey!
It should go without saying, but:
A cozy 200-square-foot living room will cost a whole lot less to update than a sprawling 400-square-foot space—and those numbers add up fast.
On average, you’re looking at $10 to $60 per square foot, depending on the finishes you choose and how much work needs to be done. High-quality materials will definitely push your budget higher, but they’ll also add value to your home in the long run.
So, whether you’re planning a light refresh or a total transformation, here’s a breakdown of what you might be spending:
Room Size (sq. ft.)
Cost Range
Average Cost
200
$2,000 to $12,000
$7,000
250
$2,500 to $15,000
$8,000
300
$3,000 to $18,000
$10,500
350
$3,500 to $21,000
$12,250
400
$4,000 to $24,000
$14,000
Think about how much change you really want. Are you swapping out furniture and paint, or are we talking new floors, lighting, and maybe even knocking down a wall? The size of your space is just the start—what you do with it is what counts.
Not sure where to start? At Design on a Dime, we specialize in turning budgets of all sizes into stunning, functional spaces. Contact us today—and let’s make your dream living room a reality!
Material and Labor Expenses: What to Expect
Before you whip out your wallet and go all-in on that dream living room makeover, it’s time to chat about what truly pulls the strings of your budget—materials and labor.
Flooring, for instance, can range from wallet-friendly, with vinyl costing only $2 per square foot, to more luxurious options like hardwood at $25. Investing in quality wood floors instead of LVT can be viewed as a long-term investment, ensuring durability and enhancing the aesthetics of your living space.
Walls are another story:
A simple paint job might cost as little as $1 per square foot—but fancy custom wood paneling could set you back $20.
And let’s not forget lighting—basic fixtures might only cost $50, but that custom chandelier you’ve been eyeing? That’s another $1,000 or more.
Again, the size of your room plays a crucial role in determining total expenses, as larger spaces naturally require more materials and labor, potentially increasing costs. And of course, don’t overlook labor costs. Electricians and carpenters don’t come cheap, charging $40 to $120 an hour.
High-End Installations and Luxury Finishes
If you’re dreaming of a living room that looks straight out of a designer catalog, high-end installations and luxury finishes are where the magic happens. These upgrades don’t just elevate your space—they turn it into a statement.
But they also come with a price tag to match.
Imagine walking on herringbone hardwood floors that set the stage for timeless elegance—that’ll be at least $2,000. Natural stone countertops? They scream sophistication but can run anywhere from $3,000 to $5,000, depending on the material. And if you want custom cabinetry or built-in shelving, you should be prepared to invest over $10,000—but oh, the elegance they bring!
Thinking about smart upgrades? You can add a touch of futuristic flair for around $500 to $3,000 per room with motorized window treatments.
Designer fixtures can light up your space for $1,000 to $5,000. And for that ultimate in comfort, a plush sectional sofa with dreamy designer fabrics can set you back $5,000 to $10,000—but trust me, it’s worth every penny.
It’s an investment, darling—but one that transforms your living room into pure luxury. Plus, remodeling can boost home selling appeal, with energy-efficient window and door replacements yielding the highest return on investment (ROI) when it’s time to sell.
Keep in mind, though—hiring specialized contractors is a must for large-scale renovations.
If you’re thinking about going all-in on luxury, Design on a Dime can help you create a space that’s elegant and functional—and tailored to your budget. Be sure to check out how we brought the Lake Conroe Home Reimagined project to life with custom finishes and upscale elements that added a modern, sophisticated touch.
Professional Fees and Contractor Charges
Alright, grab your favorite comfy chair—we’re about to break down the costs that might make your wallet a little nervous, but will definitely turn your remodel into a masterpiece.
Buckle up for the cost ride that makes wallets tremble but transforms spaces into a masterpiece.
In terms of hiring pros, that’s where a big chunk of your budget goes, with local regulations and permit or license costs introducing additional expenses.
General contractors will typically take 40–50% of the total project cost, overseeing everything from labor to permits. They keep the whole operation running smoothly—and that added peace of mind? Worth every penny.
Specialized labor doesn’t come cheap either! Need an electrician? Expect to pay $40–$120 per hour. A skilled carpenter? $75–$125 an hour. And again, you’ve got those pesky permits—costs vary by location, though, so check your local regulations to avoid surprise fees.
Speaking of surprises, set aside 10–20% of your budget for unexpected expenses. Trust me, hidden damage loves to crash the party—and the last thing you want is to be caught off guard mid-renovation.
Need help managing costs without sacrificing style? Whether you need a full-scale renovation or a curated refresh, Design on a Dime creates stunning spaces tailored to your vision and budget.
Frequently Asked Questions
How long does a typical living room remodel take?
Timelines of a typical living room remodel can vary based on the scope. A simple refresh, including paint and furniture updates, can take 2 to 3 weeks, while structural changes or custom installations may stretch to 6 to 8 weeks.
Are there any permits needed for a living room remodel?
Yes, you’ll likely need permits for structural changes, electrical work, or plumbing modifications in your living room remodel. Always check local regulations to avoid penalties and guarantee everything’s up to code before starting your project.
Can I live in my house during the remodeling process?
It’s possible to stay in your house during the remodeling process, but keep in mind noise, dust, and safety. Temporary relocation might be wise if major structural changes or hazardous work are involved, especially if you have kids, pets, or allergies.
What are some budget-friendly design tips for a remodel?
It’s best to focus on high-impact, budget-friendly upgrades. Start with decluttering to create more space and rearrange existing furniture for a fresh look. You can mix in secondhand finds and repurpose decor, too, and play with lighting and textiles to add warmth. Small changes can make a big impact here.
How can I make my living room more eco-friendly?
One way to make your living room more eco-friendly is to choose secondhand furniture, bamboo flooring, and energy-efficient, LED lighting. You can integrate natural textiles and recycled décor to create a cozy, eco-friendly space that blends vintage charm with modern sustainability.
Bringing Your Dream Living Room to Life
A living room remodel isn’t just about adding new furniture or fresh paint—it’s about creating a space that feels like home. With the right plan, smart budgeting, and a little creativity, you can transform your space without unnecessary stress or overspending.
Whether you’re refreshing the look or going for a full remodel, every choice you make should reflect your style and comfort.
Ready to transform your living room without breaking the bank? Design on a Dime is here to help! Get in touch with our team—and let’s create a space that’s perfectly you.
Ever thought about a bathtub to shower conversion?
Maybe that old tub of yours is just taking up space, or stepping over the edge feels more like a chore these days. In any case, swapping it out for a sleek, modern shower could open up your bathroom and make it feel fresh, roomy, and way more convenient.
But before you grab a sledgehammer, let’s talk about what goes into this kind of transformation. What’s the process like? How much will it cost? And is it really worth it?
Stick around, sugar, and we’ll walk you through what you need to know, so you can decide if a shower upgrade is the right move for your home.
Benefits of a Bathtub-to-Shower Conversion
Okay, darling, let’s talk showers—and, more specifically, why you should even consider getting a bathtub-to-shower conversion.
Here’s the thing:
Swapping out that old tub for a modern shower isn’t just about looks—it’s about making your life easier, cleaner, and just plain better.
First off, accessibility. No more stepping over a high tub wall—just glide right in, whether you’re chasing a wiggly toddler, helping Grandma, or simply giving your knees a little break.
A shower—especially a curbless one—keeps things smooth and safer for everyone. It is a small change that makes a huge difference in everyday convenience.
Then there’s the cleaning factor—fewer nooks, less grime, and way less scrubbing every week. A quick rinse-down is all it takes to keep things fresh, giving you more time for things you actually enjoy. And let’s be real, who wouldn’t love that?
Let’s not forget the style upgrade. A shower instantly makes your bathroom feel bigger, brighter, and more like one of those fancy spa retreats.
Clean lines, open space, and pure relaxation? Yes, please!
Oh, and cost-wise? You might be surprised—converting your bathtub to a shower could save you money in the long run. Sometimes less is, indeed, more!
Plus, a well-done shower conversion might even add value to your home if you’re thinking about resale down the road. In fact, 58% of homeowners prefer walk-in showers over tubs!
Tub-to-Shower Transformation: What Does the Process Look Like?
Before you dive headfirst into transforming that old tub into a sleek new shower, it helps to know what you’re getting into. Think of this as your treasure map to bathroom bliss!
First up, you’ll have to check the existing plumbing, because if the pipes aren’t right, neither is the shower. Then, you should set a budget (trust me, surprise costs are about as welcome as a Monday morning).
Once that’s settled, you can go ahead and pick a shower design—don’t worry, hun, we’ll help with that, too—and make sure everything’s up to code.
Demo day? That’s when the real fun starts—out with the old, as they say.
Don’t forget to shut off the water first, though!
Then come plumbing adjustments and waterproofing—because who wants leaks in a freshly renovated bathroom? Finally, install those gorgeous tiles and fixtures.
And just like that, your new shower is ready for its debut!
Remember—proper planning is key for a successful conversion, preventing future issues.
Price Tag Preview: What You Can Expect to Pay for Your Shower Conversion
Alright, now that you’ve got the steps down like a pro, let’s chat about what’s going to make your wallet sing (or cry) during your tub-to-shower adventure—the costs.
If you’re looking for a budget-friendly option, a prefabricated shower will run you from $1,000 to $3,000—simple, stylish, and easy on the pockets.
Want something a little fancier? A corner shower can set you back $1,500–$4,000. But if you’re dreaming of luxury, a walk-in shower starts around $2,000, with those high-end beauties going up to $15,000—ooh la la!
And honey, materials matter, too. Ceramic tiles? They could be a steal at $0.50—or a splurge at $17 per square foot. Want cultured marble? Well, in that case, you’re looking at $10 to $35 per square foot.
Every choice you make—style, size, materials—affects your final cost.
The choice of shower type affects the overall costs, influencing both the design and functionality of your new bathroom space. On average, a bathtub-to-shower conversion lands around $3,100 nationwide—just a reference point for homeowners.
Prefabricated showers are budget-friendly at $1,000–$3,000, while walk-in versions can reach a hefty $15,000!
Keep in mind that labor often eats up 40–60% of your budget. And let’s not forget those sneaky unexpected repairs, which can run anywhere from $300 to $2,400.
So, keep a little “cushion” in that budget—you never know what’s hiding behind those bathroom walls!
Ready to get started? We’ll help you bring your vision to life with a custom bathroom remodel designed to fit your needs and budget.
Plan Like a Pro: Tips for Designing Your Perfect Shower
When you’re swapping that old tub for a sleek new shower, it’s a bit like planning a mini home adventure—and you want it to be smooth, stylish, and stress-free, right?
First things first, think about what you need from your new shower:
Are you going for a spa-like retreat? A no-fuss, easy-to-clean setup? Something accessible and safe for the whole family?
Your design should fit you—not the other way around.
Here’s a quick checklist to get you started—and keep you on track:
Measure Everything: Know the space you’re working with, from wall to wall and floor to ceiling. Remember, the standard tub width is typically 60 inches; ensure the new shower design accommodates this dimension. Also, be sure to consider any windows above the tub area that could impact your design choices.
Set a Budget: Decide how much you’re willing to spend and stick to it—even if you fall in love with that fancy tile.
Material Choices: Durable, slip-resistant surfaces are a must for safety. Plus, investing in high-quality materials can extend the life of your shower—they’re designed to handle wear and tear better than cheaper options.
Professional Help: A licensed contractor will keep things up to code and save you from costly mistakes.
Remember, a shower conversion isn’t just about looks—it’s about making your bathroom work better for you.
Planning your space is key! Check out the Lake Conroe Home Reimagined for inspiration on how we maximized space and incorporated functional features to transform this home into a dream retreat.
Improving Accessibility and Comfort in Your New Shower
Now, let’s talk about making your shower not just beautiful, but easy to use for everyone in the household. Accessibility and comfort go hand in hand when you’re designing a bathroom that fits your lifestyle—whether you’re planning for the future, have folks with mobility challenges at home, or just need a lil’ extra convenience.
Curbless Entry
You know that awkward step-over into a traditional tub? Gone. With a curbless entry, you’ll glide right in—no tripping, no fuss. It’s a small change that makes a big impact—especially for people with mobility challenges, seniors, or anyone who wants a smoother transition into their shower.
Curbless showers offer multigenerational usability, ensuring that people of all ages and abilities can access the shower with ease.
It’s not just practical; it’s stylish, too, adding a sleek, modern vibe to your space, all while making it feel open and airy.
Plus, cleaning becomes a breeze:
No tricky ledges to trap grime—just a smooth, easy-to-maintain surface.
Ergonomic Fixtures
Let’s talk comfort, honey! Imagine showering in a space where everything’s designed with ease of use in mind— the ultimate chill zone where accessibility meets style in the most fabulous way.
With ergonomic fixtures, you can have it all—comfort, safety, functionality, and even a dash of flair.
Check out these must-haves:
Grab Bars: Strategically place them on several walls for support and style. Go for stylish stainless steel or zinc alloy finishes. Remember—grab bars have to be installed in easily reachable locations to ensure maximum safety.
Shower Seats: Think about adding a fold-up seat that saves space but still offers steady comfort when you need it. The folding seat should ideally be positioned at a height of 19 inches from the floor, as this makes it more accessible for users with mobility issues.
Handheld Showerheads: Opt for ones with ergonomic grips and long hoses, perfect for seated use.
Motion Sensor Faucets: Single-lever faucets are great, but with these, you get to enjoy the magic of touchless operation, while keeping things clean and sleek.
Space Optimization
So, you’re ready to transform that cramped bathroom into a spacious oasis? The good news is, you don’t need a mansion to create a spacious feeling—and we’re here to make sure it’s just as fabulous as it is functional.
Use these tips to maximize every inch of your bathroom:
Walk-In Showers: Eliminate the bulky tub walls and opt for an open, free-flowing design. Got a tight space? Skip the doors or go for glass blocks—they’ll keep things airy. Walk-in showers also eliminate barriers, enhancing the open aesthetic of the space.
Built-In Storage: Say goodbye to clutter with built-in niches or corner shelves that keep your shampoo, soaps, and sponges right where you need ‘em. Consider adding vertical space solutions—such as over-the-door organizers—to maximize every inch.
Non-Slip Flooring: Safety first! Non-slip tiles and slip-resistant coatings ensure you are always on solid ground, keeping things safe and stylish.
By incorporating these accessible and thoughtful features, you’ll have a shower that’s not only a pleasure to use, but also a space that’s safer and more comfortable for everyone.
Accessibility should always be a priority in your remodel. Learn how Design on a Dime can help you design a bathroom that’s safe and stylish with our expert bathroom remodeling services.
Essential Tips to Maintain Your New Shower for Years
Alright, hun, now that you’ve got that gorgeous new shower, let’s make sure it stays looking fab and working like a dream! A little love and care go a long way when it comes to keeping things fresh, clean, and problem-free.
Remember:
Regular cleaning prevents mold and mildew, contributing to a longer lifespan for your shower.
Waterproofing Inspections: Your Shower’s Best Friend
You’ll want to make waterproofing inspections a regular habit. It’ll help you catch any leaks or cracks before they become a soggy nightmare.
Think of waterproofing inspections like a spa day for your shower, keeping everything sealed up tighter than a pickle jar!
Check for mold or mildew – Sneaky little things love hiding behind tiles and in corners. Don’t let ‘em!
Inspect sealants – Give the sealants a once-over. If they’re peeling or cracking, it’s time for a refresh.
Check the grout for signs of wear – Don’t forget to give some love to your grout while you’re at it.Worn-out grout can let water seep where it shouldn’t.
Monitor your drain – Slow drainage? That’s your cue to investigate before things get messy. A little care keeps the gunk away—and guarantees everything flows smoothly.
And don’t forget—proper installation is key. Cutting corners during the conversion process can lead to leaks, code violations, and even home insurance issues.
So, stay ahead of the game with regular inspections!
A Quick Word on Grout and Drain Care
Ever noticed how grout in your shower is a bit like that one friend who needs constant attention? Sure, it’s always begging for a lil’ TLC—but treat it right, and it’ll keep your shower looking fresh!
Use sanded grout to prevent cracks, scrub those lines down with a pH-balanced cleaner, and seal it every so often to ward off stains and mold.
Now, let’s talk drains.
If your bathtub to shower conversion involved an upgrade from 1-1/2-inch pipes to 2-inch pipes, as it often does, that’s great for drainage—but only if you keep it clear!
Think of it like the bouncer at a club—keeping the bad stuff out, so everything flows smoothly.
Use a drain screen – Stops hair and soap scum from causing trouble.
Apply a touch of silicone sealant – Keeps leaks and odors at bay.
Flush it regularly – A little hot water rinse now and then keeps things flowing.
With just a bit of routine care, your shower will stay in top shape for years to come—no stress, no mess, just pure relaxation every time you step in.
Frequently Asked Questions
How long does a bathtub-to-shower conversion take?
Typically, the conversion can take anywhere from 3 to 7 days, depending on the complexity of the project and whether you’re adding custom features or updating plumbing.
How can I make my new shower more eco-friendly?
Opt for water-saving fixtures like low-flow showerheads and faucets, and consider installing a tankless water heater to reduce energy consumption.
Are there any permits required for a bathtub-to-shower conversion?
It depends on local regulations. Generally, plumbing and electrical work will require permits in Texas. It’s always a good idea to check with a licensed contractor to ensure everything’s up to code.
Can I install a shower myself, or should I hire a professional?
While DIY shower conversions are possible for some homeowners, a professional contractor is recommended for plumbing, waterproofing, and ensuring everything meets building codes. That helps avoid costly issues down the line.
What’s the difference between a prefabricated shower and a custom one?
Prefabricated showers are pre-made and easier to install—typically at a lower cost. Custom showers, however, offer more flexibility in design, materials, and size but tend to cost more and require a longer installation process.
Ready to Make the Switch?
Converting your bathtub into a sleek, curbless shower can truly transform your bathroom into a space that’s not only visually stunning but also safer and more functional for everyday use.
Whether you’re aiming for a more modern look, improving accessibility, or simply upgrading your bathroom to suit your needs, a shower conversion is an investment that pays off. This isn’t just a cosmetic change; it’s about maximizing your bathroom’s potential and making sure it meets your style and needs.
Design on a Dime is here to help you turn that dream shower into a reality. With our expertise and passion for creating beautiful spaces, we’ll guide you through every step—from design to installation.
If you’re ready to explore your options, let’s talk! Schedule a consultation with us today and start your journey to a more functional and fabulous bathroom.